NVIDIA DGX H100 Service Manual
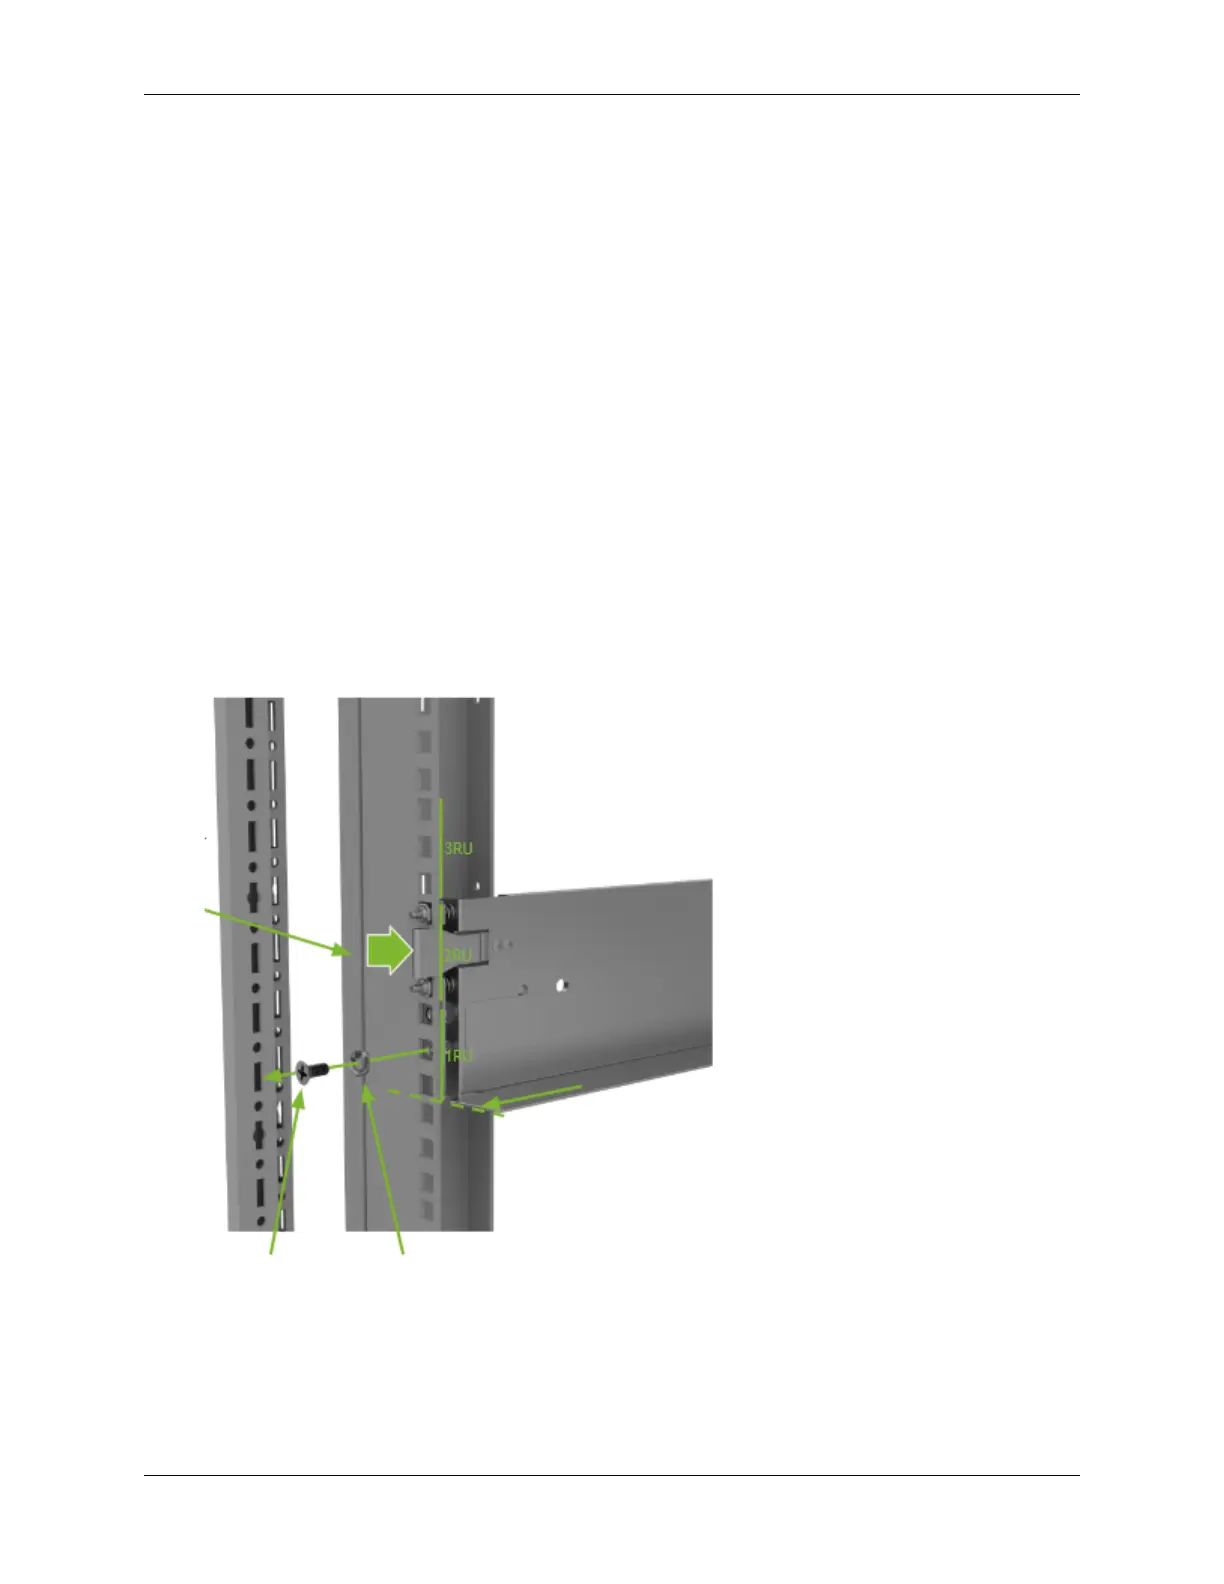
1. On the lower part, there is a lip, labeled ‘1’, that when installed in a rack, will hold the system in
place as if it was a shelf.
2. On either end, and labeled ‘2’ on the diagram, there are spring loaded prongs that t into the
rack’s holes (either square or round.)
3. Together with the metal clips labeled ‘3’, they hold the rack mount kit in place for ease of instal-
lation.
4. Labeled with a number 4 are the holes where the screws that secure the rack kit in place must
be installed.
5. The number ‘5’ identies the location where that part of the rack mount kit should be installed
in the rack
18.2. Remove Rack Mount Kit - Front Rack
1. To remove the rack mount kit, rst remove the at head screw and the countersunk washer, and
keep in a safe place.
▶ Push on the clip to release the rack mount kit rail from the post, and push it towards the
back while holding the rail
2. Next pull on the clip to release the rack mount kit from the post so it can slide back and so that
the prongs can be released from the post.
▶ Remove the rail from the front post and hold in place while the rear is released;
▶ Remove all cage nuts from the rack posts so they can be used during installation
108 Chapter 18. Rack Mount Kit Replacement

 Loading...