NVIDIA DGX H100 Service Manual
9.2. Preparing the System for Replacement
This failure is hard to diagnose because the system won’t boot, as both boot drives are unavailable.
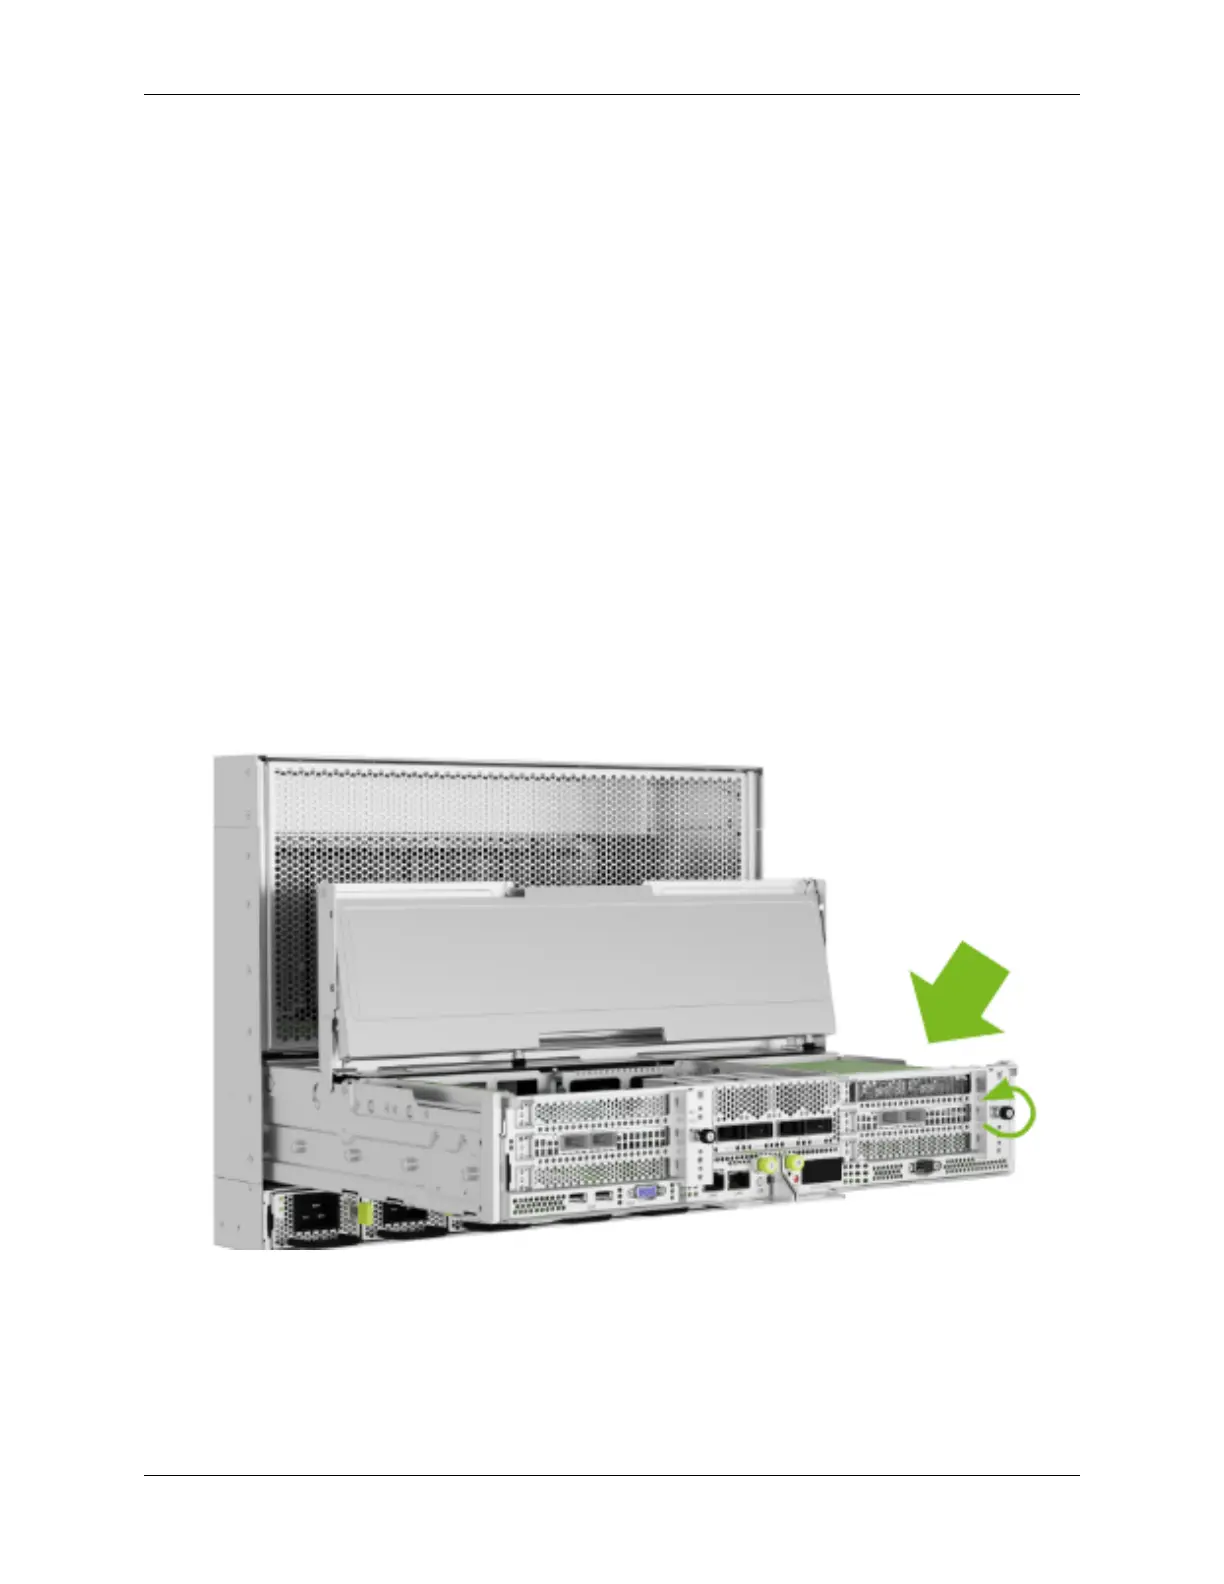
After the replacement part arrives from NVIDIA, shut down the system from the front power button
or from the BMC user interface and proceed by opening the IO door of the motherboard. Refer to
Motherboard Tray - Opening and Closing the IO door to get access to the M.2 boot drive carrier.
9.3. Remove the M.2 Boot Drive Carrier
Before attempting to remove M.2 boot drive carrier, make sure that you performed the following pre-
requisites:
▶ Label all network, monitor, and USB cables connected to the motherboard tray for easy identi-
cation when reconnecting.
▶ Unplug all power cords, and all network, monitor, and USB cables.
Refer to Motherboard Tray - Opening and Closing the IO door for more information.
1. After the IO section of the motherboard is open, unlock the M.2 drive carrier by loosening the
PCI card locking mechanism by loosening the black captive thumbscrew on the right side of the
motherboard:
2. Rotate the locking mechanism for the PCI carrier out of the way:
56 Chapter 9. M.2 Boot Drive Assembly Replacement

 Loading...