32
Item Specification
Input time constant
(ON response time =
OFF response time)
Can be set for all input points.
(1 ms, 2 ms, 3 ms, 5 ms, 10 ms, 20 ms, 40 ms, or 80 ms)
Clock function Shows the year, month, day of the week, day, hour, minute, and second.
(Backed up by the battery.)
Communications functions Built-in peripheral port:
Supports Host Link, peripheral bus, no-protocol, or Programming Console connections.
Built-in RS-232C port:
Supports Host Link, no-protocol, 1:1 Slave Unit Link, 1:1 Master Unit Link, or 1:1 NT Link
connections.
Functions provided by
Expansion Units
Analog I/O Unit: Provides 2 analog inputs and 1 analog output.
Temperature Sensor Unit: Provides up to 6 or 12 thermocouple or platinum resistance
thermometer inputs.
CompoBus/S I/O Link Unit: Provides 8 inputs and 8 outputs as a CompoBus/S Slave.
DeviceNet I/O Link Unit: Provides 32 inputs and 32 outputs as a DeviceNet Slave.
Memory protection
(See notes 1 and 2.)
HR area, AR area, program contents, read/write DM area contents, and counter values
maintained during power interruptions.
Memory backup
(See notes 1 and 2.)
Flash memory:
Program, read-only DM area, and PC Setup
Battery backup:
The read/write DM area, HR area, AR area, and counter values are backed up by a
battery. (Battery life is approximately 5 years at 25°C.)
Self-diagnostic functions CPU Unit failure (watchdog timer), I/O bus error, battery error, and memory failure
Program checks No END instruction, programming errors (checked when operation is started)
Note 1. The DM area, HR area, AR area, and counter values are backed up by the
CPU Unit’s built-in battery. If the battery is discharged, the contents of these
areas will be lost and the data values will revert to the defaults.
2. The contents of the program area, read-only DM area (DM 6144 to
DM 6599), and PC Setup (DM 6600 to DM 6655) are stored in flash
memory. The contents of these areas will be read from flash memory the
next time the power is turned ON, even if the backup battery is discharged.
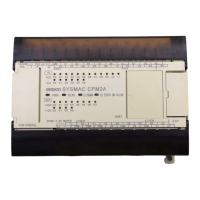
When data has been changed in any of these areas, write the new values to
flash memory by switching the CPM2A to MONITOR or RUN mode, or by
turning the power OFF and then ON again.
Specifications Section 2-1

 Loading...