15
Speaker system setup
11. Press the ENTER button to confirm the setting.
12. Set the distance from the listening position to the
speakers.
Select a value closest to the actual distance.
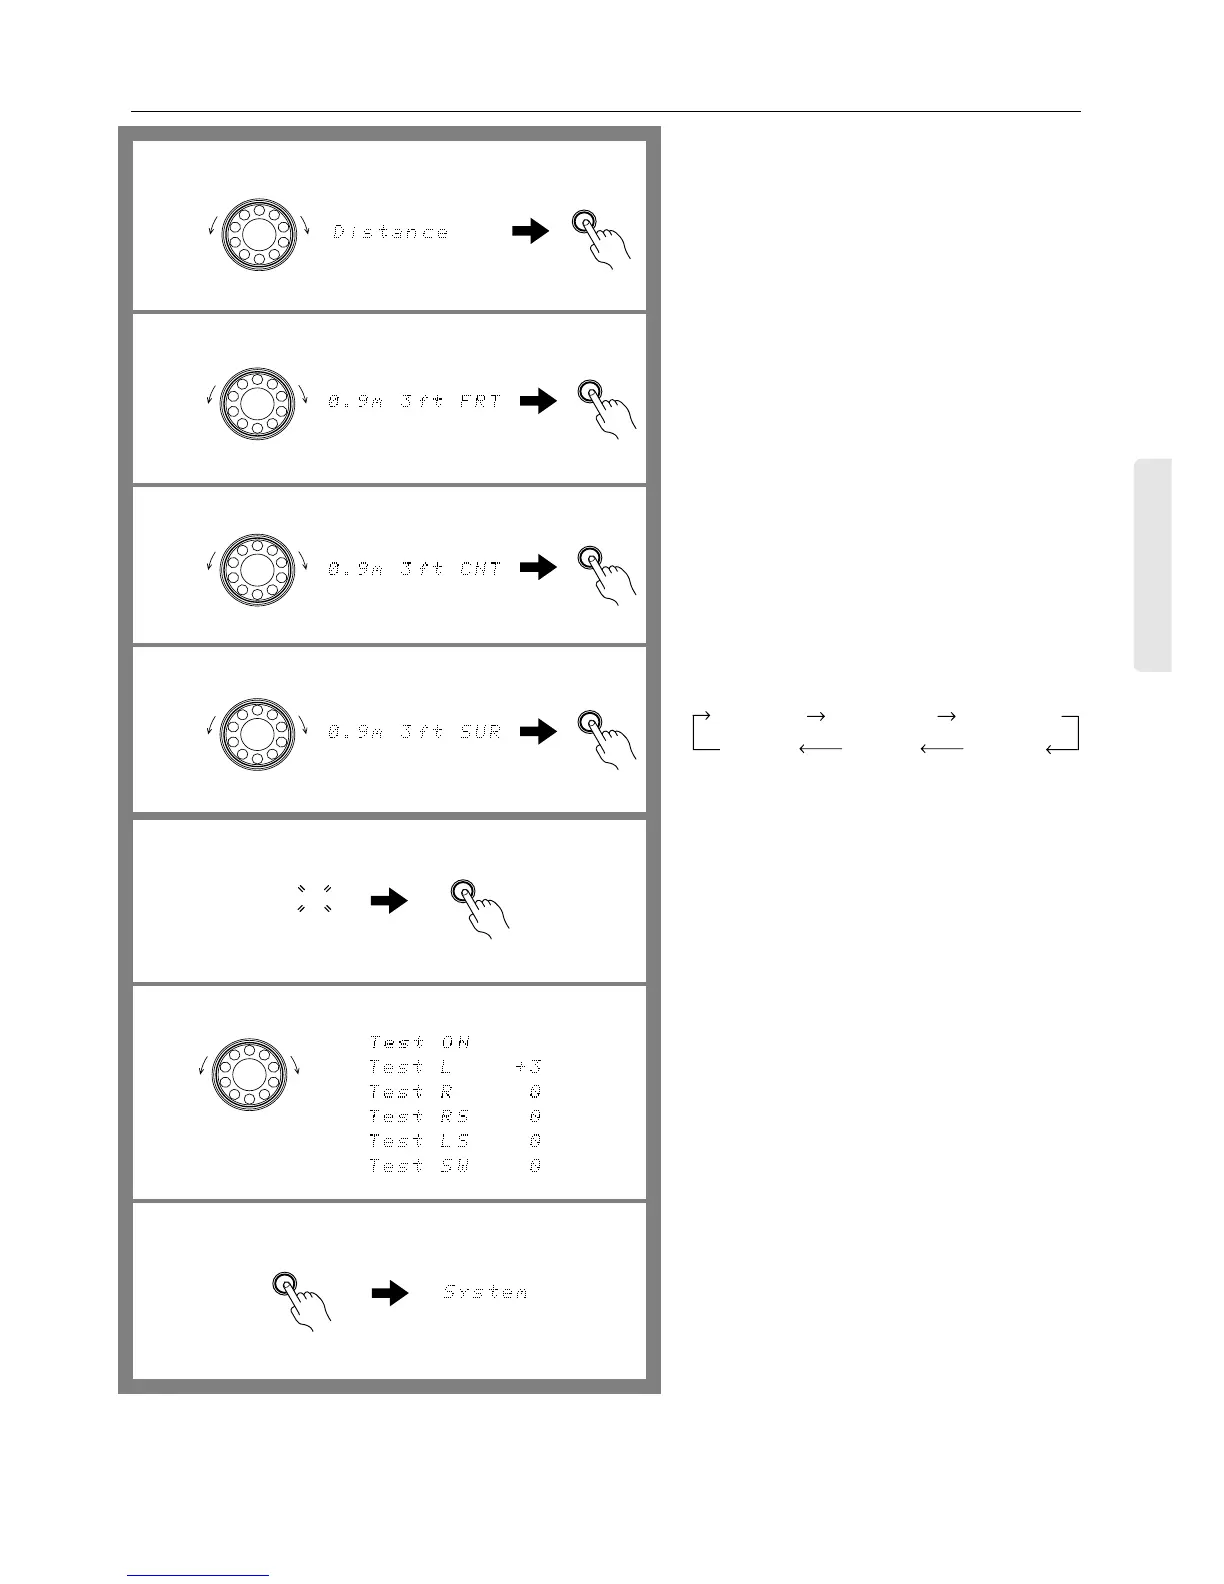
12-1. Rotate the SMART SCAN CONTROLLER to
select “Distance” and press the ENTER button.
12-2. Rotate the SMART SCAN CONTROLLER to
select from 0.3m 1ft FRT to 9m 30ft FRT, and
press the ENTER button.
•
The distance value changes in meters (0.3 m incre-
ments) or feet (1 foot increments) when you rotate the
SMART SCAN CONTROLLER.
•
The delay time is automatically set according to these
distance values.
12-3. Rotate the SMART SCAN CONTROLLER to
select from 0.3m 1ft CNT to 9m 30ft CNT, and
press the ENTER button.
12-4. Rotate the SMART SCAN CONTROLLER to
select from 0.3m 1ft SUR to 9m 30ft SUR, and
press the ENTER button.
13. Adjust each speaker to the same relative volume
level regardless of the speaker’s location.
13-1. Press the ENTER button while the TEST
“ON” indicator is flashing.
The test tone will sound from each speaker starting with
the FRONT LEFT speaker and proceeding in the follow-
ing order:
•
If you have set the parameter for one of the speakers to
“NO” or “NON”, the corresponding speaker’s test tone
will not sound.
13-2. Rotate the SMART SCAN CONTROLLER to
set the level (–30 dB to +12 dB for subwoofer,
–12 dB to +12 dB for others) while the name
of the speaker you wish to adjust appears on
the display.
Repeat step 13-2 to adjust all speaker levels until the test
signal level sounds the same from all speakers.
•
You can also use the remote controller for this step:
press the CH.SEL button to select a speaker and press
the LEVEL
π
and
†
buttons to adjust the level.
13-3. When you finish setting the parameters, press
the ENTER button.
The display will return to the System Setup indication.
•
You can also press the TEST button on the remote con-
troller to produce the test signal.
NOTE:
•
The speakers do not produce sound while you are setting
up the system.
•
Press the PARAMETER button to cancel the system setup
operation.
•
If the headphones are connected, you cannot set up the
speaker system.
•
If the MULTI-CH INPUT is selected, use the device con-
nected to the MULTI-CH INPUTs to set up the speaker
system. For more information, refer to the instruction
manual of the corresponding device.
SMART SCAN CONTROLLER
TEST ON
dB
dB
dB
dB
dB
12-1
13
SMART SCAN CONTROLLER
ENTER
12-2
ENTER
SMART SCAN CONTROLLER
ENTER
12-3
ENTER
SMART SCAN CONTROLLER
ENTER
12-4
SMART SCAN CONTROLLER
13-2
13-3
ENTER
Left Level (L) Center Level (C) Right Level (R)
R-Sur.
Level (RS)
L-Sur.
Level (LS)
Subwoofer
Level (SW)
 Loading...