9-40
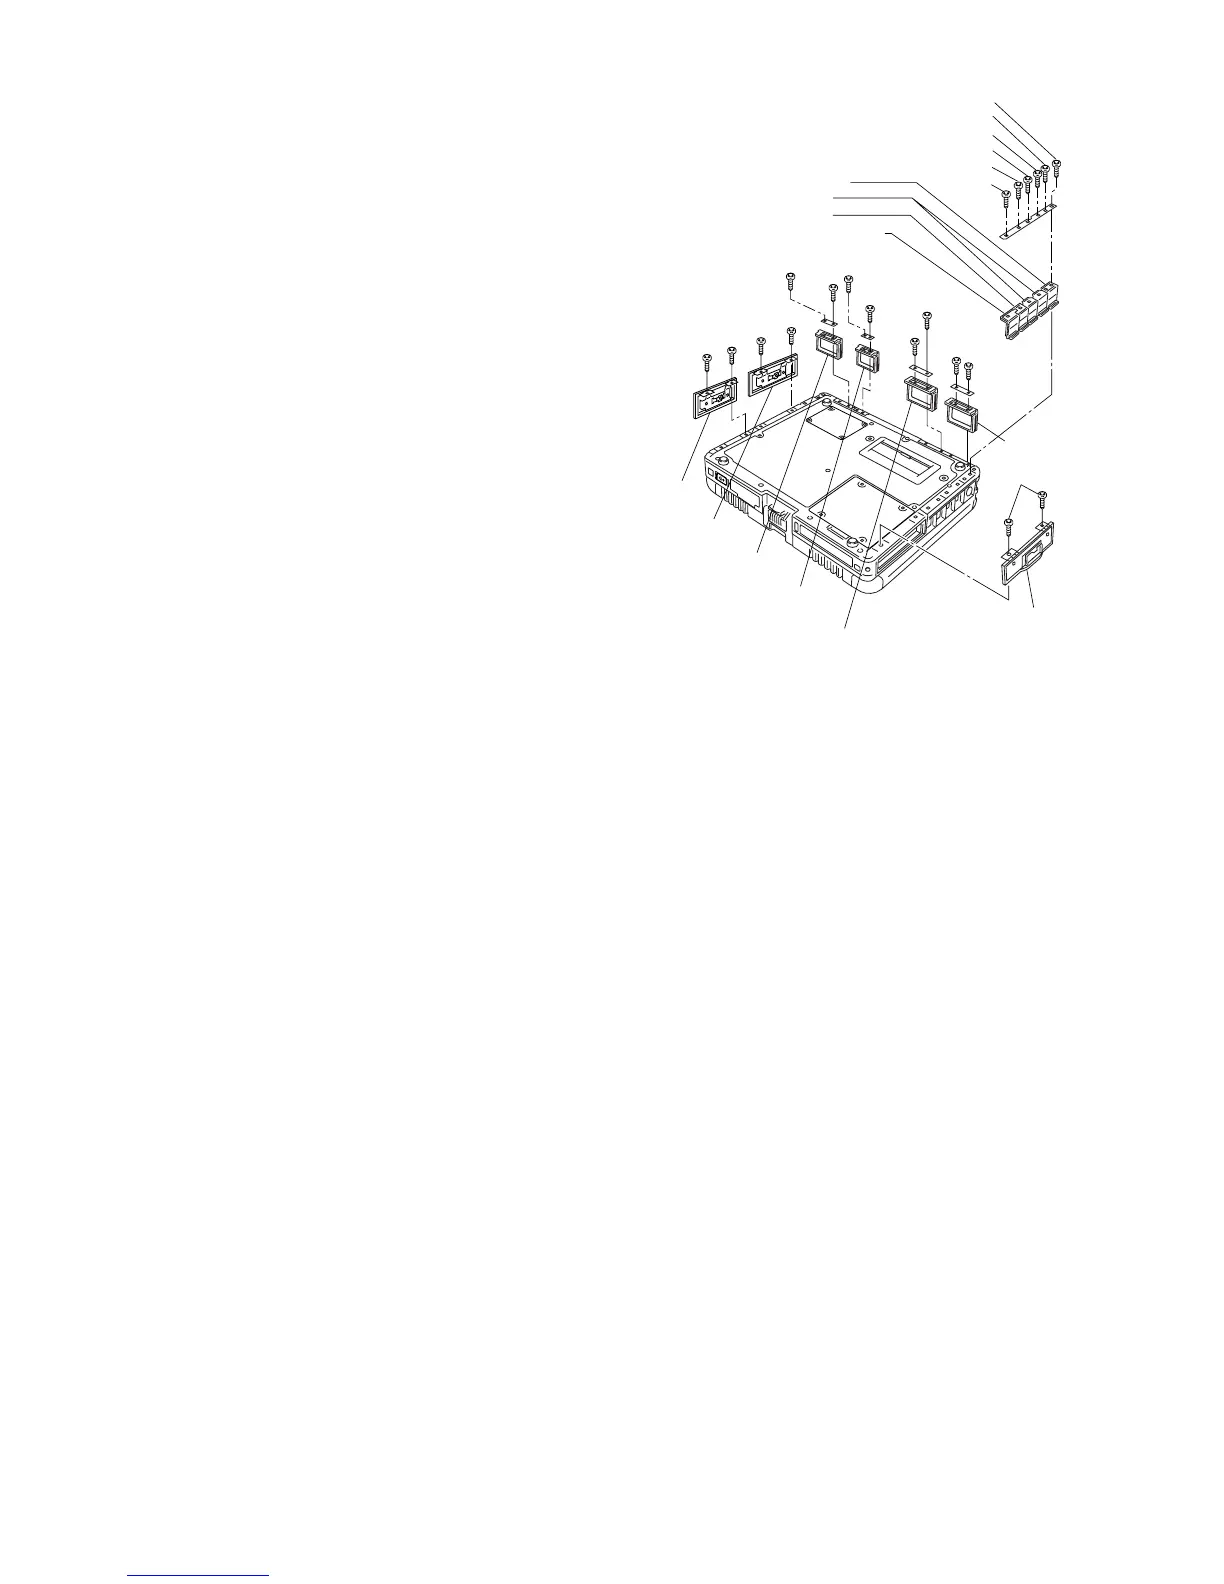
9.2.19. Assembling the Each Cover
1. Fix the Battery LID Ass'y, the HDD LID Ass'y, and the
PCMCIA LID Ass'y using the 6 Screws. <K12-16>
2. Set the Rear Cabinet.
3. Fix the Modem/LAN LID Rubber, the LAN LID Rubber, the
USB LID Rubber, the DC IN LID Rubber, the Serial LID
Rubber, the RGB LID Rubber, the Audio LID Rubber and
USB Back Rubber using the 14 Screws. <N6>
Note:
Tighten the Screws in the numbered order (No1 to No14).
Screws <K12-16> : DRQT26+D3FKL
Screw <N6> : DRHM5025YA
PCMCIA LID ASS’Y
DC IN LID Rubber
USB LID Rubber
LAN LID Rubber
Moden/LAN LID Rubber
Audio
LID Rubber
USB Back
Rubber
HDD LID ASS’Y
Battery
LID ASS’Y
<K12-16>
<K12-16>
<K12-16>
<K12-16>
<K12-16>
<N6>
:No.7
<N6>:No.1
RGB
LID Rubber
Serial
LID Rubber
<N6>:No.2
<N6>:No.3
<N6>:No.4
<N6>:No.5
<N6>:No.6
<N6>
:No.8
<N6>
:No.9
<N6>
:No.14
<N6>
:No.13
<N6>
:No.10
<N6>
:No.11
<N6>
:No.12
 Loading...