3
Shooting
63
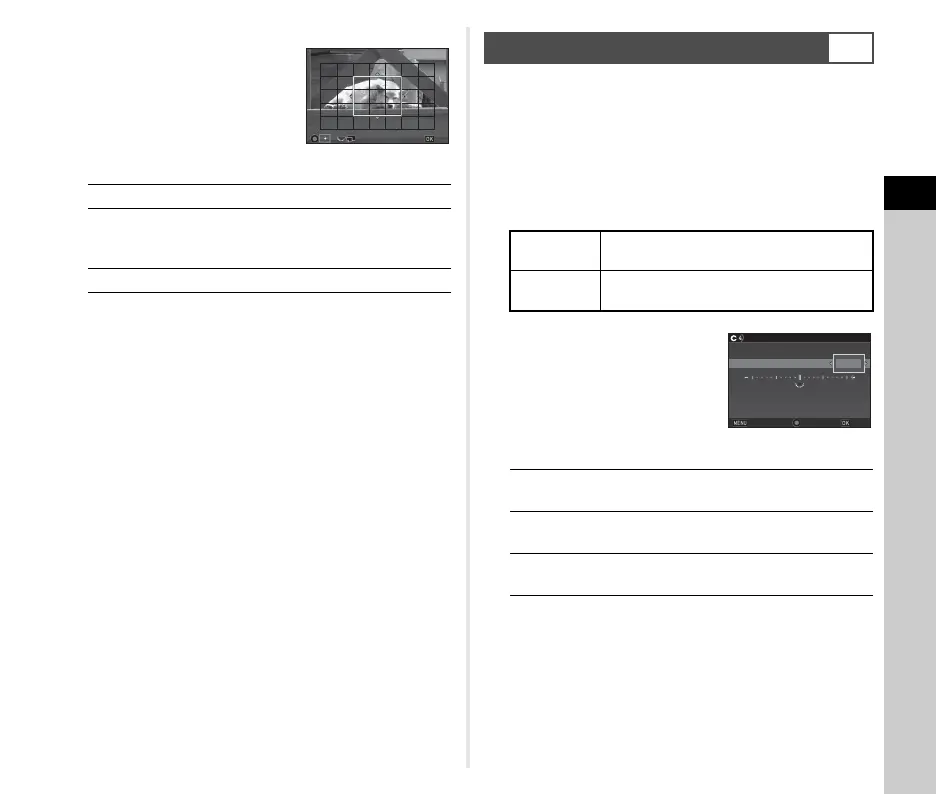
3 Select the AF area.
Use the frame that appears on
the monitor to change the
position and size of the AF area.
Available operations
4 Press E.
The AF area is set.
t Memo
•In R mode, [AF Active Area] is fixed to [Face Detection].
• You can switch the function of the arrow keys to AF area
change mode with X, Y, or Z, instead of pressing and
holding E. (p.102) When [Change AF Area] is assigned to
X, Y, or Z, the operation by pressing and holding E is
disabled.
You can precisely fine-tune your lenses with the camera’s
autofocus system.
1 Select [23 AF Fine Adjustment] in the E4 menu
and press D.
The [23 AF Fine Adjustment] screen appears.
2 Select [Apply All] or [Apply One] and press E.
3 Select [Setting] and adjust
the value.
Available operations
4 Press E.
The adjustment value is saved.
5 Press F twice.
The camera returns to standby mode.
ABCD
Changes the position of the AF area.
R
Increases/reduces the size of the AF
area (when [Multiple AF Points] is
selected).
M
Returns the AF area to the center.
OK
AF Fine Adjustment
E4
Apply All
Applies the same adjustment value to all
lenses.
Apply One
Saves an adjustment value for the lens
being used. (Up to 20 values)
D/R to the right Adjusts the focus to a closer
position.
C/R to the left Adjusts the focus to a farther
position.
M
Resets the adjustment value to
the default setting.
±0
±0
3
23
AF Fine Adjustment
Apply One
Setting
Reset Individual Settings
Reset Individual Settings
Save
Cancel

 Loading...