Publication: AMEN00064 2019‑03‑07 11
Rite‑Hite
®
Installation/Service/Owner’s Manual Revolution
®
HVLS Fan • Rogue
®
HVLS Fan
INSTALLATION
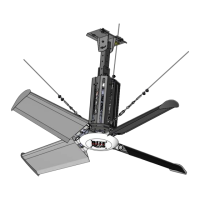
Step 5 – Stabilization Cables (INCLUDED WITH KIT)
WARNING / AVERTISSEMENT
Always use stabilization cables. They protect the
fan from tilting and allowing the blades to impact
a ceiling joist or object.
Toujours utiliser des câbles de stabilisation. Ils
empêchent le ventilateur de basculer et ses pales
d’entrer en contact avec une solive du plafond ou
un objet.
Stabilization cables anchor the fan for situations like cross
winds or impacts that could tilt the fan, causing the blades
to impact a ceiling joist or other object. Use these cables
to attach the fan bracket to the ceiling.
1. For greatest support, attach the stabilization cables
to the ceiling at 90° to each other and as far away as
possible from the point where the fan is mounted.
2. Secure the stabilization cables to the ceiling with 2
cable clamps, and tighten with a turnbuckle.
3. Cut stabilization cable to length as required.
4. Ensure that stabilization cables are attached in a
position that does not allow the blades to hit the
stabilization cables when the fan is operating.
5. Tighten the turnbuckle 1 turn past hand‑tight.
6. Install stabilization cable clamp nuts away from
turnback.
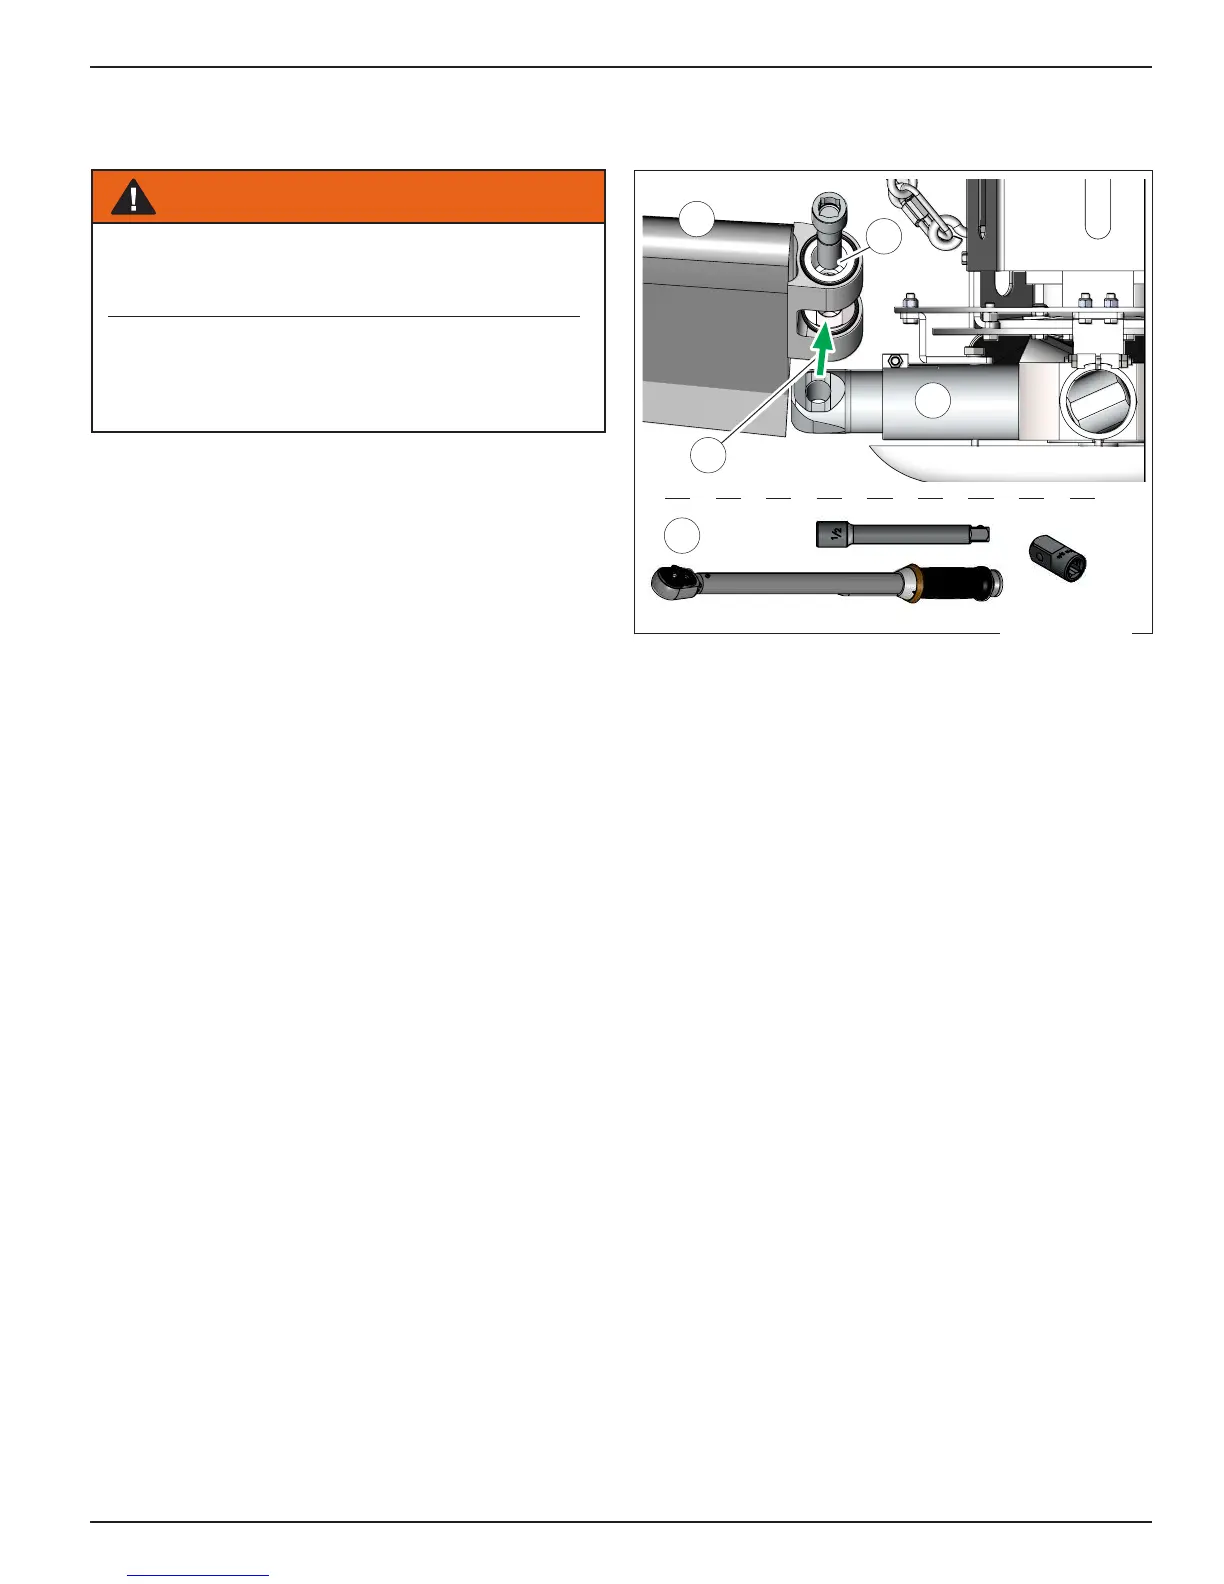
Step 6 – Attach Blades
A
B
C
D
E
Clean each blade with a paper towel to remove
ngerprints and dirt before the blades are installed.
To attach each fan blade to the fan hub:
1. Use a step ladder or lift as required.
2. Raise the blade (A) above the arm of the hub (B) and
allow the slot of the blade to slide onto the hub (C).
3. Insert (provided) 1in bolt (D). Use a torque wrench
(E) with a 3/4in drive extension to tighten the bolt to
200 ft-lb. [271 Nm].
Step 7 – Level Hub
1. Hold a level across the center of the hub
(all directions).
2. Make fine adjustments with the (turnbuckle clamped)
stabilization cables.
3. Run / Test (page 17) the unit, then re‑adjust fan
level and cable tension.
Figure 8
 Loading...