42
Recording and Playing Back a Performance
The E-A7 lets you record your performance on a USB ash drive (sold
separately).
The resulting audio le is saved in the “My Recordings” folder.
The recording format is WAV (not mp3).
NOTE
5 In order to record your performance, you’ll need a USB ash
drive.
5 Use a USB ash drive sold by Roland. We cannot guarantee
operation if you use any other USB ash drive.
Recording Audio (WAV Format)
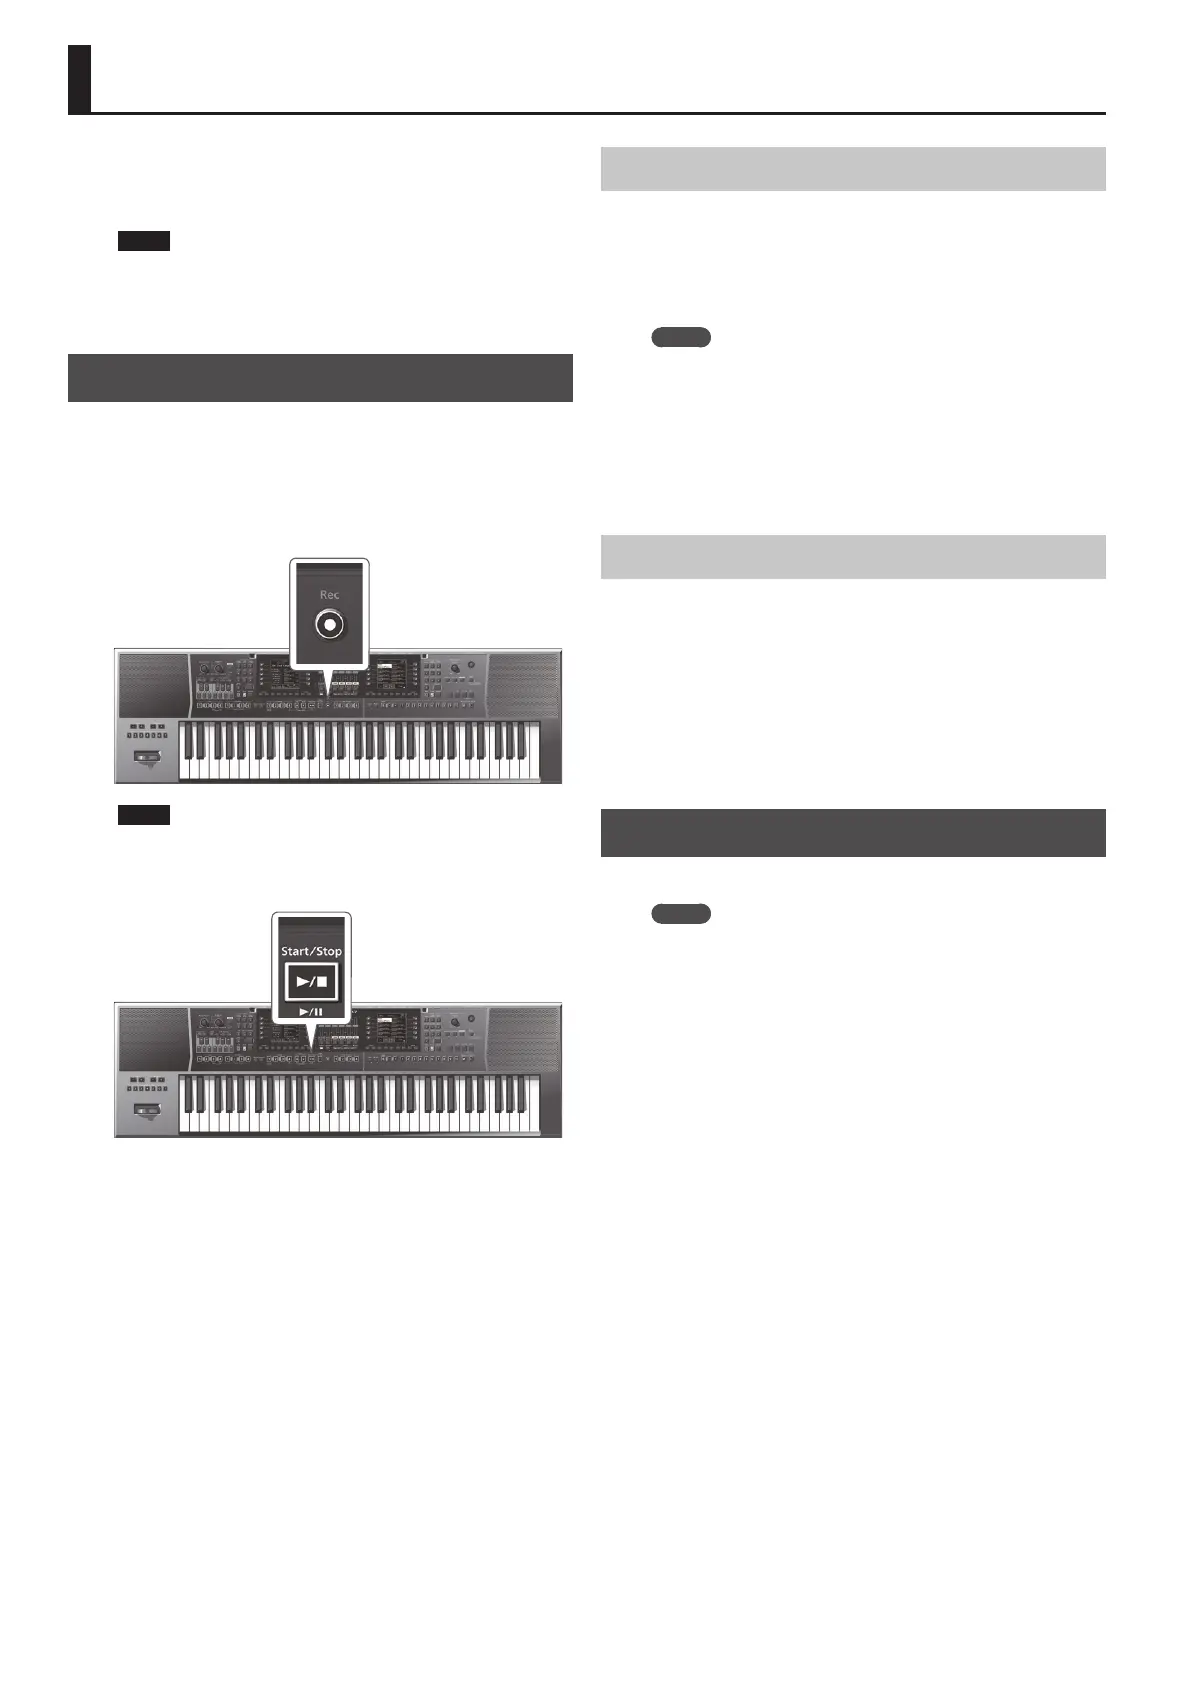
1. Connect a USB ash drive to the E-A7.
2. Make preparations for recording.
5 Select the style or song that you want to use as accompaniment.
5 Make settings for the volume and eects.
3. Press the [Rec] button so it’s blink.
NOTE
If you pressed the [Rec] button by mistake, you can cancel by
long-pressing the button until it once again goes dark.
4. Press the [Start/Stop] (
s
) button.
The [Rec] button and [Start/Stop] (
s
) button light, the style or
song plays, and recording begins. Your playing on the keyboard is
recorded.
The main screen shows the recording time.
5. Press the [Rec] button or [Start/Stop] (
s
) button to
stop recording.
The style or song stops playing, and recording also stops. A screen
allowing you to assign a name appears.
Saving the Song
a. Assign a name as necessary.
&
For details on how to assign a name, refer to “Assigning
Names” (p. 16).
b. Use the function buttons to select “Exec.”
The recorded result is saved.
MEMO
5 If a le of the same name already exists on the USB ash drive,
you’ll be asked whether you want to overwrite it.
5 In this case, the older le is overwritten if you use the function
buttons to select “YES” (the older le disappears).
5 If you don’t want to overwrite the older le, select “NO” and
return to step a.
5 The audio le is saved on the USB ash drive in the “My
Recordings” folder.
Discarding the Recorded Content
If you are not satised with the recording, you can discard it without
saving.
a. In the screen at which you assign the name, press the [Exit]
button.
A conrmation screen asks whether you want to discard the
recording.
b. Use the function buttons to select “YES.”
The recorded content is discarded.
If you select “NO” at this point, you return to the naming screen.
Listening to the Recorded Content
1. Press the [Start/Stop] (
s
) button.
MEMO
5 You can change the volume of the recorded audio. Before
recording, adjust the “Rec Audio Level” value ([Menu]
0
“Global”
0
“Rec Audio Level”).
5 If you don’t want the start and end of recording to synchronize
with the accompaniment play/stop, turn o “Rec Audio Sync”
([Menu]
0
“Global”
0
“Rec Audio Sync”). If this is o, use the
[Rec] button to control recording start/stop.
5 It is not possible to overdub onto a WAV le.
5 If the USB ash drive is full, the message “Disk Full” appears and
recording stops. In this case, the data that had recorded up to
that point is not saved.
 Loading...