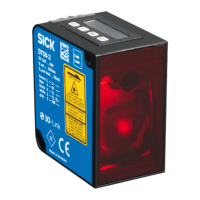
Commissioning
34 © SICK AG • Subject to change without notice • 8014868/YIF1/2020-10-19
Scaling the analog output
Example
Example: 4 mA is to correspond to a distance near the sensor and 20 mA
is to correspond to a distance far from the sensor.
Prerequisite: 4 … 20 mA has been selected for Q2. → See Chapter 8.5 on
page 36
1. Position object at teach point 1.
2. Press the select pushbutton for longer than 5 seconds. The LED Q1
near lights up.
3. Keep pressing the select pushbutton until the LED Q2 near lights up.
4. Press the set pushbutton.
If the teach was successful, the setting is applied immediately. The
LEDs Q1 and Q2 ash twice simultaneously. If the teach was not suc-
cessful, the LEDs Q1 and Q2 ash alternately.
5. If necessary, perform ne teach. → See Chapter 8.3 on page 34
6. Position object at teach point 2.
7. Press the select pushbutton. The LED Q2 far lights up.
8. Press the set pushbutton.
If the teach was successful, the setting is applied immediately. The
LEDs Q1 and Q2 ash twice simultaneously. If the teach was not suc-
cessful, the LEDs Q1 and Q2 ash alternately.
9. If necessary, perform ne teach. → See Chapter 8.3 on page 34
10. In order to leave teach mode, either press the select pushbutton
longer than 5 seconds or wait 5 minutes without pushing the pushbut-
tons.
8.3 Performingneteach
NOTE!
Fine teach automatically ends if no pushbuttons have
been pushed for 30 seconds.
Performingneteach You can perform a ne teach directly after successfully performing a teach.
You can use the ne teach to move the taught-in switching point or analog
point.
1. Perform teach. → See Chapter 8.1 on page 28 and Chapter 8.2 on
page 33
2. Press the select and set pushbuttons simultaneously for less than 1
second. The LED of the teach point to be moved ashes.
 Loading...