EasyManuals Logo
Home>Sony>Printer>DPP-FP55

Sony DPP-FP55 User Manual

Sony DPP-FP55
92 pages
To Next Page IconTo Next Page
To Previous Page IconTo Previous Page
Page #12 background imageLoading...
Page #12 background image
12
GB
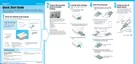
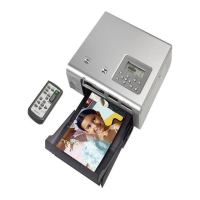
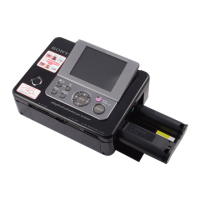
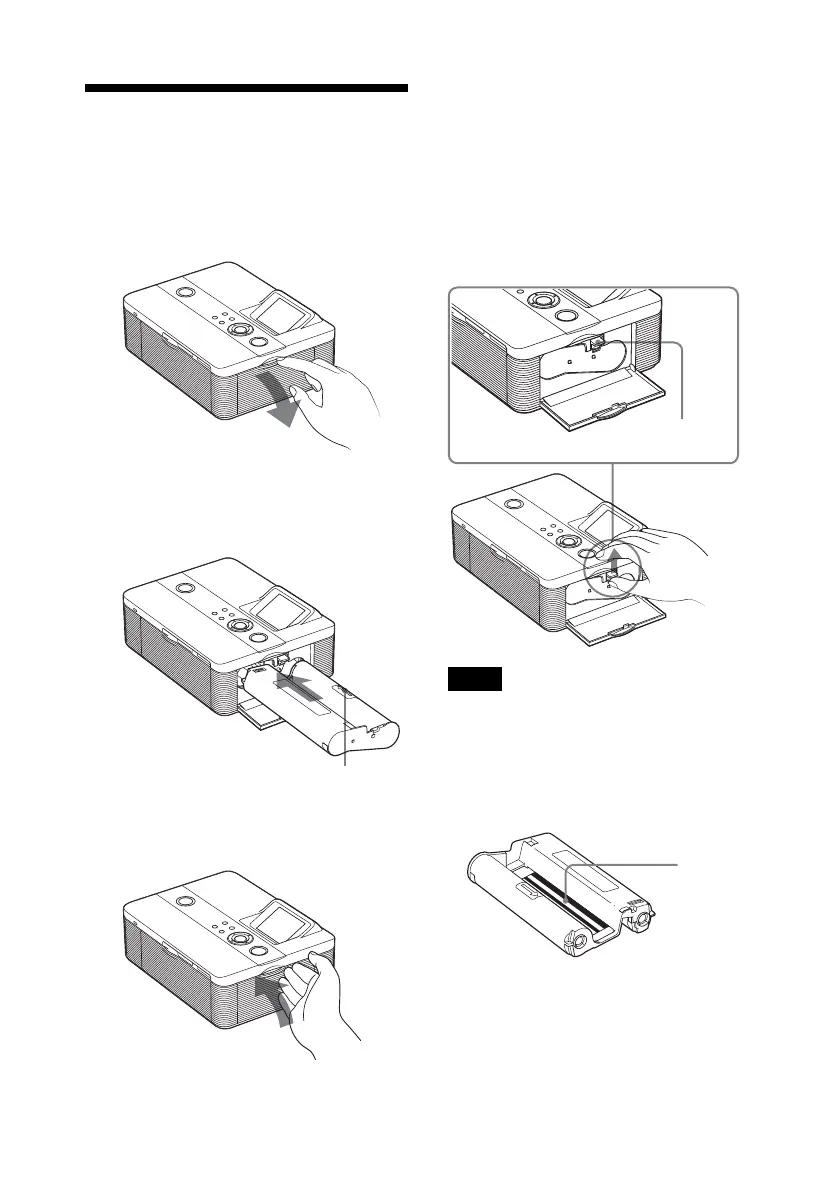
Removing the print cartridge
When the print cartridge runs out, the
cartridge error message appears on the
LCD screen.
Open the cartridge compartment door,
push up the eject lever, and remove the
used print cartridge.
Eject lever
Notes
Use the print cartridge contained in the same
box with the print paper.
Do not touch the ink ribbon or place the print
cartridge in a dusty location. Fingerprints or
dust on the ink ribbon may result in imperfect
printing.
Ink ribbon
3 Loading the print
cartridge
1
Pull and open the cartridge
compartment door.
2 Insert the print cartridge in the
arrow direction until it clicks into
place.
Arrow
3 Close the cartridge compartment
door.

Table of Contents

Other manuals for Sony DPP-FP55

Questions and Answers:

Question and Answer IconNeed help?

Do you have a question about the Sony DPP-FP55 and is the answer not in the manual?

Sony DPP-FP55 Specifications

General IconGeneral
Maximum resolution300 x 300 DPI
Video capabilityYes
Mac compatibilityNo
Dimensions (WxDxH)175 x 137 x 60 mm
Power requirements120-240V
Compatible operating systemsWindows Me/2000/XP
Printing sizes10 x 15 cm
Paper tray media typesPhoto paper
Bundled softwarePicture Motion
USB 2.0 ports quantity1
Compatible memory cardsMS Duo, MS Pro, MS PRO Duo, SD
DisplayLCD
Display diagonal2 \
Market positioningHome & office
Weight and Dimensions IconWeight and Dimensions
Weight1000 g

Related product manuals