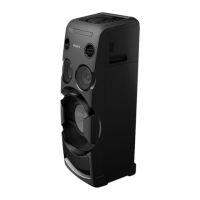
MHC-V50/V50D
24
SECTION 3
TEST MODE
PANEL TEST MODE
This mode is used to check the keys, knob, screen display panel
and LEDs.
Procedure:
1. Press [1] button to turn on the system.
2. Touch [] and [ TUNING - .] touch keys simultane-
ously for 3 seconds.
3. All LEDs and segments in screen display panel are lighted up.
This is the display check mode.
Touch [ENTER] touch key repeatedly to toggle different
display mode as below:
Segments on screen display panel:
All On → 1st Group On → 2nd Group On → All On → All Off
Single color LEDs:
All On → 1st Group On → 2nd Group On → All On → All Off
Multi Color LEDs:
White → Red → Green → Blue → Off
4. Touch [
- ] touch key, the keys and knob check mode is
activated.
5. In the key and knob check mode, the screen display panel
displays “K 0 V0”.
Each time a button/touch key is touched, “K” value increases.
However, once a button/touch key has been touched, it is
no longer taken into account. After all the button/touch keys
have been touched, “K” value will toggle between “OK” and
“K27”.
“V” value increases in the manner of 0, 1, 2, 3 ... if [VOLUME/
DJ CONTROL] knob is turned clockwise, or it decreases in the
manner of 0, 9, 8, 7 ... if [VOLUME/DJ CONTROL] knob is
turned counterclockwise.
6. To release from this mode, touch the touch keys in the same
manner as step 2, or disconnect the power cord.
VERSION DISPLAY MODE
This mode is used to check the software version.
Procedure:
1. Press [1] button to turn on the system.
2. Touch [ENTER] and [ TUNING - .] touch keys simul-
taneously and hold 3 seconds.
The SC and CD/DVD software version appears on the screen
display panel.
After that, it returns to the default display.
MODEL AND DESTINATION DISPLAY MODE
This mode is used to check the model and destination of the set.
Procedure:
1. Press [1] button to turn on the system.
2. Touch [] and [ TUNING - .] touch keys simultane-
ously for 3 seconds.
All segments in screen display panel are lighted up.
3. Touch [ +] touch key. Model information appears on the
screen display panel.
4. Touch [ +] touch key again. Destination information ap-
pears on the screen display panel.
5. Touch [] and [ TUNING - .] touch keys simultane-
ously for 3 seconds to exit.
USER RESET
The user reset clears all data including preset data stored in the data
fl ash to initial conditions.
Procedure:
1. Press [1] button to turn on the system.
2. Touch [ENTER] and [ TUNING + >] touch keys
simultaneously for 3 seconds.
3. “RESET” appears on the screen display panel. After that, the
screen display panel becomes blank for a while, and the system
goes to demo mode.
COLD RESET
This mode is used to reset all the user settings to factory setting.
Execute this mode when returning the set to the customer.
Procedure:
1. Press [1] button to turn on the system.
2. Touch [] and [ TUNING + >] touch keys
simultaneously for 3 seconds.
3. “COLD RST” appears on the screen display panel. After that,
“SONY DEMO” appears on the screen display panel. The
system automatically turn on and off once. Please be sure that
the system stay at demo mode fi nally before switch off the
power supply.
DISC TRAY LOCK
When the disc tray does not open and “LOCKED” appears on the
screen display panel, disc tray lock mode has been activated by the
shop front.
To release from Disc Tray Lock Mode:
1. Press [1] button to turn on the system.
2. Touch [FUNCTION] touch key repeatedly to select the CD/
DVD function.
3. Touch [ENTER] and [VOCAL FADER] touch keys
simultaneously and hold down until “UNLOCKED” displayed
on the screen display panel.
BLUETOOTH PAIRING HISTORY CLEAR
This mode is used to delete the Bluetooth pairing history on the
system.
Procedure:
1. Press [1] button to turn on the system.
2. Touch [FUNCTION] touch key repeatedly to select the Blue-
tooth function.
3. Touch [ENTER]
and [
- ] touch keys simultaneously for
3 seconds.
4. The message “BT HIST” → “CLEAR” appears on the screen
display panel. The pairing history has been deleted.
SHOP FRONT DEMO
The playback started automatically and the “ * DEMO * ” appears
on the screen display panel.
This is the Shop Front Demo mode which is activated by the shop
front.
To release from Shop Front Demo
1. Touch [] and [MIC ECHO] touch keys simultaneously for 5
seconds.

 Loading...