HT-S350/SD35
11
Sony CONFIDENTIAL
For Authorized Servicer
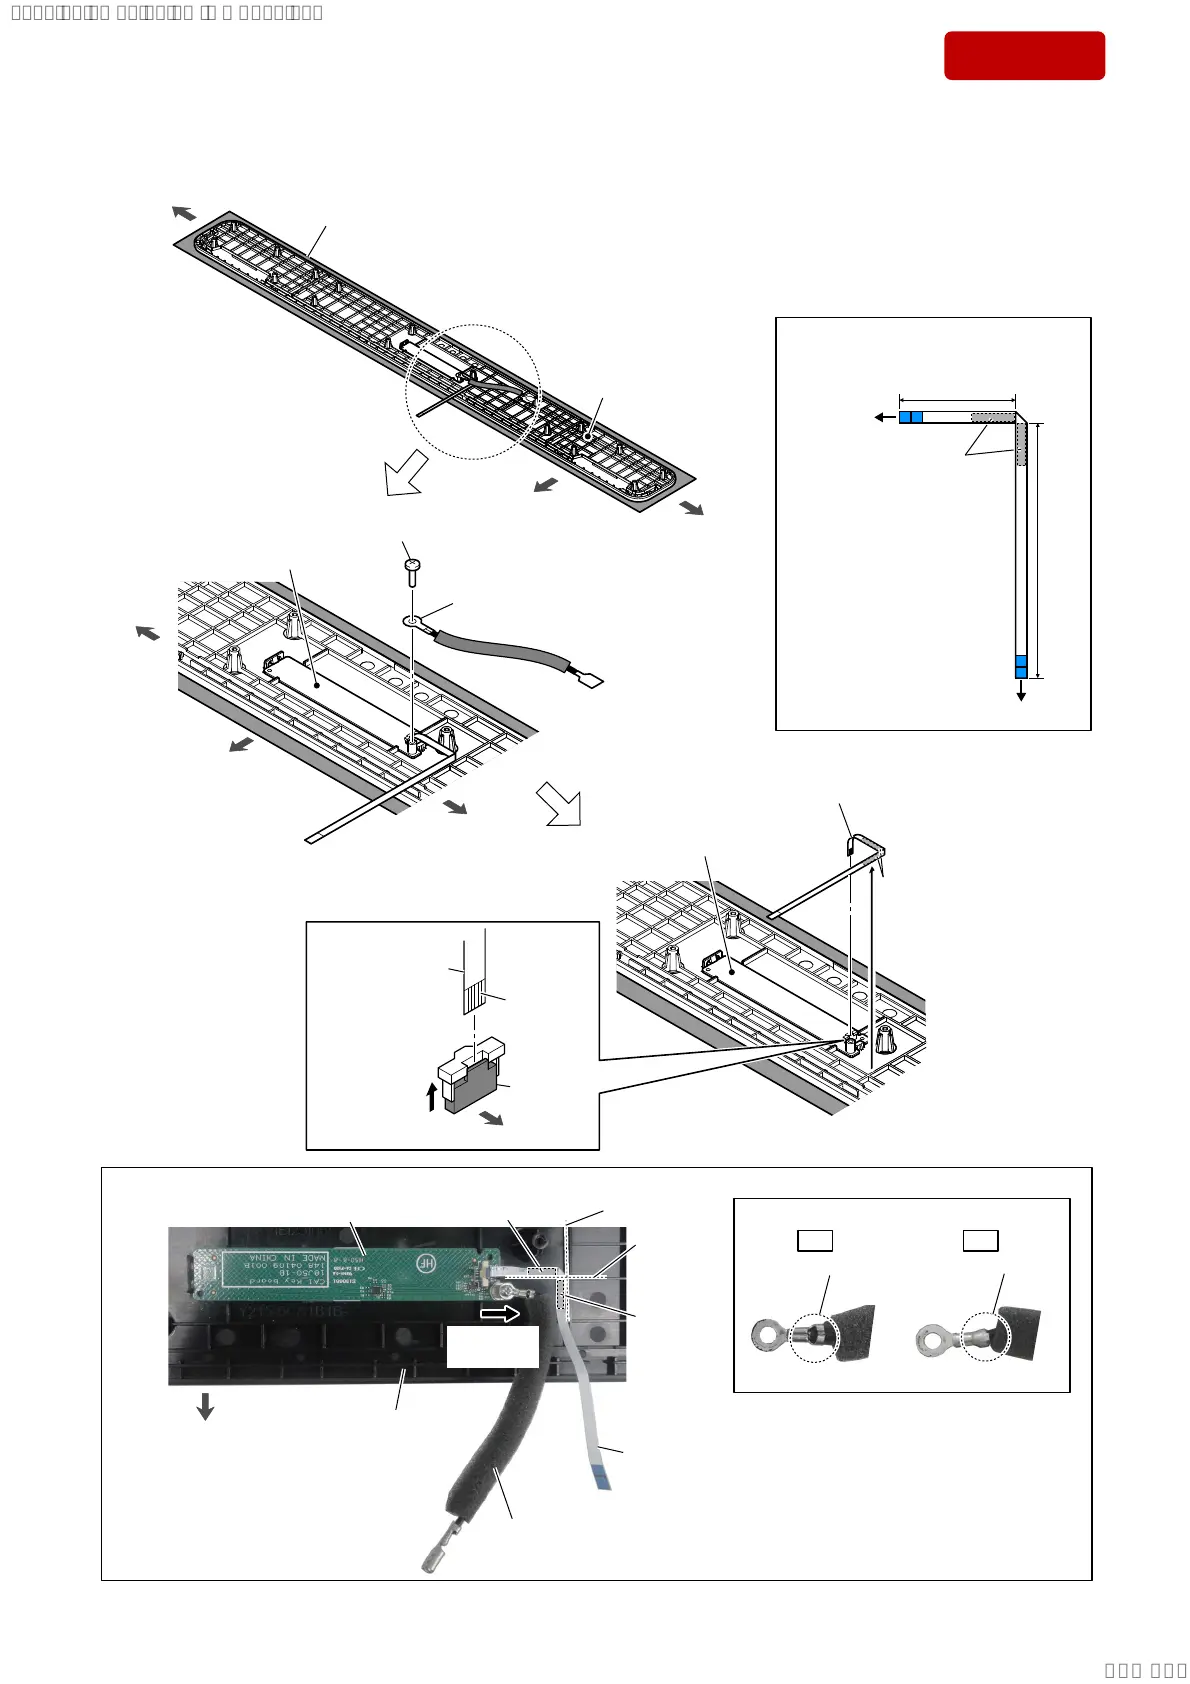
2-3. WIRE WITH LUG TERMINAL, FFC (6 CORE) (L=138 mm)
short
long
TOUCH
KEY board
MAIN board
,QVWDOODWLRQGLUHFWLRQIRUWKH))&
FRUH/ PP
3 Peel the FFC (6 core) off
of the top panel block.
(See Fig. B)
adhesive
tape
adhesive
tape
6 FFC (6 core) (L=138 mm)
(See Fig. B, C)
TOUCH KEY board
TOUCH KEY board
guide line
FFC (6 core)
(L=138 mm)
front side
guide line
adhesive
tape
adhesive tape
lug terminal
direction
wire with lug terminal
:LUHVHWWLQJ
)LJ%!
soft cloth, etc.
Note:
When working with the top side facing down,
lay a soft cloth, etc. so as not to damage.
top panel block
(inner side)
front side
front side
left side
left side
right side
right side
2 wire with lug terminal
(See Fig. B)
4
Unlock the
connector.
connector
(CN1)
terminal
side
5 Draw the FFC
(6 core) out of
the connector.
left side
TOUCH KEY board
top panel block
(inner side)
)LJ&!
OK NG
,QVWDOODWLRQGLUHFWLRQIRUWKHOXJWHUPLQDO
–7RSYLHZ–
Caulking is upward. Caulking is downward.
1 screw
(BM2.5 u 6)
SYSSET
2019/02/1301:27:25(GMT+09:00)
 Loading...