XAV-AX150
20
Sony CONFIDENTIAL
For Authorized Servicer
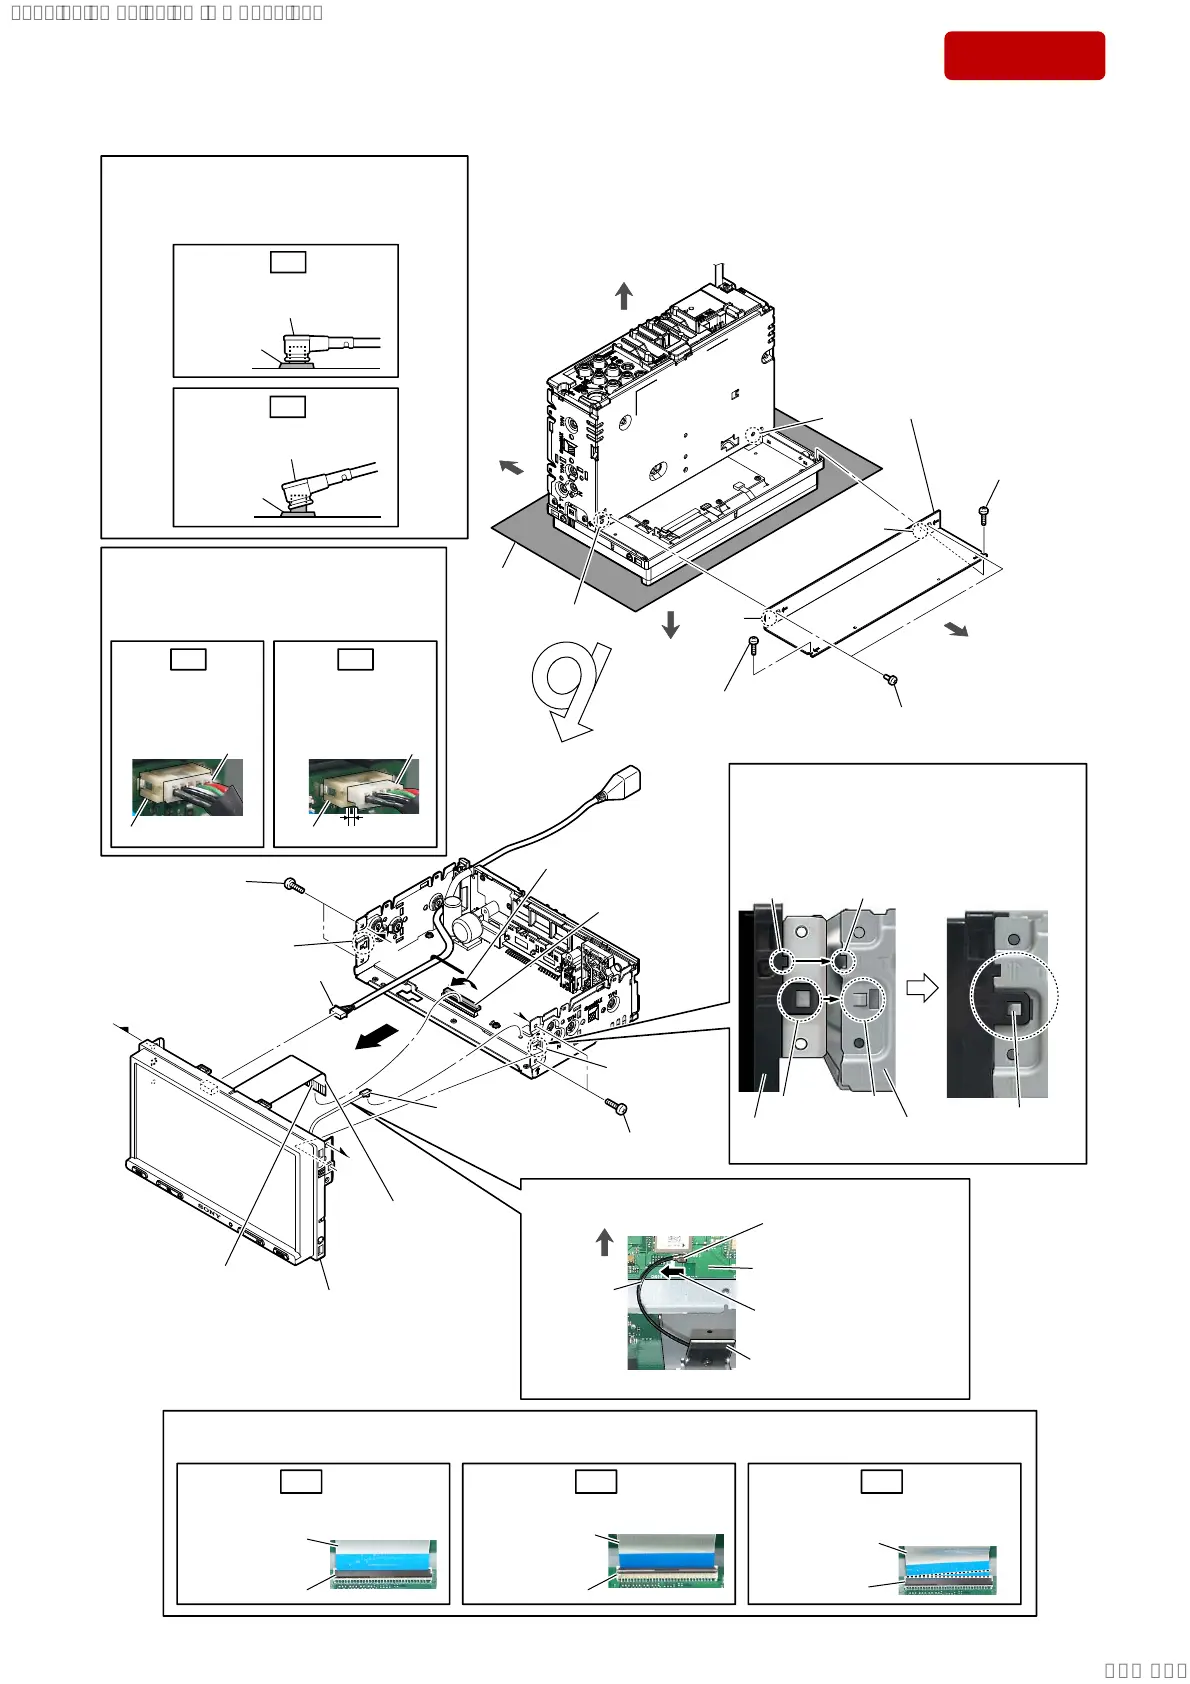
3-3. FRONT PANEL BLOCK
soft cloth, etc.
rear side
top side
bottom side
qa front panel block
8 two screws
(PTT2.6 u 6)
8 two screws
(PTT2.6 u 6)
front side
1 two screws
(PTT2.6 u 4)
2 screw (+B, TT,
P-TYPE, 2 u L)
(L = 6.0 mm)
hole
boss
boss
hole
A
A
B
B
4 Unlock.
connector
(CN201)
terminal side
7
cable for automobile
(USB)
connector
(CN1701)
(See Note 3)
Insert is straight to the interior.
OK
Connector is unlock. Insert at a slant.
Note 2:
When installing the flexible flat cable (60 core) to the connector (CN201) on the MAIN board,
insert straight to the connector and lock a connector completely. No slanting after insertion.
NG
flexible flat cable
(60 core)
flexible flat cable
(60 core)
flexible flat cable
(60 core)
connector connector
NG
connector
2 screw (+B, TT,
P-TYPE, 2 u L)
(L = 6.0 mm)
3 plate back
Note 1:
When installing the plate back,
align the two bosses and two
holes.
BT antenna wire connector
Insert vertically.
OK
Insert at a slant.
NG
connector
BT antenna wire connector
connector
Note about installing the BT antenna wire
connector
When installing the BT antenna wire connector,
insert vertically, and push it from the top.
< Fig. A >
6 BT antenna wire
connector (J600)
5 flexible flat cable
(60 core)
(See Note 2)
9 claw
(See Fig. A)
9 claw
(See Fig. A)
0
connector
(J600)
%7DQWHQQDZLUHVHWWLQJ
– Top view –
rear side
BT antenna
wire
BT antenna
MAIN board
Position the BT antenna wire
in the direction of the arrow.
– Side view –
How to install the front panel block
When installing the front panel block, install it
as shown figure below, then check that claws
of left and right are locked.
hook claw
groove
rib
claw is locked.
front panel block chassis
Insert only part way.
Insert straight into
the interior.
OK NG
Note 3:
When installing the cable for automobile
(USB) to the connector (CN1701) on the
DISPLAY board, insert straight to the
connector.
cable for
automobile (USB)
connector
connector
cable for
automobile (USB)
Return to the normal position.
SYSSET
2020/02/0723:51:10(GMT+09:00)
 Loading...