XAV-AX150
24
Sony CONFIDENTIAL
For Authorized Servicer
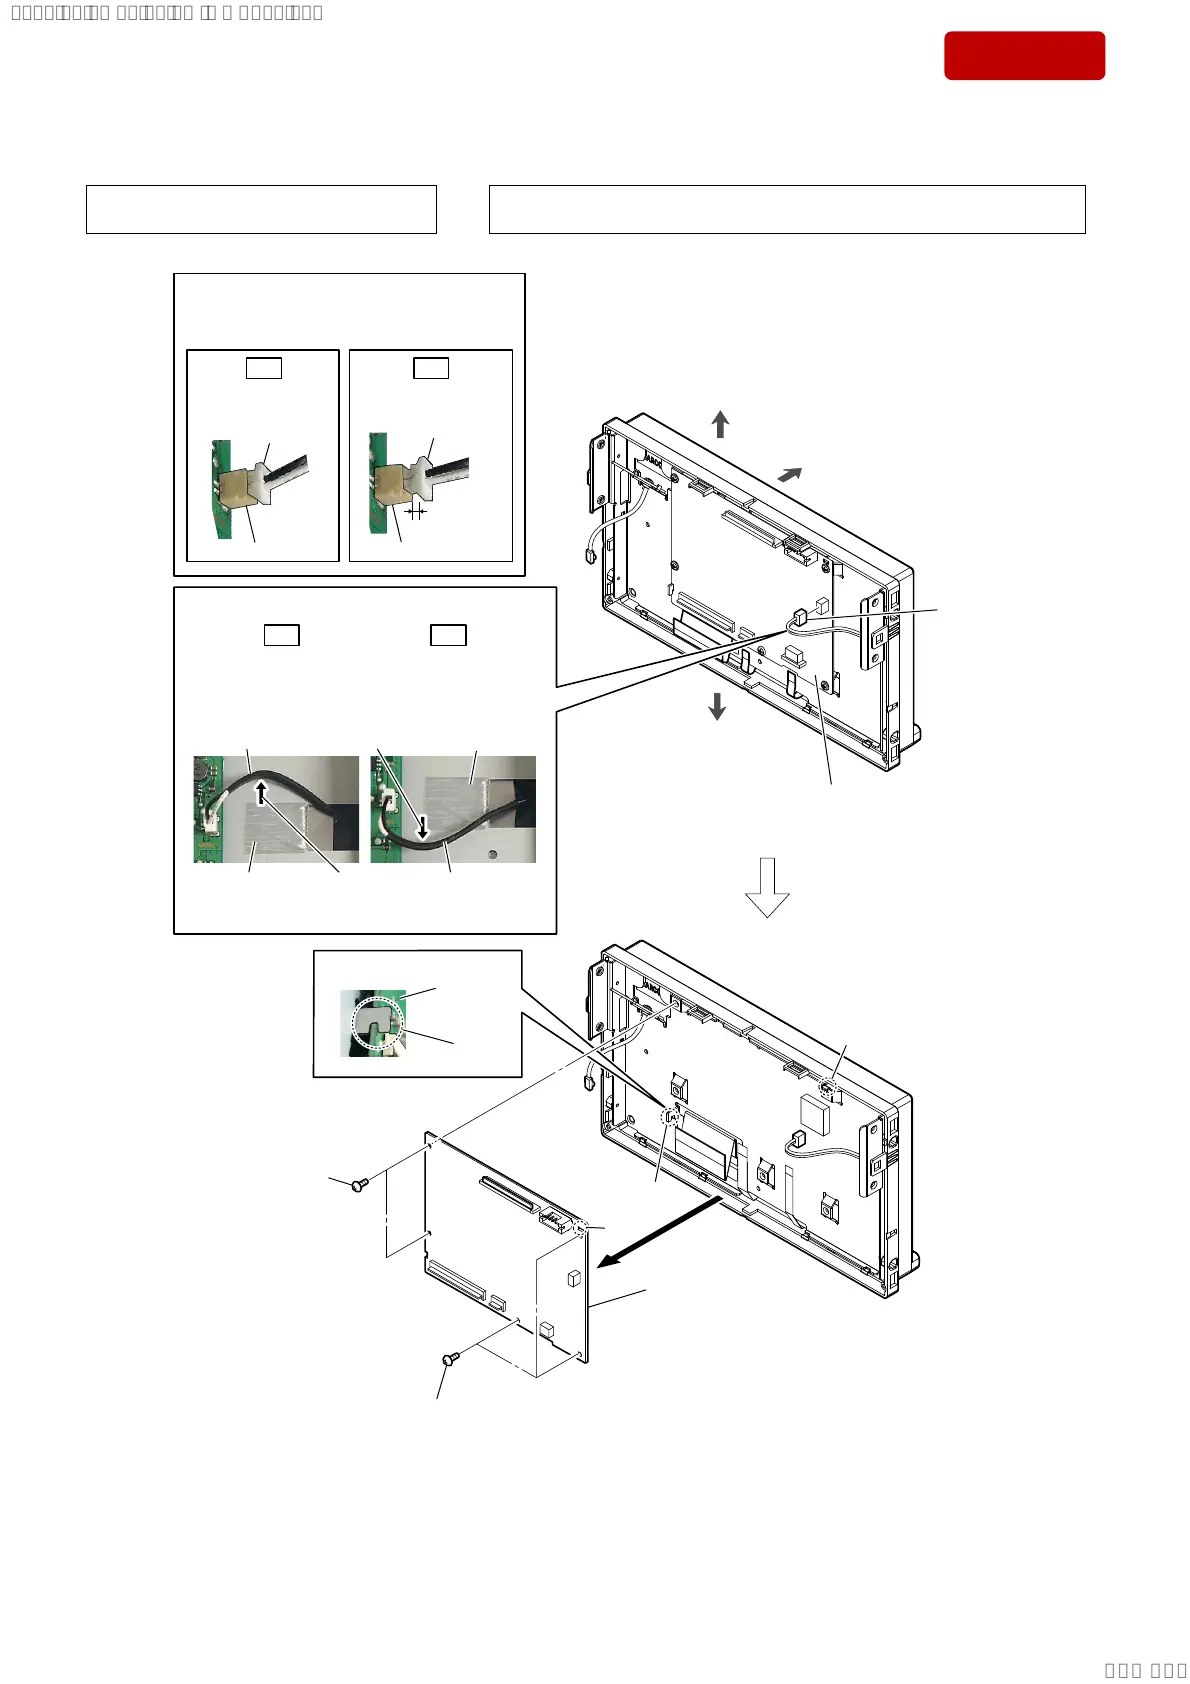
3-8. DISPLAY BOARD-2
5
DISPLAY board
(See Note 1, 2)
Note 4:
When installing the DISPLAY board,
align the rib and hole.
2 three screws
(2 u 4) (silver)
2 two screws
(2 u 4) (silver)
3 claw
hole
rib
– Side view –
4
claw
DISPLAY
board
top side
front side
1 LCD wire
connector
(CN1302)
(See Note 3)
DISPLAY
board
Insert only part way.
Insert straight into
the interior.
LCD wire
connector
LCD wire
connector
OK NG
Note 3:
When installing the LCD wire to the
connector (CN1302) on the DISPLAY
board, insert straight to the connector.
bottom side
OK NG
,QVWDOOLQJSRVLWLRQRIWKH/&'ZLUH
LCD wire is positioned
above of the filament
tape (sub material).
LCD wire is positioned
below of the filament
tape (sub material).
–5HDUYLHZ–
filament tape
(sub material)
filament tape
(sub material)
LCD wire
LCD wire
Note 1:
Replaced old DISPLAY board is destroyed
with the hammer, and dispose it.
Note 2:
When the DISPLAY board is replaced, be sure to refer the “IMPORTANT NOTE
FOR REPLACING THE DISPLAY BOARD” on page 4, and perform it.
below
side
above
side
SYSSET
2020/02/0723:51:10(GMT+09:00)
 Loading...