XAV-AX150
23
Sony CONFIDENTIAL
For Authorized Servicer
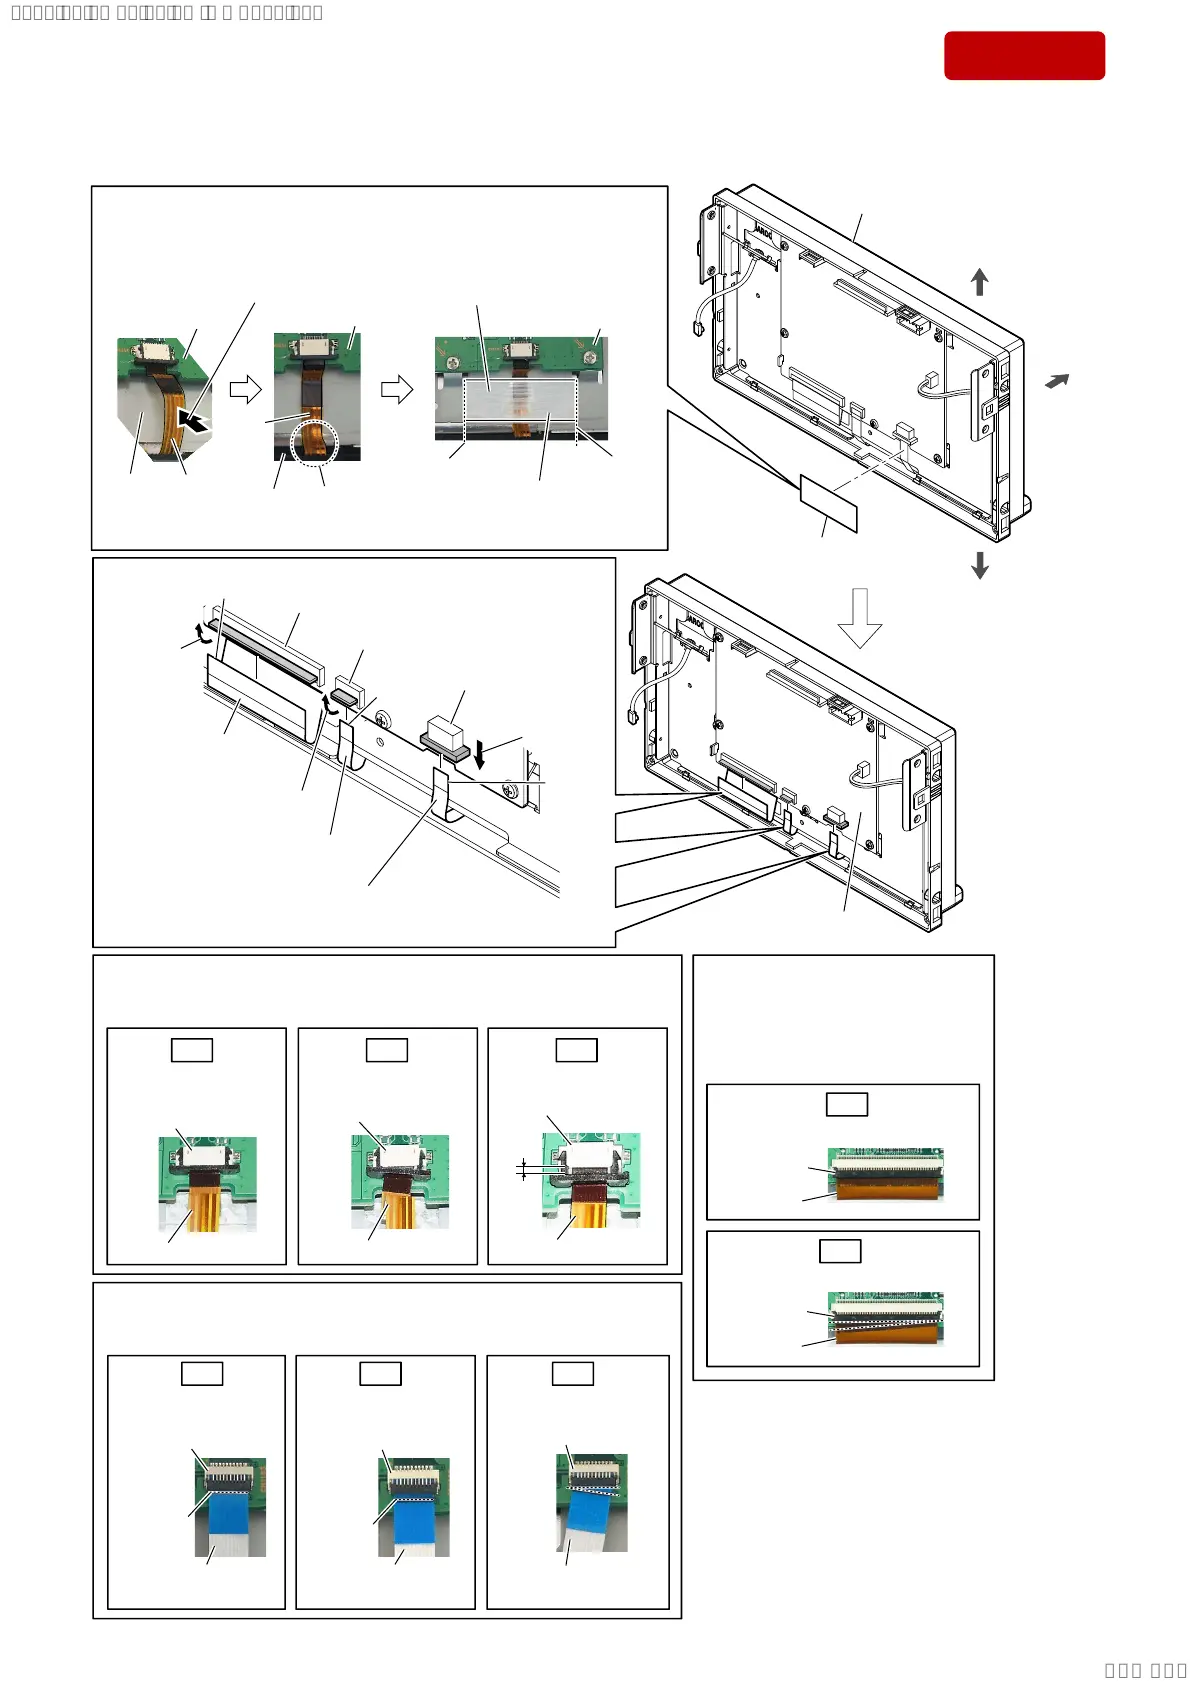
3-7. DISPLAY BOARD-1
• Continued on 3-8 (page 24).
Insert is straight to
the interior.
OK
Note 2:
When installing the flexible flat cable (10 core) to the connector (CN1103)
on the DISPLAY board, insert straight to the connector with fullness and
lock a cconnector ompletely. No slanting after insertion.
flexible flat cable
(10 core)
connector
top side
front side
bottom side
OK
Note 3:
When installing the LCD FPC to
the connector (CN1301) on the
DISPLAY board, insert straight
to the connector with fullness and
lock a connector completely.
No slanting after insertion.
LCD FPC
connector
NG
OK
Connector is unlock.
Note 1:
When installing the touch panel FPC to the connector (CN1501) on the
DISPLAY board, insert straight to the connector with fullness and lock
a connector completely. No slanting after insertion.
NG
touch panel FPC touch panel FPC touch panel FPC
connector
connector
NG
LCD FPC
connector
Insert only part way.
1
filament tape
(sub material)
connector
+RZWRLQVWDOOWKHILODPHQWWDSHVXEPDWHULDO/ PP
front panel block
DISPLAY board
–5HDUYLHZ–
Insert straight into
the interior.
Insert at a slant.
Insert straight into the interior.
guide line
filament tape
(sub material)
(L = 30 mm)
guide line
3 Draw the touch panel FPC
out of the connector.
(See Note 1)
7 Draw the LCD FPC
out of the connector.
(See Note 3)
5 flexible flat cable (10 core)
(See Note 2)
DISPLAY
board
–5HDUYLHZ–
2
Unlock.
connector
(CN1501)
terminal
side
flexible flat cable
(10 core)
connector
NG
Insert only part way.
NG
flexible flat cable
(10 core)
connector
Insert at a slant.
black line
black line
connector
(CN1301)
connector
(CN1103)
6
Unlock.
4
Unlock.
terminal
side
terminal
side
DISPLAY board
DISPLAY board
chassis
display
touch panel
FPC
Attach in order from 1 to 3.
1
Push the touch panel FPC to
attach with the chassis display.
touch
panel
FPC
panel
sub assy
2
Fold the touch panel
FPC to attach with
the panel sub assy.
3
Paste the filament tape
(sub material) (L = 30 mm).
SYSSET
2020/02/0723:51:10(GMT+09:00)

 Loading...