XAV-AX150
28
Sony CONFIDENTIAL
For Authorized Servicer
SECTION 4
ELECTRICAL ADJUSTMENTS
MONITOR SECTION
If any of the following parts was replaced, execute the “FLICKER
ADJUSTMENT” as mentioned below.
• MAIN board
• IC801 on the MAIN board
• DISPLAY board
• Liquid crystal display
FLICKER ADJUSTMENT
Note: Remote commander is necessary for fl icker adjustment operation.
Procedure:
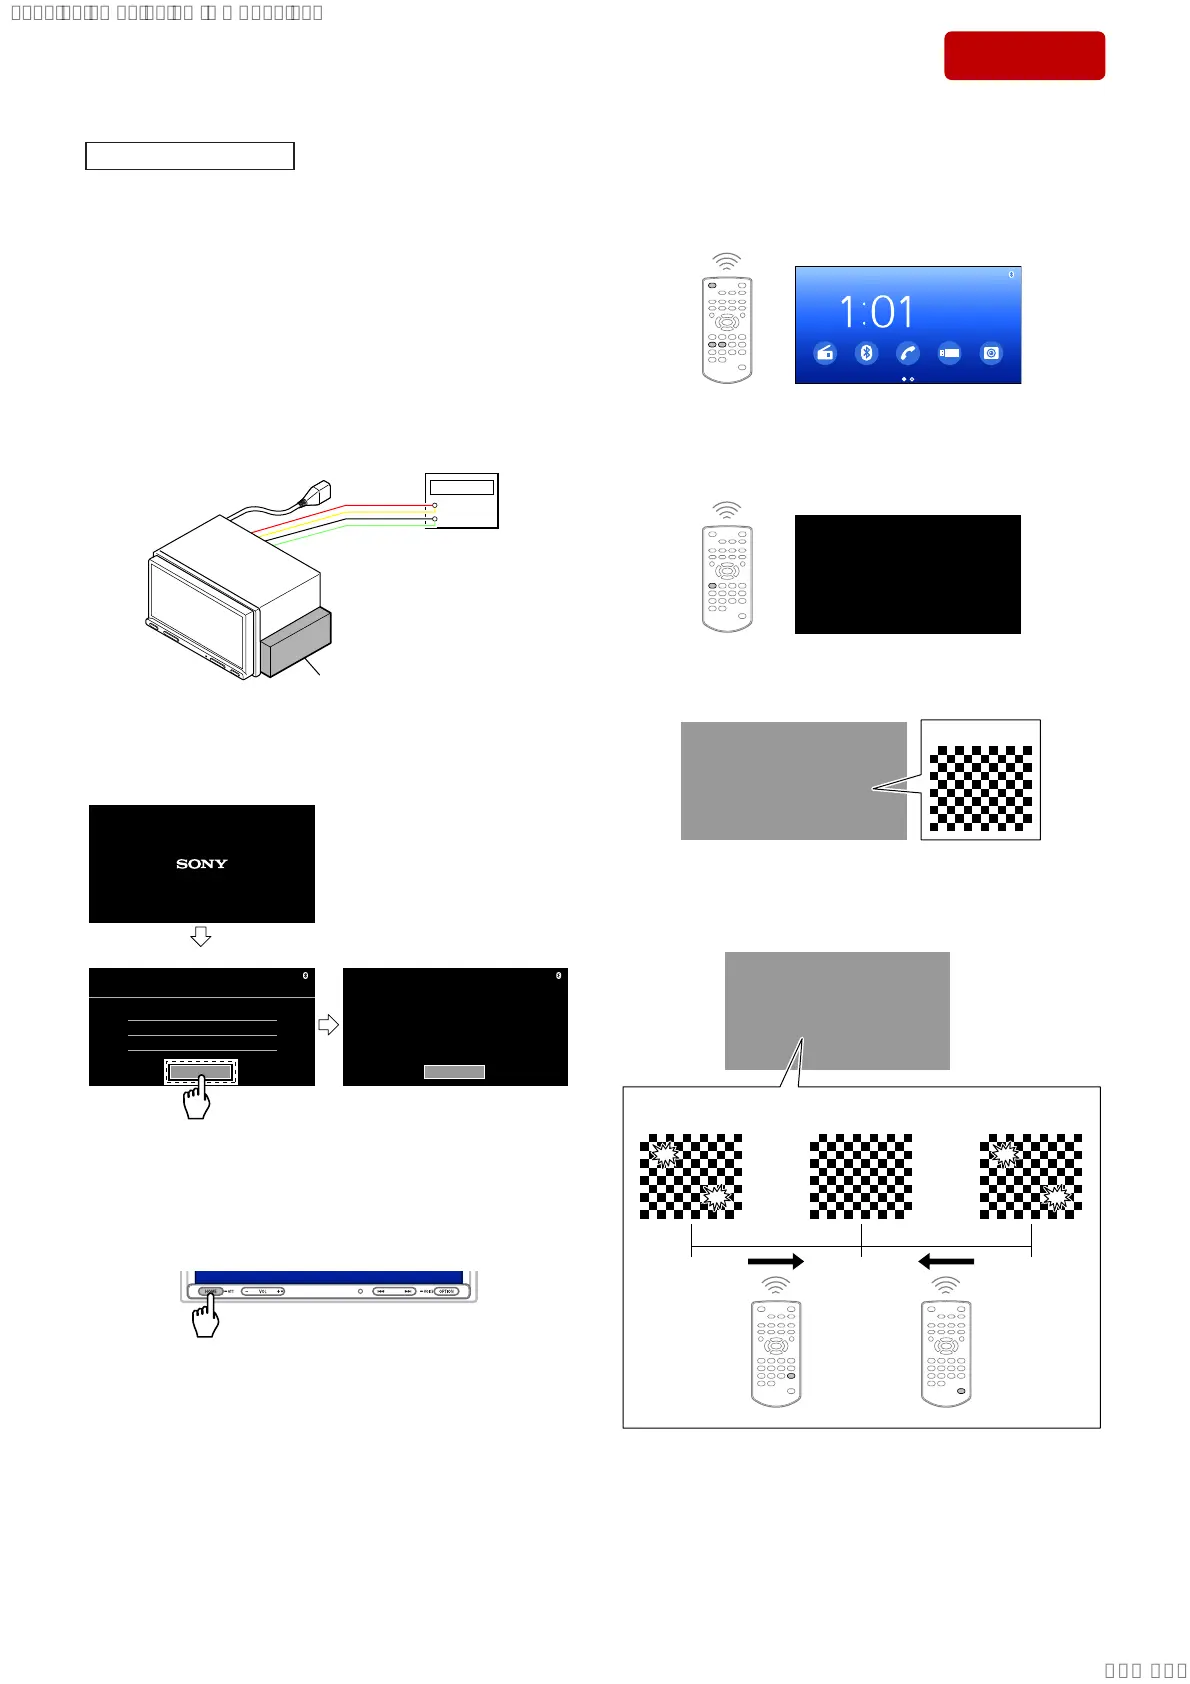
1. Connect the power cord to the regulated DC power supply, and
turn the power on of this unit.
+
–
Regulated DC
power supply
stand, etc.
2. Touch the [OK] on the “Initial Setting” screen, the screen chang-
es to the “For your safety” screen and then the home screen is
displayed.
Do not watch and operate the unit while driving.
Follow your local traffic laws and regulations.
For your safety:
1:00 AM
Close
Language
Demo
Set Date
/
Time
English
ON
01/01/2018
Initial Setting
1:00 AM
OK
For your safety screen
Touch the [OK]
Initial Setting screen
(Displayed screen in the above fi gure are example)
3. Turn the power on this unit, and perform the aging more than
fi ve minutes.
4. Press the [HOME] button on the main unit.
– Lower side of front panel –
Press the [HOME] button
5. Press the [OFF] button on the remote commander to the state
of source off, pressing the buttons on the remote commander in
order of the [4] → [5] → [4] (press only the [4] button for two
seconds).
Tuner
AM
Source off (HOME screen)
Rear Camera
Phone USBBT Audio
(Displayed screen in the above fi gure are example)
6. The “LCD Test mode Menu” is displayed, then press the [1] but-
ton on the remote commander.
LCD Test mode Menu screen
LCD Test mode Menu
[1] Flicker
[2] Brightness / Color Adjust
[3] White Balance
TestMode_Visual
7. The checker pattern is displayed.
Checker pattern
Enlarged view
8. Press the [VOL +] or [VOL −] button on the remote commander
to adjust so that the fl icker becomes minimum in the sight.
Checker pattern
The screen
flickers
Flicker
level
HighHigh
Low
Press [VOL +]
button
3UHVV>92/í@
button
The screen
flickers
The screen does
not flickers
– Continued on next page –
SYSSET
2020/02/0723:51:10(GMT+09:00)
 Loading...