FLIGHT MANUAL TSA-M, VARIANT S6
Doc.-No.:P400-006.000 E Page: 4-5 Revision: 1
Date of Issue: 07. October 2008 Agency approved Date of Rev.: 28.01.2011
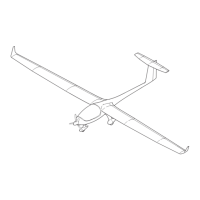
3. Place it on the fuselage. Do NOT jam fuel-lines or connecting-cables.
Incline the wing a little bit with the rear down.
First place the rear joints then the forward joints onto the frame.
4. Start with the rear wing bolts. Insert the 2 bolts fully into the connectors
between the fuselage and inner-wing. If needed extra force can be applied
to push the bolts forward using appropriate tools. Secure the 2 bolts with
Fokker-needles.
5. Insert the 2 forward wing bolts fully into the connectors in forward direction
by using the on-board tool-set. Note - the cotter-pins must pass through the
hole in the bolts.
6. Secure the 2 forward wing bolts with the cotter-pins.
7. Connect the two fuel-lines (out and backflow) of the wing-tank with the fuel
lines of the fuselage. Use the quick-disconnect-fittings of the fuel-lines by
reaching from the cockpit through the opening in the rear bulkhead. To
guarantee good sealing of the fittings, they must be clean.
Caution: Pay attention to correct (audible!) engagement of the quick-
disconnect-fittings. Pull to test for secure fit!
8. Connect the plug for the electrical-connections and the fuel-sensor.
9. Install the cover at the cockpit’s rear wall.
10. Connect the 2 plugs for the pressure-tubes at the left side of the center-
frame with quick-disconnect-fittings.
11. Connect the 3 push-rods with red quick-disconnect-fittings. Start from front
with air-brakes, then flaps and the ailerons. Secure all quick-disconnect-
fittings with cotter-pins.
Outer wing (OW)
12. Preparation of left outer-wing:
- cockpit: Set the flap-lever to maximum positive deflection LDG2!
- cockpit: Set the air-brake-lever to the forward position
- prepare all quick-connect-fittings from the push-rods of the inner-wing
- grease the main-bolts
- use the T-handle-tool to insert the main-bolt into the bushing of the inner-
wing, do not insert it fully
Insert the spar of the left outer-wing into the spar-opening of the inner-wing.
Do not cant the outer-wing with the inner-wing. Leave a gap of approx. 8 in /
20 cm to allow for the connection of the flight-controls.
13. Insert the spar of the left outer-wing into the spar-opening of the inner-wing.
Do not cant the outer-wing relative the inner-wing. Leave a gap of approx.
8 in / 20 cm to allow for the connection of the flight-controls.
 Loading...