FLIGHT MANUAL TSA-M, VARIANT S6
Doc.-No.:P400-006.000 E Page: 4-6 Revision: ---
Date of Issue: 07. October 2008 Agency approved Date of Rev.: --.--.----
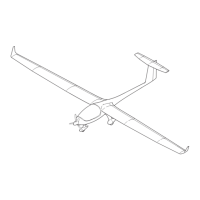
14. Extend the air-brake at the outer-wings by moving the deflection-lever by
hand. Secure the air-brake with the other hand.
15. Push the outer-wing into the inner-wing leaving a gap of approx. 4 in / 10
cm.
16. Starting at the front, connect the 3 control-rods to the deflection-levers of
the air-brake, outer aileron, and inner aileron. Secure the 3 quick-
connectors with cotter-pins. The quick-connectors must be inserted into the
push-rods from above. The cotter-pins must be inserted bottom-up.
17. Connect the Avionic-plugs forward of the main-spar. Plugs or cable must
not protrude from the wing’s contour.
18. Insert the outer-wing fully into the inner-wing. Pay attention to the
engagement outer-wing-shear-bolts into the sockets of the inner-wing.
Maximum allowed gap between inner- and outer-wing is 2 mm / 0.08 in.
19. It could be helpful to lift the outer-wing at its tip to ease the insertion of the
main-bolt. Use the T-handle-tool to insert the main-bolt fully, rotate the bolt
for easy movement. Unscrew and remove the tool.
The main-bolt is inserted correctly, when the outer contour of the axial
safety-mechanism fits smoothly to the contour of the wing-surface.
20. Mount the right outer-wing in the same manner as described above.
Winglet
21. Insert the spar of the winglet into the main-spar of the outer-wing. Use the
T-handle to insert the winglet-bolt.
22. Connect the Avionic-plugs.
23. Insert the winglet fully.
24. Use the T-handle-tool to insert the main-bolt fully. Remove the tool.
The main-bolt is inserted correctly, when it does not protrude from the outer
contour of the wing.
4.3.3 Horizontal-Tail-Unit
1. The elevator is connected automatically to the elevator-control-rod.
2. Pull the horizontal-tail-unit’s forward tension-screw fully out. Place the
horizontal-tail-unit onto the vertical-stabilizer. Ensure that the reel of the
elevator-deflection-lever fits into the bracket of the vertical stabilizer. Then
move the horizontal tail rearwards, so that the mounting-bolts fit completely
into the sockets. All 3 mounting-bolts must engage properly into the
sockets.
3. Tighten the tension-screw with a box-wrench (wrench-size: 8 mm).
 Loading...