G
gvaldezJul 29, 2025
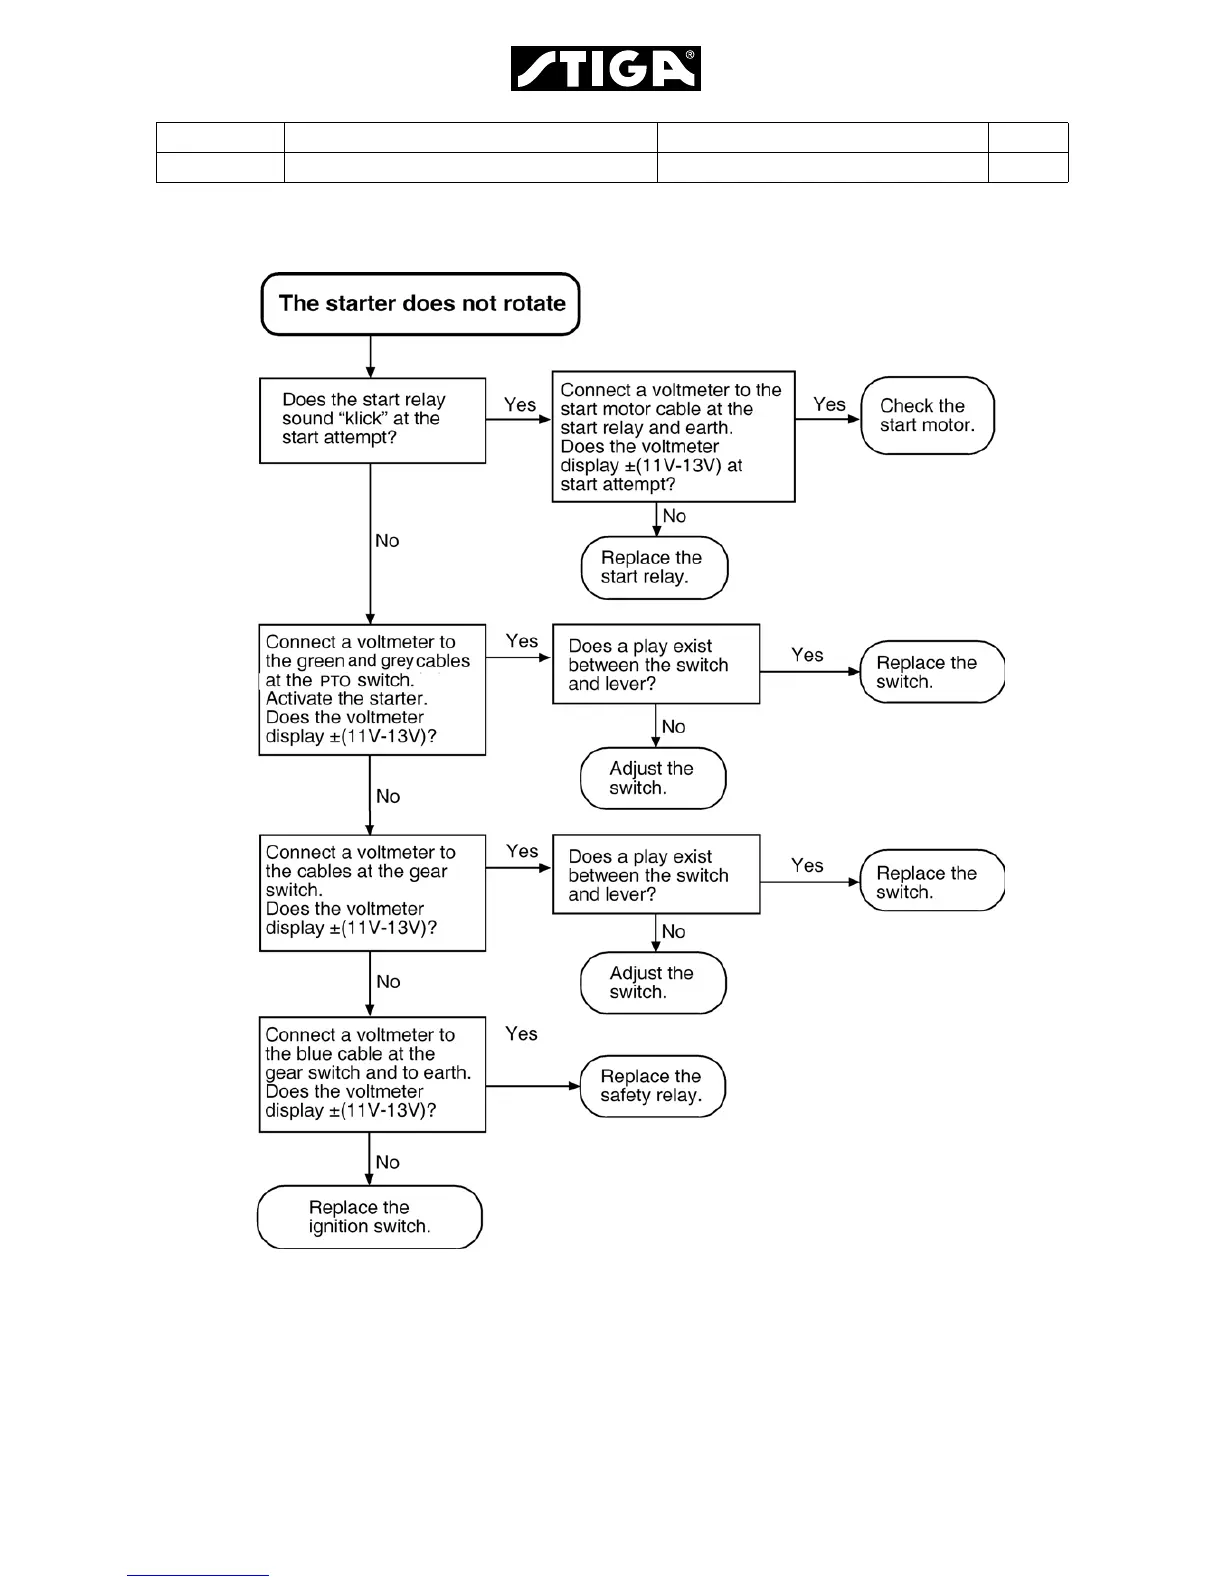
How to fix a Stiga Primo 2008 when the starter does not rotate?
- AAllen SolisJul 29, 2025
If the starter of your Stiga Lawn Mower does not rotate, check all fuses and replace them if necessary. Ensure the battery is fully charged. Also, confirm that all requirements for starting are met. For example, the gear should be in neutral, and the power take off should be disengaged.