21BT 130
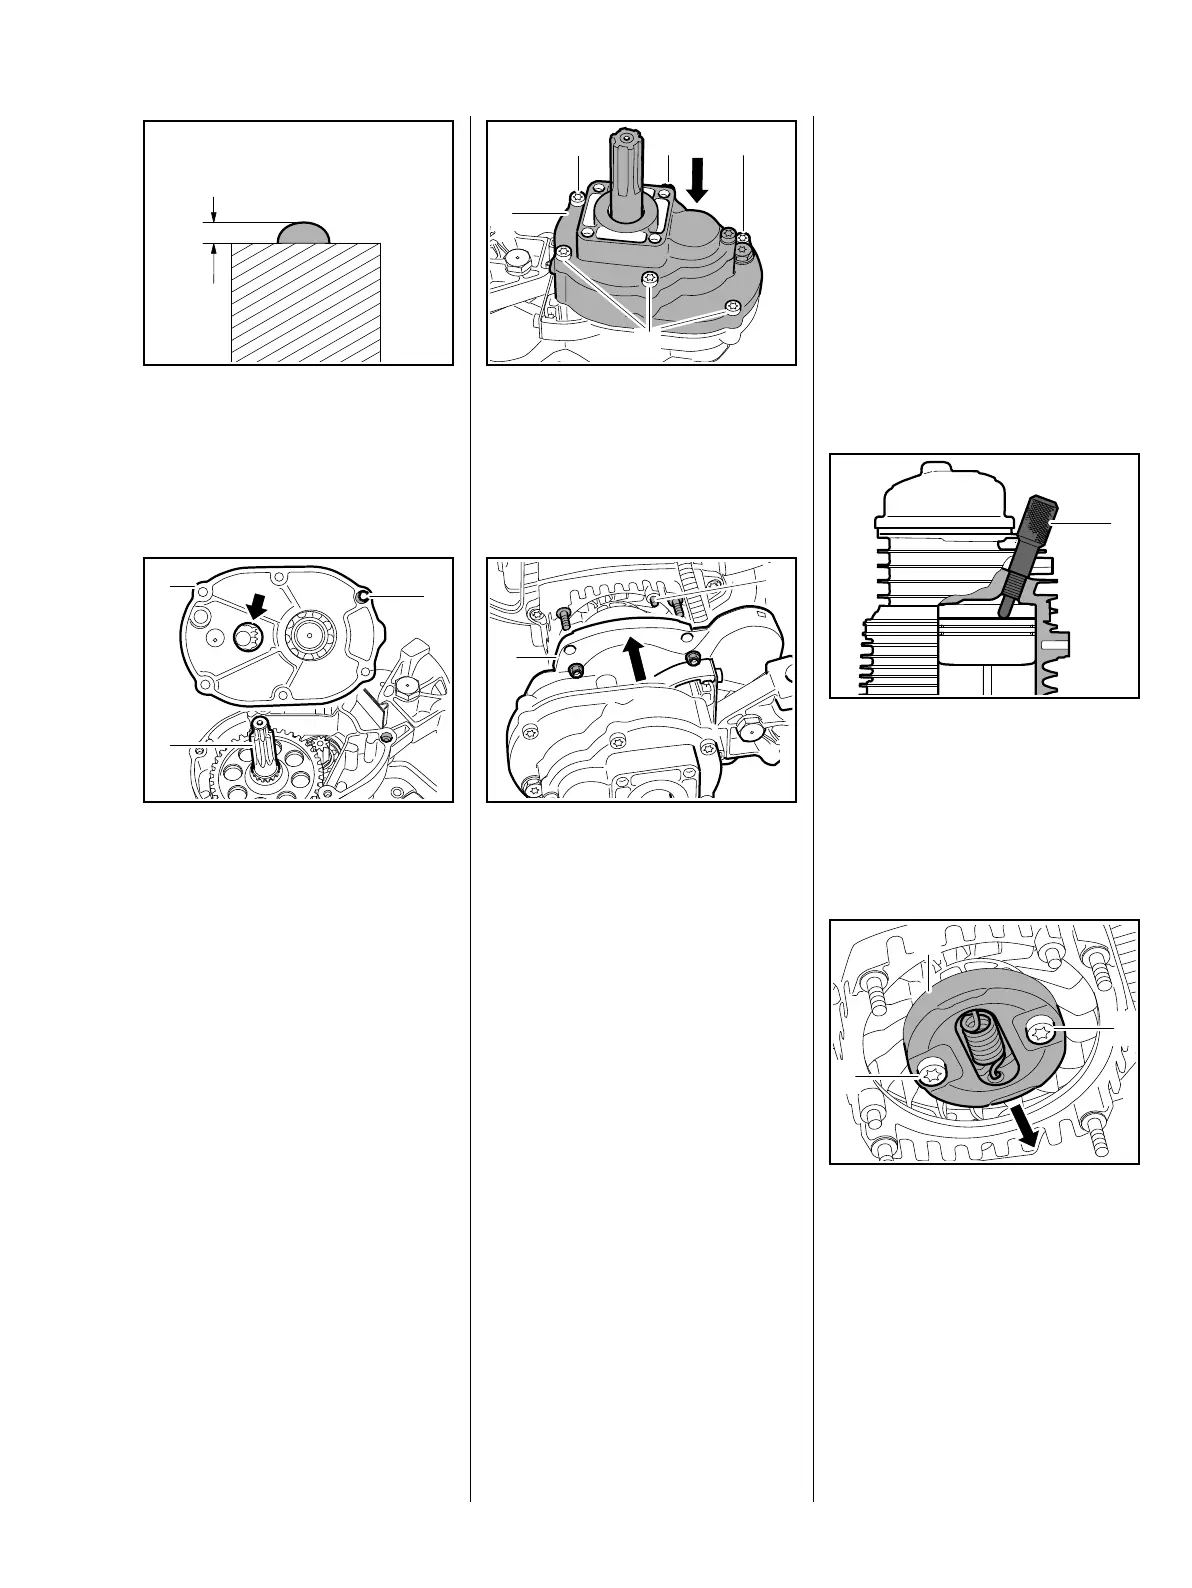
: The bead of sealant should be
about 1 mm high (a).
Make sure the sealant does not
project into the clutch housing.
: Position the gearbox housing (1)
so that the guide sleeve (2) is in
line with the clutch housing bore
and the pinion shaft (3) engages
the spur gear through the hole
(arrow).
a
7022RA094 TG
1
2
9912RA018 TG
3
: Push the gearbox housing (1)
into position; insert the
screws (2) and tighten them
down firmly in a crosswise
pattern.
Do not pinch the throttle cable.
: Push the clutch housing (1) with
gearbox onto the collar studs so
that the pin (2) engages the
clutch housing bore.
– Fit new nuts and tighten them
down firmly.
– Reassemble all other parts in the
reverse sequence.
9912RA019 TG
2
2 2
2
1
1
2
9912RA020 TG
4.2 Clutch
– Remove the auger.
– Remove the engine, b 7.1
– Remove the clutch housing with
gearbox, b 4.1
– Pull off the boot and unscrew the
spark plug.
: Fit the locking screw (1)
4282 890 2700.
– Rotate crankshaft
counterclockwise until the piston
butts against the locking screw.
: Take out the screws (1) and
remove the clutch (2) complete
with cover washers.
9912RA022 TG
1
1
9912RA023 TG
1
2
 Loading...