18
1
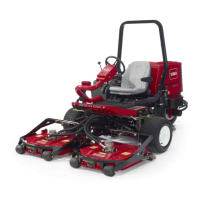
Figure 10
1. Lynch pin
7. Slide seat completely forward and backward to ensure
proper operation and that seat switch wires and
connectors are not pinched or do no contact any moving
parts.
Seat Kit, Model No. 30625, Deluxe Seat
with Model No. 30628 Seat Adapter Kit
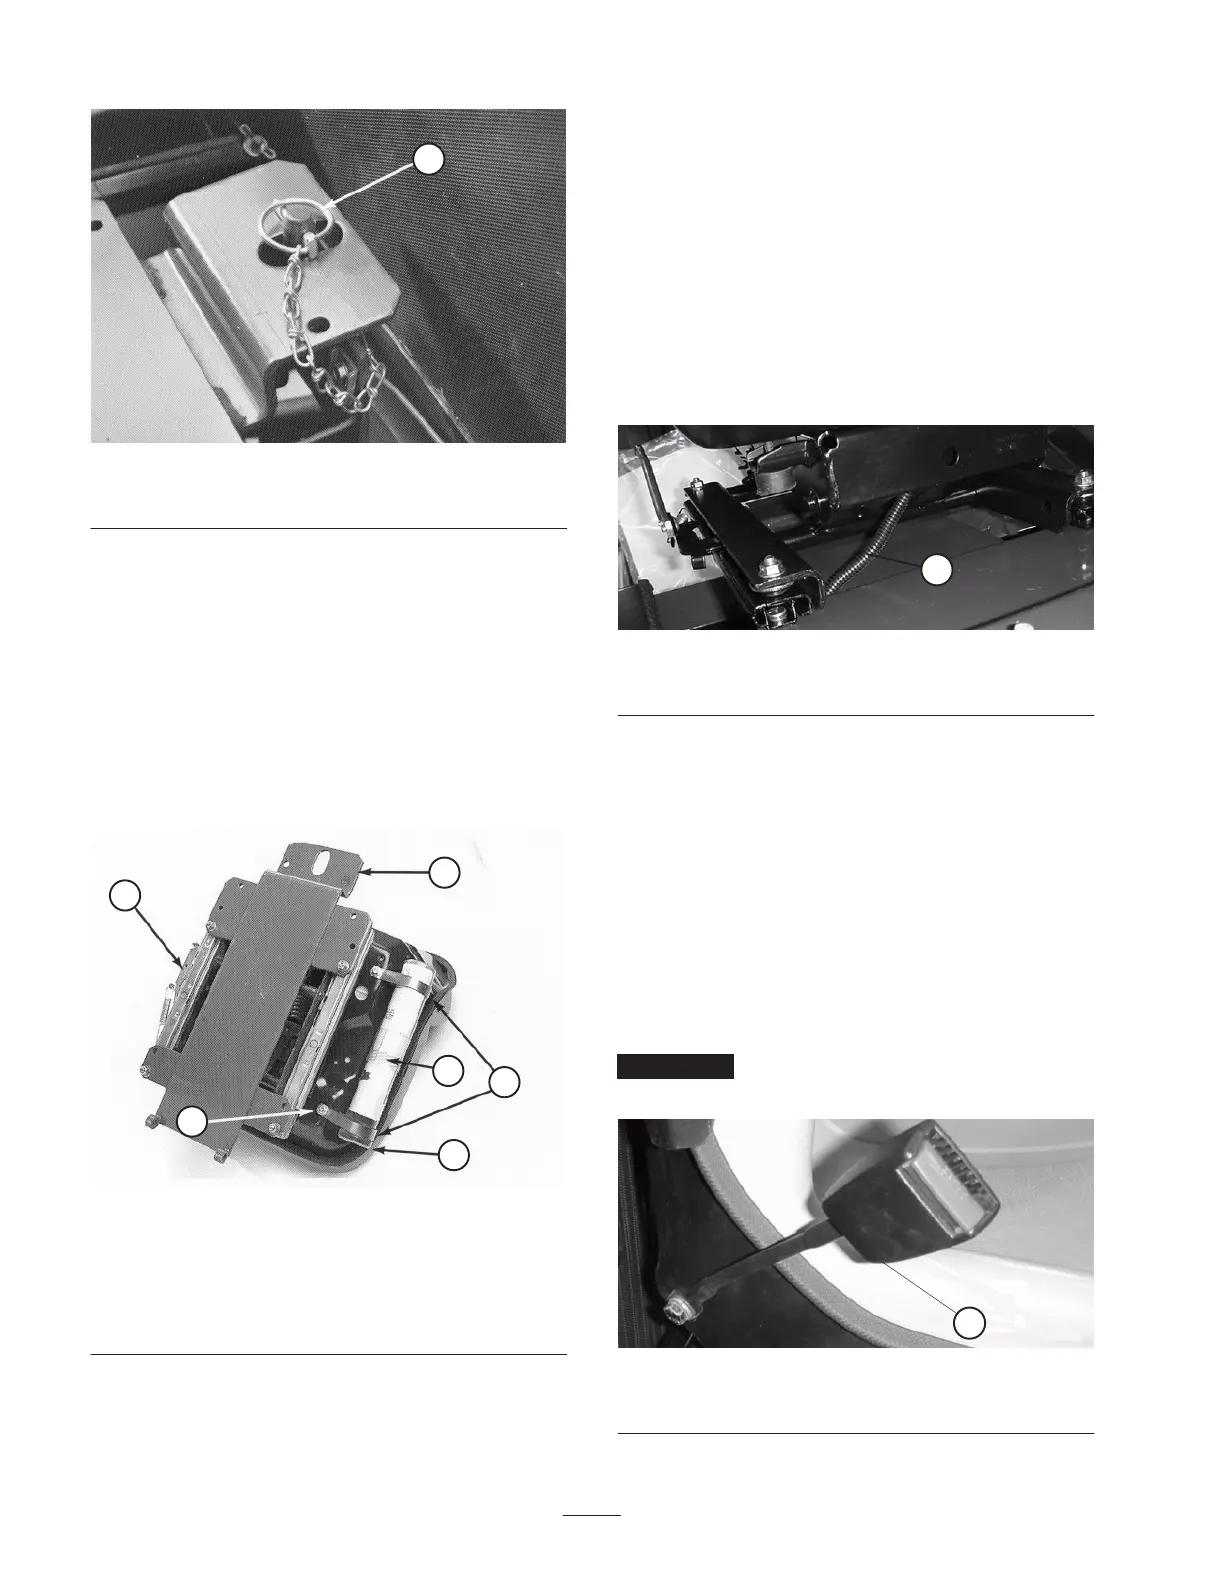
1. Mount seat suspension assembly to 4 capscrews on seat
bottom and secure with 4 lock washers, flat washers,
and nuts (Fig. 11).
1
6
4
2
5
3
Figure 11
1. Seat suspension
assembly
2. R-clamps
3. Lock washer, flat washer,
and nut
4. Manual tube
5. Cap
6. Seat support
2. Loosely secure 2 R-clamps to right side of seat bottom
with 2 capscrews and flat washers supplied in kit
(Fig. 11). Install manual tube into R-clamps and tighten
capscrews (Fig. 11).
3. Mount seat support over four threaded studs at the
bottom of seat suspension assembly and secure in place
with flangenuts (Fig. 11).
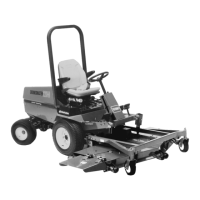
4. Mount seat pivot bracket to frame with (2) flange
screws supplied in kit (Fig. 7)
5. Mount seat and seat support to seat pivot bracket with
pivot shaft and roll pin (Fig. 8).
6. Hold seat up with seat support rod (Fig. 9).
7. Route seat switch harness through holes in seat support
and seat suspension (Fig. 12). Plug wire harness
connector into seat switch connector on bottom of seat.
1
Figure 12
1. Seat switch wire harness
8. Disengage seat support rod and pivot downward. Pivot
seat down and push lynch pin through seat latch stud.
Flip wire end of pin over latch stud (Fig. 10).
9. Slide seat completely forward and backward to ensure
proper operation and that seat switch wires and
connectors are not pinched or do no contact any moving
parts.
Installing the Seat Belt
Install seat belt to holes in back of seat with 2 bolts
(7/16 x 1 in.) and lock washers (Fig. 13). Tighten securely.
Important Mount the latch side of the belt to the right
side of the seat.
1
Figure 13
1. Seat belt
 Loading...