36
force dirt through the filter into the intake tract. This
cleaning process prevents debris from migrating into
the intake when the primary filter is removed.
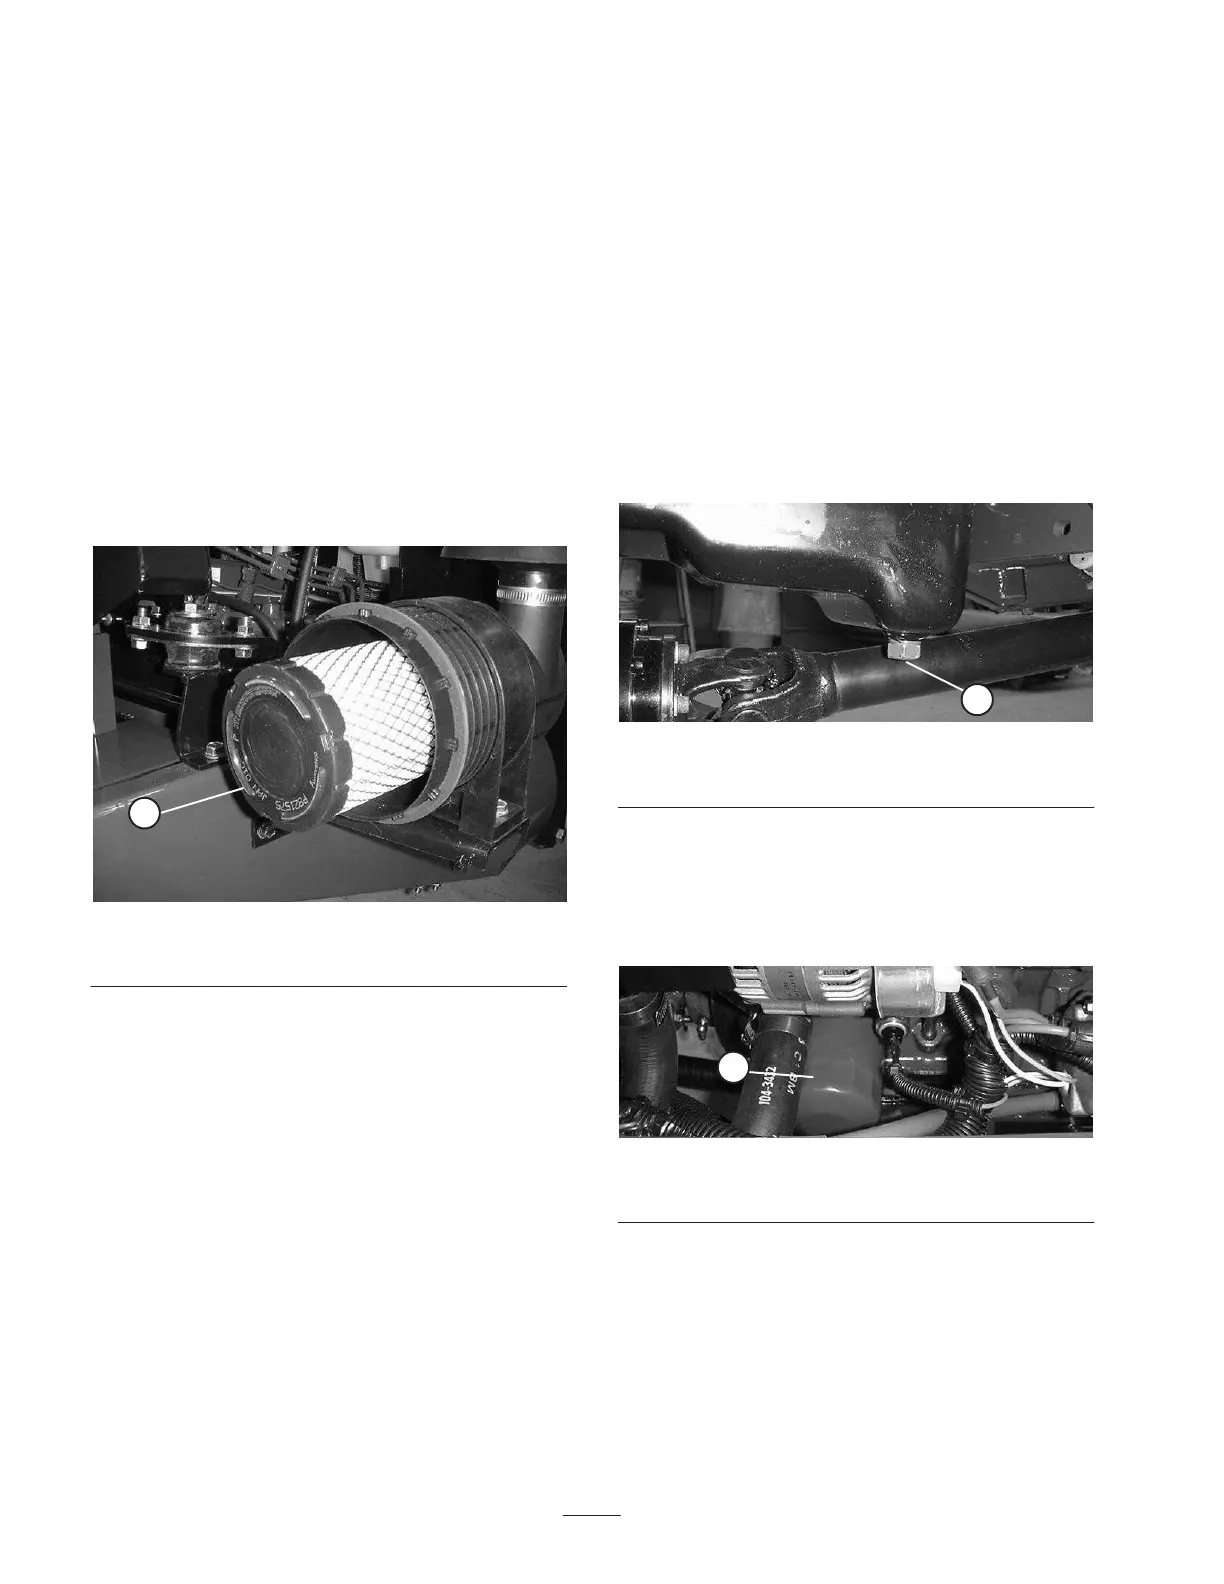
3. Remove and replace the primary filter (Fig. 44).
Cleaning of the used element is not recommended due
to the possibility of damage to the filter media. Inspect
the new filter for shipping damage, checking the sealing
end of the filter and the body. Do not use a damaged
element. Insert the new filter by applying pressure to
the outer rim of the element to seat it in the canister. Do
not apply pressure to the flexible center of the filter.
4. Clean the dirt ejection port located in the removable
cover (Fig. 43). Remove the rubber outlet valve from
the cover, clean the cavity and replace the outlet valve.
5. Install the cover orienting the rubber outlet valve in a
downward position – between approximately 5:00 to
7:00 when viewed from the end.
1
Figure 44
1. Primary filter
6. Reset indicator (Fig. 42) if showing red.
Cleaning the Radiator and
Screen
The screen and front of the radiator must be kept clean to
prevent the engine from overheating. Normally, check the
screen and front of radiator daily and, if necessary, clean
any debris off these parts. However, it will be necessary to
check and to clean the screen each quarter hour and radiator
checked every hour in extremely dusty and dirty
conditions.
Note: This situation may be particularly prevalent if the
rear discharge cutting unit is being used. The front of the
radiator can be cleaned thoroughly by blowing with
compressed air from the fan side of the radiator. Make sure
to clean out any debris that settles to the bottom of the
screen. The screen in front of radiator can be removed—by
loosening wing nuts at top of screen—to make cleaning
easier.
Changing Engine Oil And Filter
Check oil level after each day’s operation or each time
machine is used. Change oil and filter initially after first 50
hours of operation; change oil and filter after every 100
hours of operation thereafter. If possible, run engine just
before changing oil because warm oil flows better and
carries more contaminants than cold oil.
1. Position machine on a level surface.
2. Open the hood. Set drain pan under the oil pan and in
line with drain plug (Fig. 45).
1
Figure 45
1. Drain plug
3. Clean area around drain plug.
4. Remove oil drain plug and allow oil to flow into drain
pan.
5. Remove and replace oil filter (Fig. 46).
1
Figure 46
1. Oil filter
6. After oil is drained, reinstall drain plug and wipe up any
oil that is spilled.
7. Fill crankcase with oil; refer to Check Crankcase Oil.
 Loading...