24
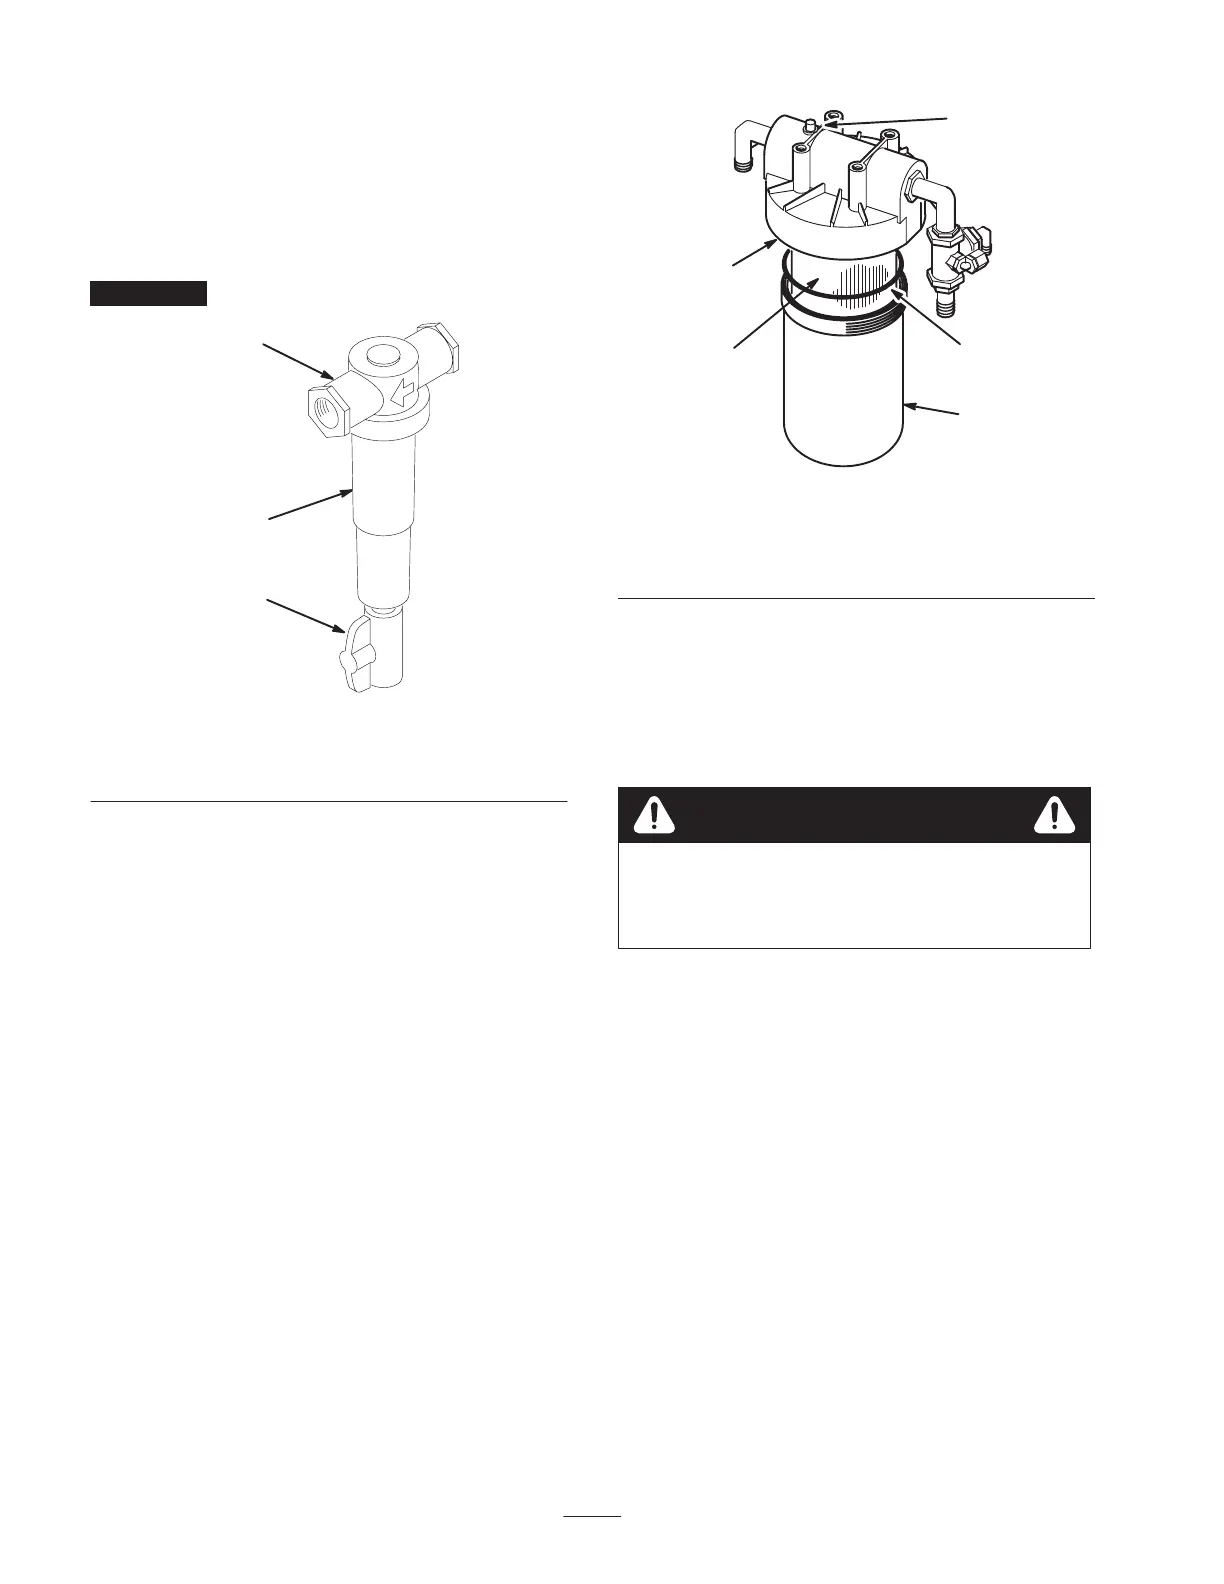
Servicing the Pre-Filter
Sediment can be removed by opening the ball valve, with
the water source attached, to flush (Fig. 18). The reusable
filter screen may be removed for cleaning by untwisting the
clear cover (Fig. 18) from the filter by hand. Replace the
clear cover and hand tighten only.
Important Use of tools will damage the filter.
1
2
3
Figure 18
1. Body
2. Clear cover
3. Ball valve for flushing
Replacing the Main Water Filter
The machine is a precision piece of equipment and the
quality or cleanliness of your water supply is very
important in determining the life of the machine. If your
water supply contains silt, sand, or other debris, you may be
required to install additional filtration or separation
equipment between your supply source and the machine.
Depending on the quality of water, the frequency of the
filter change will vary greatly. When the pump inlet
pressure decreases or the water system shuts down, it
usually means the water filter is restricted and must be
replaced. Never operate machine without a water filter
as severe damage may occur.
1. Position the machine on a level surface and make sure
that the engine is shut off. Shut off the water supply.
2. Locate the main water filter assembly mounted below
the fuel tank. Press the bleed button (Fig. 19) to release
air pressure from the filter body.
1
2
3
4
5
Figure 19
1. Filter body
2. Filter cartridge
3. Filter head
4. Bleed button
5. O-ring
3. Unscrew the filter body of the assembly (Fig. 19)
counterclockwise (as viewed from the bottom). Remove
the filter cartridge and discard it.
Note: To ease the removal of the filter body from the filter
head, a filter wrench is available. Contact your Authorized
Toro Distributor.
The water filter body is very heavy when filled
with water and the filter. Use caution when
unscrewing the filter body from the filter head.
Caution
4. Thoroughly rinse out the filter body to avoid
contaminating the water system. Make sure that the
o-ring (Fig. 19) is in the groove. If it has come out,
wipe it dry, lubricate it with a light coating of petroleum
jelly, and replace it in the groove.
5. Thoroughly clean the filter head mounting surface to
avoid contaminating the water system when the filter is
installed.
6. Insert the new filter cartridge into the filter body.
7. Thread the filter body with the filter onto the filter head.
Hand tighten them.
8. Turn on the water supply and press the bleed button on
the top of the water filter head (Fig. 19). Hold the bleed
button down until all air is purged from the filter and
water comes out of the opening.
 Loading...