REASSEMBLY
Caution:
Keep the work bench and work area clean to prevent dust and foreign matter from entering the
pump during reassembly.
Thoroughly wash parts in clean light oil before reassembly.
Coat light oil on all sliding surfaces,
0
rings and oil seals before assembly.
0
rings, nipple washers, gaskets and joint rubbers must be replaced with new ones.
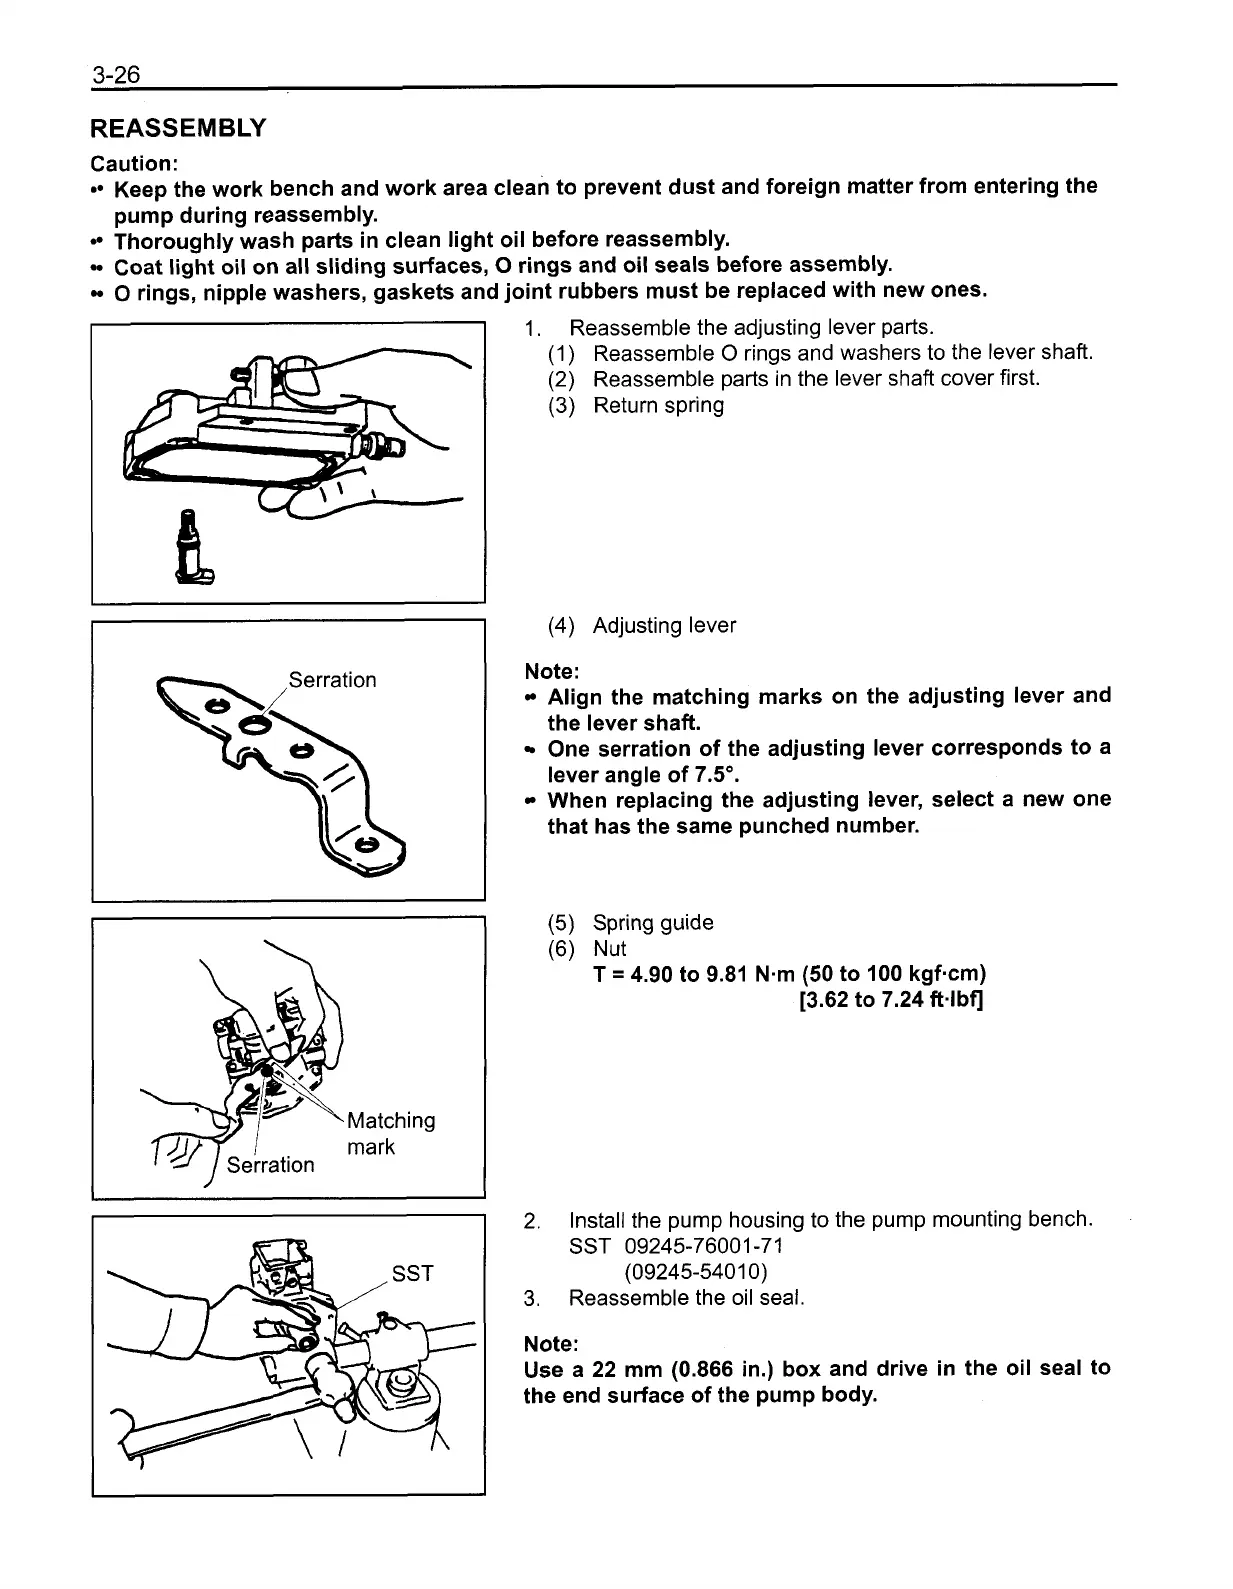
Matching
mark
1. Reassemble the adjusting lever parts.
(1) Reassemble
0
rings and washers to the lever shaft.
(2) Reassemble parts in the lever shaft cover first.
(3) Return spring
(4) Adjusting lever
Note:
Align the matching marks on the adjusting lever and
the lever shaft.
One serration of the adjusting lever corresponds to a
lever angle of
7.5".
When replacing the adjusting lever, select a new one
that has the same punched number.
(5)
Spring guide
(6) Nut
T
=
4.90
to
9.81
N-m
(50
to
100
kgf-cm)
[3.62
to
7.24
ft-lbfl
2.
Install the pump housing to the pump mounting bench.
SST
09245-76001 -71
(09245-5401 0)
3. Reassemble the oil seal.
Note:
Use a
22
mm
(0.866
in.) box and drive in the oil seal to
the end surface of the pump body.
 Loading...