73
Chapter 14
Customize Your Network Settings
14. 3. Specify DHCP Server Settings
By default, the DHCP (Dynamic Host Configuration Protocol) Server is enabled and
the router acts as a DHCP server; it dynamically assigns TCP/IP parameters to client
devices from the IP Address Pool. You can change the settings of the DHCP Server if
necessary, and you can reserve LAN IP addresses for specified client devices.
1. Visit
http://tplinkwifi.net, and log in with your TP-Link ID or the password you set for
the router.
2. Go to
Advanced > Network > DHCP Server.
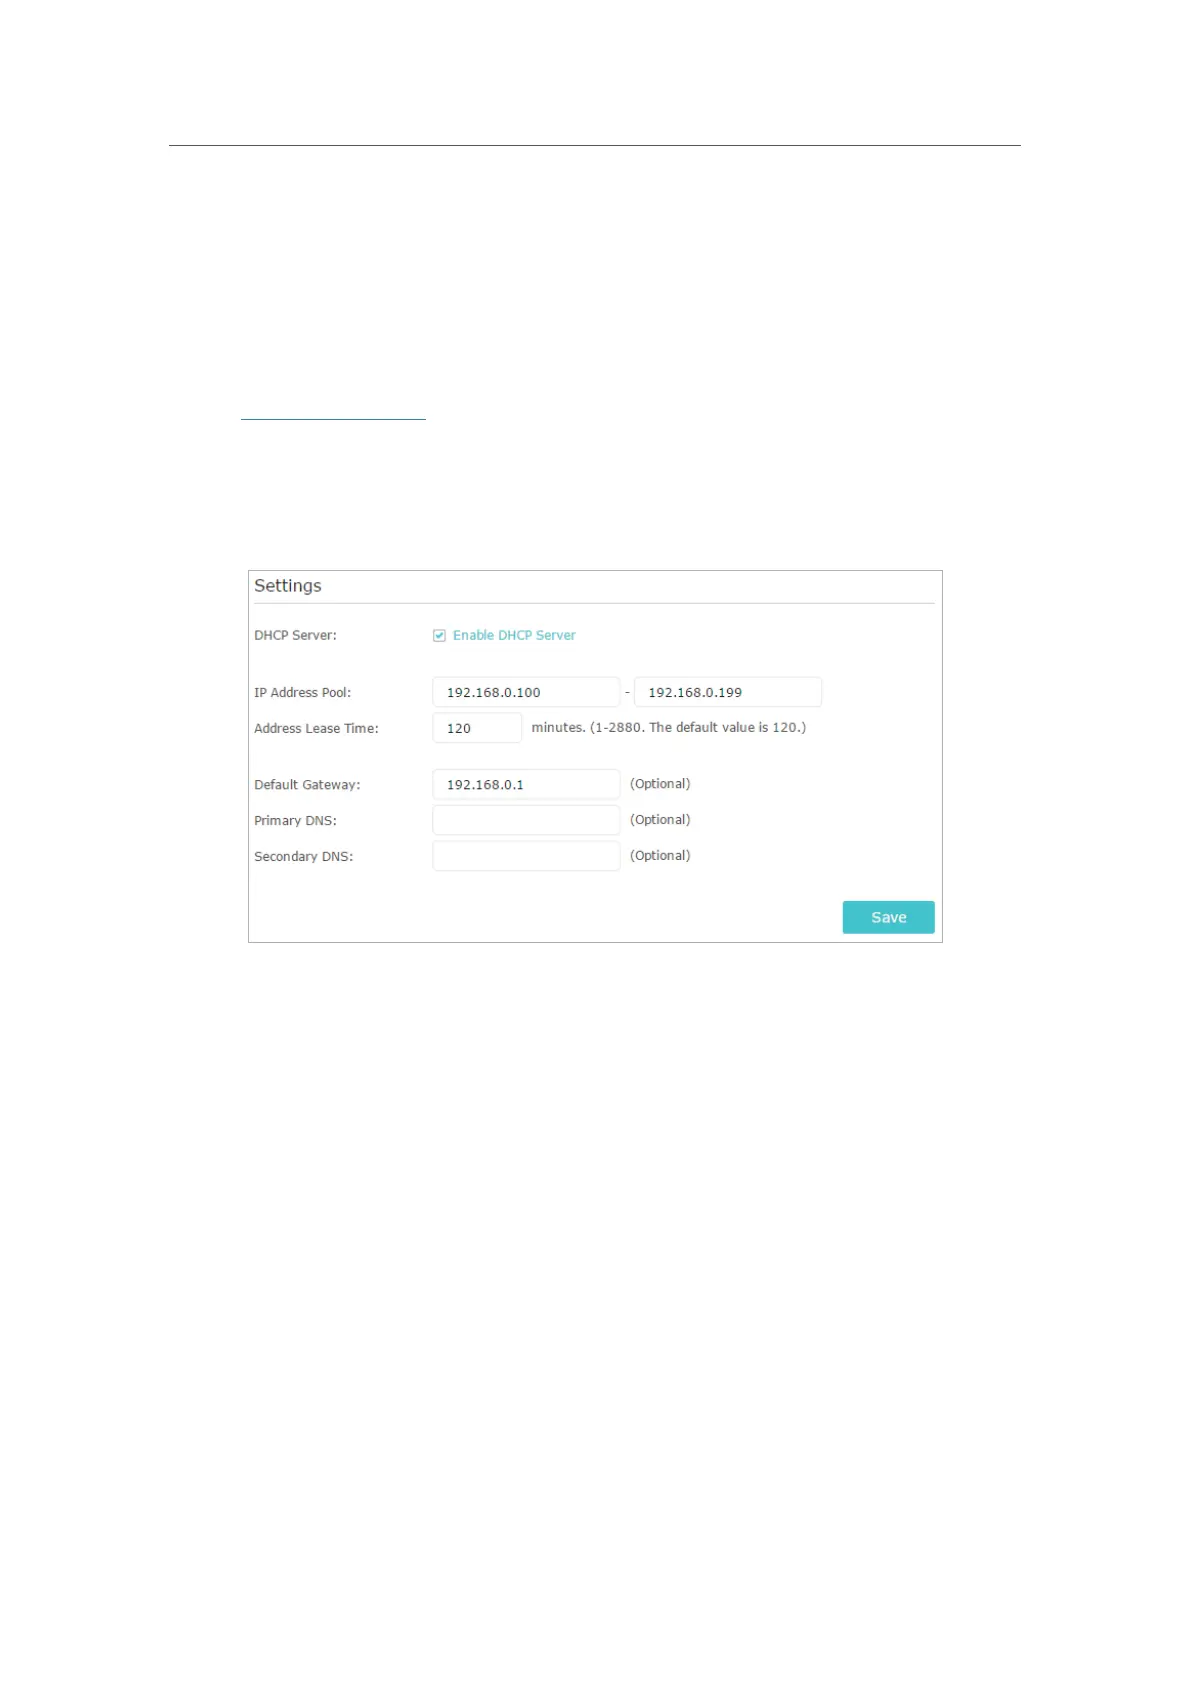
¾ To specify the IP address that the router assigns:
1. Tick the Enable DHCP Server checkbox.
2. Enter the starting and ending IP addresses in the
IP Address Pool.
3. Enter other parameters if the ISP offers. The
Default Gateway is automatically filled in
and is the same as the LAN IP address of the router.
4. Click
Save.
¾ To reserve an IP address for a specified client device:
1. Click
Add in the Address Reservation section.
 Loading...