All rights reserved 93 Servicemanual_UR10_en_3.1.3
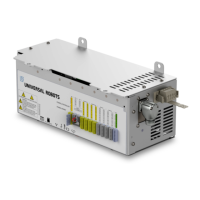
Normal startup sequence for a CB3.x UR10:
1. The 12V-PSU LED is on when the power plug is connected to a working power supply.
2. When the power button on the teach pendant is pressed, all LED indicators are turned on except for
the 48V, 24V and R LEDs. The A and B LEDs also exhibit a special behavior by intermittently turning off
and on ("blinking") once triggered.
3. The final phase of the startup sequence occurs (immediately) after the Polyscope software is done
loading. At this stage, the 48V and 24V LED indicators become active (are switched on).
If the 48V LED indicator is off all the time in the startup sequence you should measure the voltage:
See the E-Plan diagram: 5.4.1 Schematic overview
3.1. Measure the 48V on the Safety Control Board (SCB) where the 48V comes from the Current
distributor. And check this 1 second pulse.
3.1.1. The voltage is measured on the Safety Control Board. That means the Safety Control Board is
defect.
3.1.2. No voltage is measured on the Safety Control Board. Then measure the 230 V on the input
side of the 48V power supply. If the voltage pulse of 1 second is present, the Power supply is
defect.
3.1.3. No voltage is measured on the input of the power supply. Then measure the 230 V on the
input side of the Current distributor. If the voltage is present, the current distributor is defect.

 Loading...


