0020308120_02 Air/flue pipe installation manual 27
5.8.5.5 Routing extensions for the variable terminal
set around eaves
When installing the variable terminal set around eaves, ad-
ditional M8 threaded rods are required for the pipe clamps.
The threaded rods are commercially available.
▶ If required, install additional 45° elbows.
▶ Install the bird-guard grille from the 87° elbow in the last
extension.
– If you are using the 87° elbow, insert the seal for the
extension.
5.9 Horizontal wall duct, 60/100 mm diameter
(article number 0010024718)
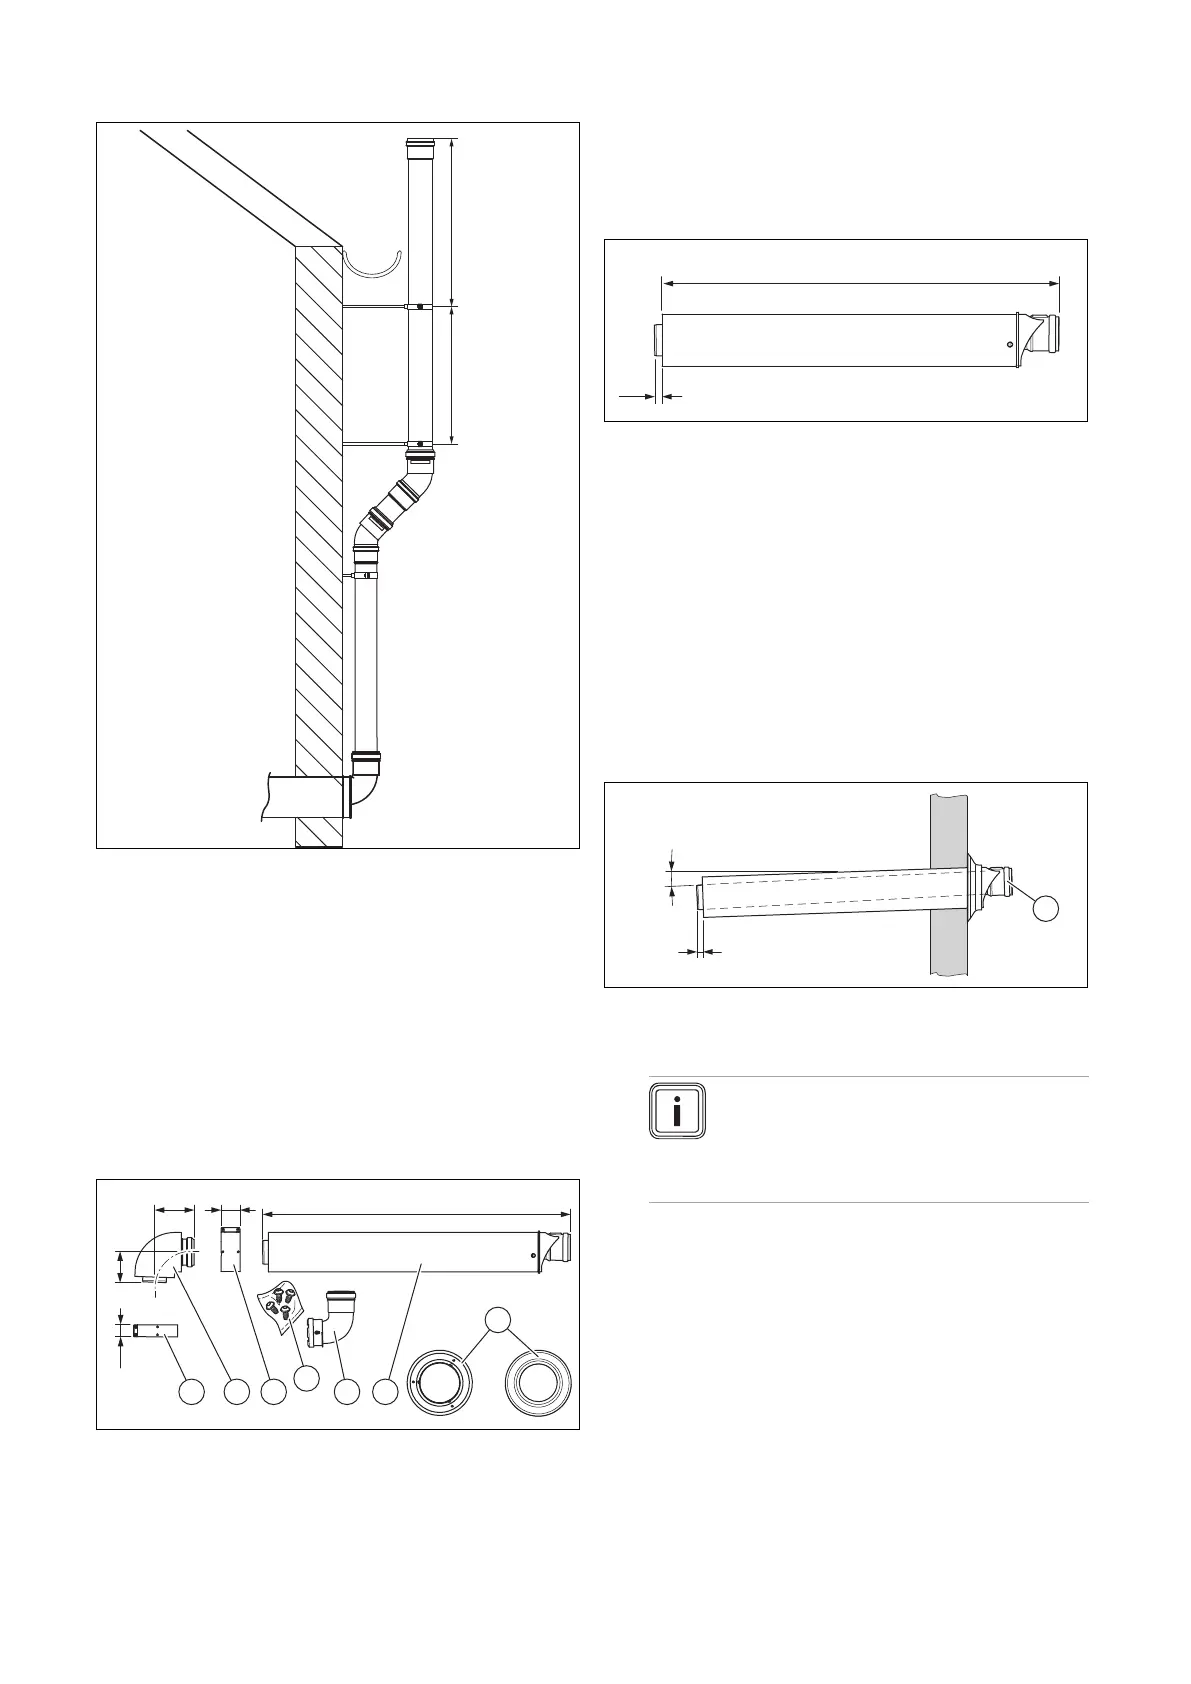
5.9.1 Scope of delivery 0010024718
1 Wall collar, 100 dia-
meter (2 pcs)
2 Horizontal wall/roof duct
3 87° adapter for connect-
ing the variable terminal
set (VTK)
4 Screws (4 pcs)
5 48 mm clamp
6 87° elbow
7 30 mm clamp
5.9.2 Shortening the air/flue pipe
1. Determine the clearance to the external wall.
(→ Page 14)
2. Shorten the air/flue pipe to the required length.
– If you install the wall collar, add 12 mm to the total
pipe length.
– Shorten the air pipe at the opposite end to the ter-
minal.
– Shorten the flue pipe at the opposite end to the
lock.
3. Deburr the sawn-off pipe end in order to prevent dam-
age the seal when installing the flue pipe.
4. Slide the flue pipe into the air pipe.
– Ensure that the flue pipe's recess snaps into place
in the air pipe's latching lug.
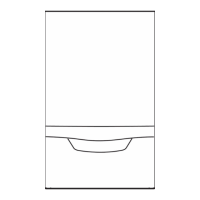
5.9.3 Installing the wall duct
1. Drill a hole.
– Diameter: 125 mm
Note
If the wall duct can be accessed from the
exterior of the building, you can drill the hole
with a diameter of 110 mm and install the
wall duct with the wall collar from outside.
2. Slide the air/flue pipe (1) with the flexible external collar
through the wall.
3. Pull the air/flue pipe back until the external collar lies
fully on the external wall.
4. Secure the air/flue pipe with mortar and leave the mor-
tar to harden.
5. Install the wall collar on the inside of the wall.
6. Connect the wall/roof duct to the product using ex-
tensions, elbows and, if required, a sliding sleeve.
(→ Page 46)
 Loading...