Chapter 9
Chapter 9:
Table Maintenance
The Vacuum Chip Removal System
The optional vacuum chip removal system is designed to simplify the engraving process and
minimize wear and tear on the engraver. The vacuum chip removal system uses a vacuum nose
cone to remove chips created during the engraving process before they have the chance to create
problems. The quiet pump, coupled with the microne-layered lters assures that your unwanted
chips are whisked away effortlessly. The vacuum pump canister uses replaceable lters that can
also be reused, to assure maximum efciency and cost-effectiveness.
Vision strives for the highest quality in their manufacturing process to provide you with
the most cost effective, reliable engraving machine in use today. Please remember
that proper maintenance and care is necessary to achieve maximum product life
expectancy.
The engraving environment generates small plastic and metal chips as well as other particles
during operation. As with any machinery, your engraving system should be kept as clean as
possible to minimize wear and tear, and to improve nal quality of the engraved product.
REMOVING CHIPS
A portable vacuum is suggested for chip removal, but applying direct suction to the spindle area
is not recommended. Note that this cleaning can be minimized and greatly simplied through the
use of the optional vacuum chip removal system. The vacuum chip removal system removes chips
and dust created by engraving. This system can also extend the life of other components in the
system, as prompt removal of chips reduces contamination and overheating in the spindle area.
The vacuum chip removal system also keeps the nose cone from skipping over letters due to chips
on the engraving surface.
REPAIRS, REPLACEMENTS, AND ADJUSTMENTS
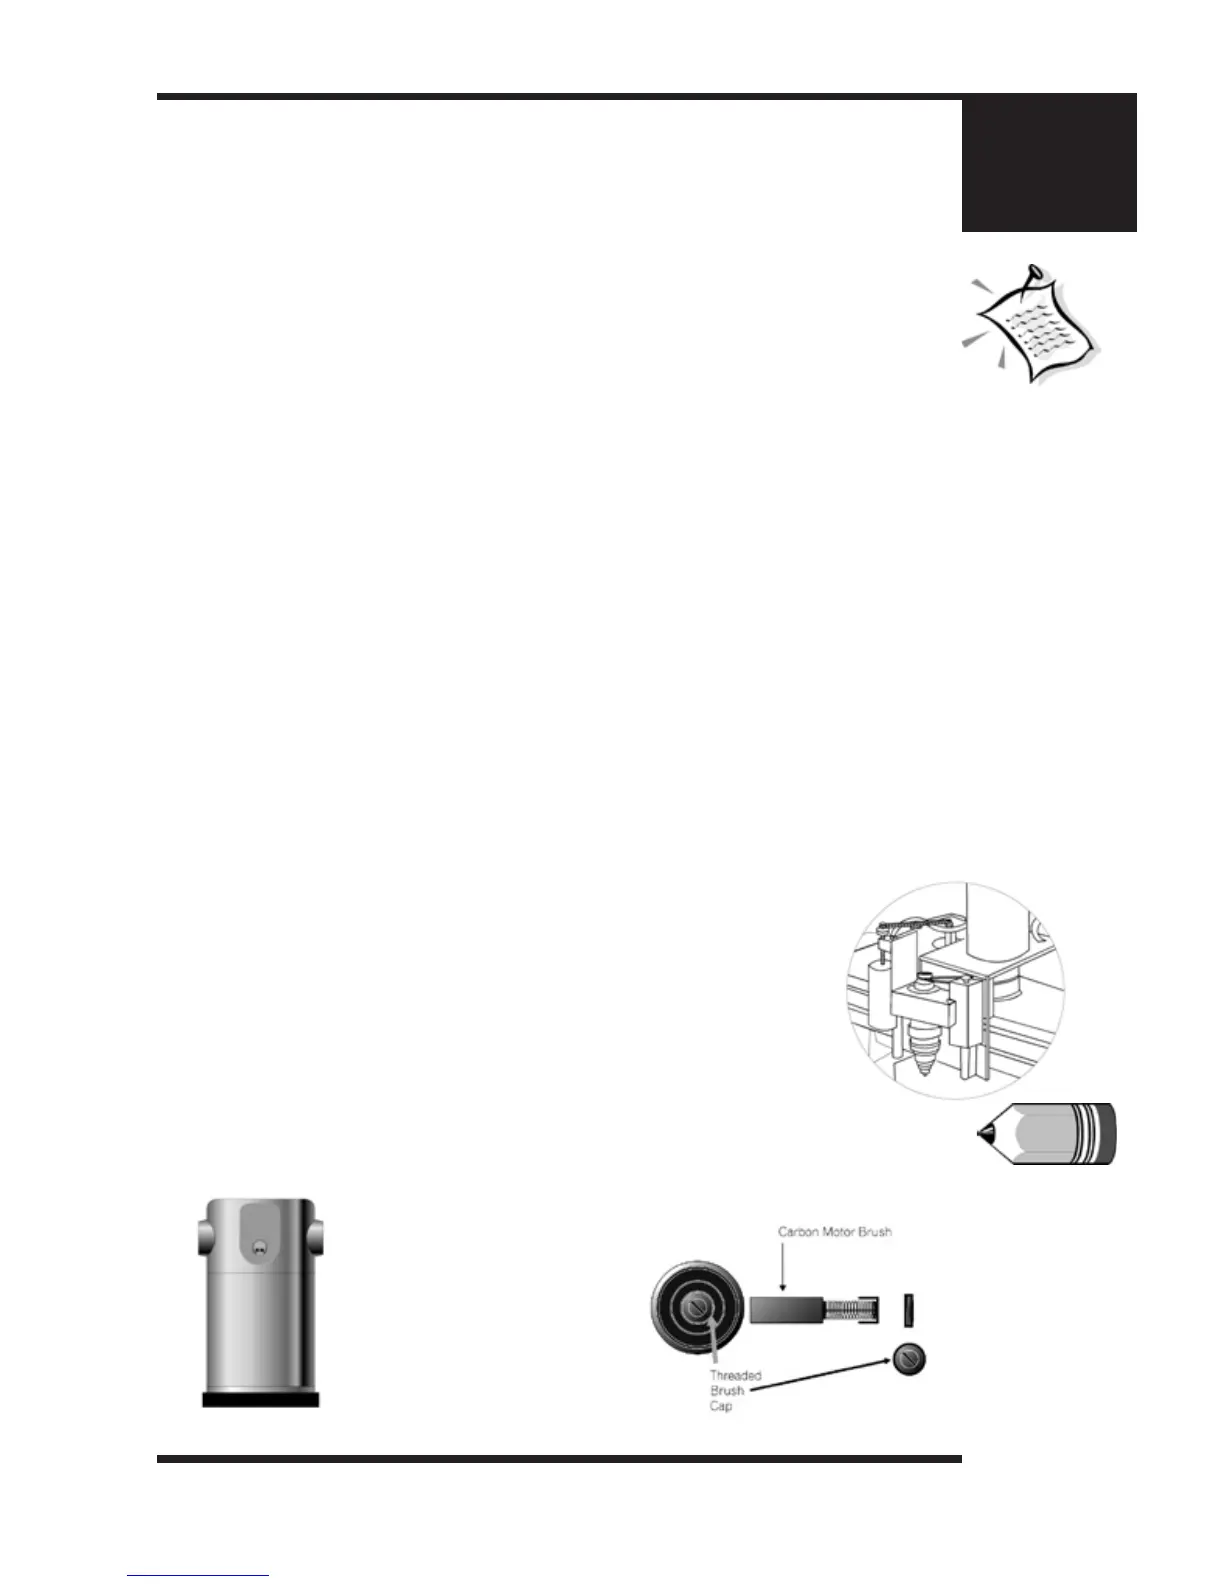
How to replace a belt
A belt is used to drive the spindle engraving system. It runs between a drive pulley
and the spindle pulley (see Fig.9.1). If it needs replacement, remove the old belt
by rolling it to the top of the spindle pulley, and give it a slight stretching motion to
snap it off the end. Once loose, it can easily be removed from the machine. Now
position the new belt around the drive pulley, then stretch it to snap over the top of
the pulley.
NOTE: Be sure to puchase the specied replacement belt from Vision
Engraving Systems. Having the correct belt size is extremely important to the
functionality of the motor. NEVER STRETCH THE BELT!
(Figure 9.2)
The engraving motor and brushes
Shown from front and side view
(Figure 9.1)
 Loading...