64
Maintenance: Accessories
Accessories
Disengageable clutch. Adjusting
Stop the engine and put the clutch lever in neutral.
Remove the inspection hatch and turn the clutch until
the locking device on the adjusting ring is accessible.
The locking devices have slightly different appearanc-
es depending on the make (see illustrations).
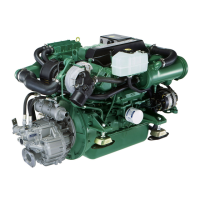
Rockford/BW
1. Undo the locking plates (A) and turn the adjusting
ring (B) to the left enough notches so that the cor-
rect torque, 96–114 Nm (71–84 lbf.ft.) and 135–
158 Nm (100–117 lbf.ft.) for 8" and 10" clutch re-
spectively, on the lever is required for engage-
ment.
2. Screw on the locking plate and the inspection
hatch.
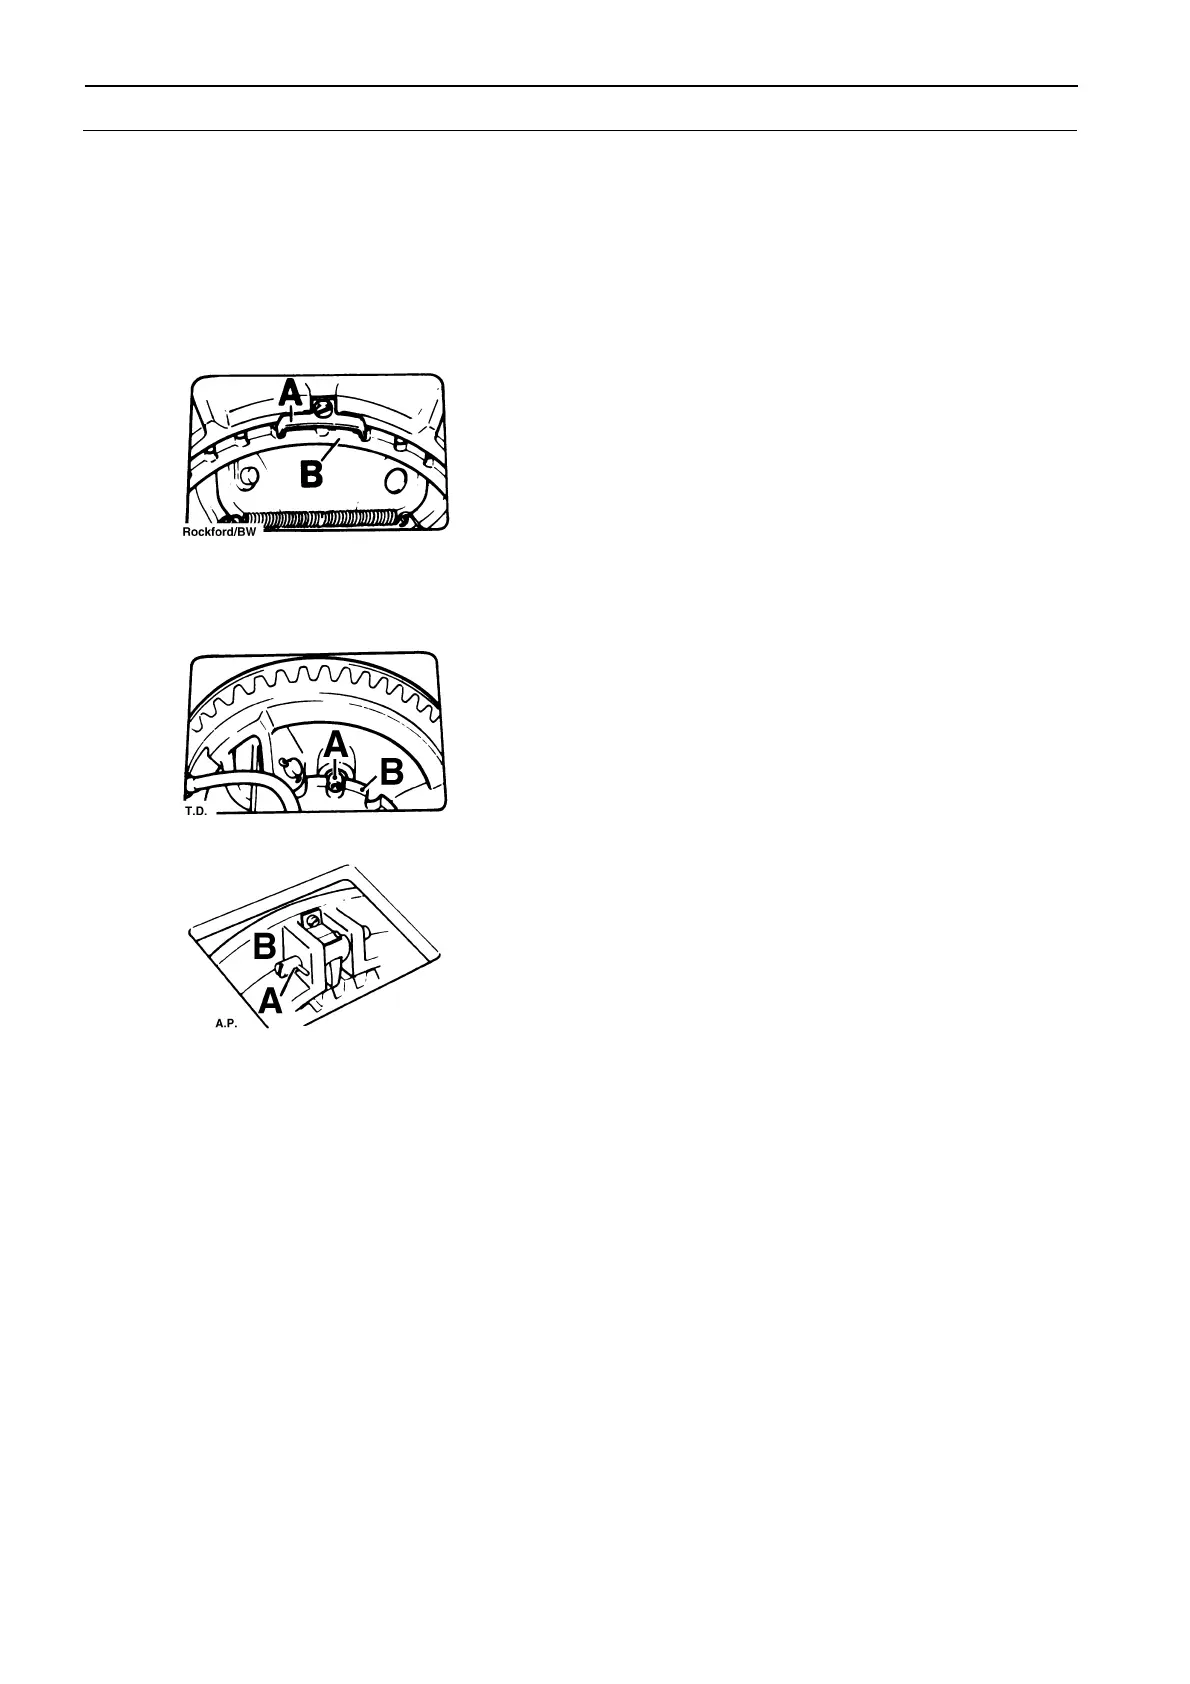
Twin Disc (T.D.)
1. Press the locking pin (A) and turn the adjusting
ring (B) to the right enough notches so that a
torque of 218 Nm (161 lbf.ft.) is required on the le-
ver for engagement.
2. Screw on the inspection hatch.
Automotive Products (A.P.)
1. Undo the locking screw (A) and turn the adjusting
ring (B) to the left so that a torque of between
226–282 Nm (167–208 lbf.ft.) on the lever is re-
quired for engagement.
2. Screw in the lock screw so it comes into a gap be-
tween two teeth. Screw on the inspection hatch.
 Loading...