49
Repair instructions
7
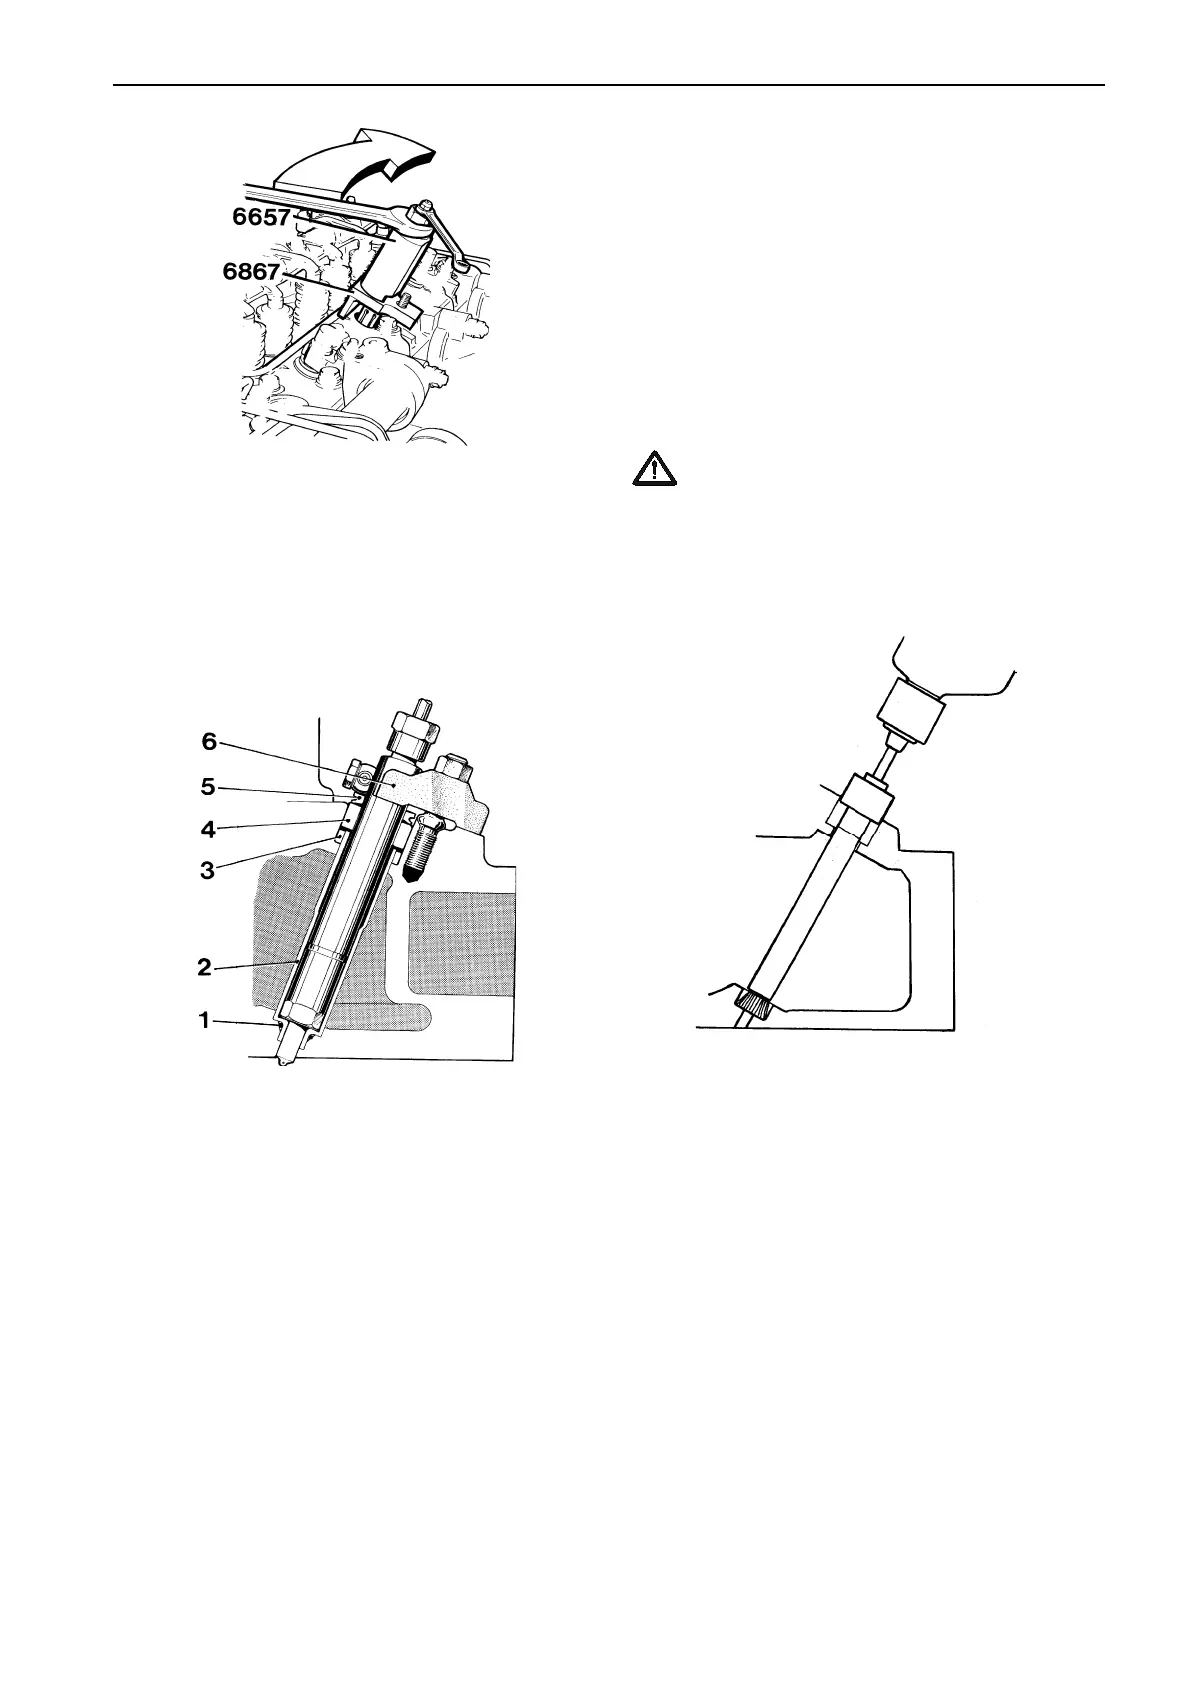
Injector and copper sleeve
1 O-ring 4 Steel ring
2 Copper sleeve 5 Protective ring
3 Seal ring 6 Yoke
8
Check that the O-ring has come up with the copper
sleeve, and that the lower sealing plane is clean.
If the sealing plane is damaged or covered in carbon,
it can either be cleaned with a plug brush (nylon
brush) or with a cutter.
Please refer to methods 1 and 2 under “Cleaning the
seat for the copper sleeve” on this page and overleaf.
Remove the upper seal ring (3). Clean the upper and
lower guides in the cylinder head.
Cleaning the seat for the
copper sleeve
Method 1 – with a plug brush (installed or
detached cylinder head)
Special tool 9812546
It is very important that all kinds of deposits on the
mating surface in the cylinder head, of the copper
sleeve are removed before a new copper sleeve is in-
stalled.
IMPORTANT! For TAMD63, cleaning with
a plug brush is the only permitted method.
1
Install plug brush 9812546 in an electric drill with ad-
justable speed. The maximum speed for the plug
brush is 1000 rpm. Insert the plug brush into the in-
jector hole and clean the seat. Blow clean with com-
pressed air.
When the extractor has grasped the copper sleeve
firmly, insert underlay 9996867 and thread the extrac-
tor sleeve over the spindle.
Pull out the copper sleeve by screwing the nut down
at the same time as you hold the spindle still. The tool
can be supplemented by impact hammer 9996400 if
necessary.
 Loading...