6 Check Mailbox
132 Xerox CopyCentre/WorkCentre/WorkCentre Pro 123/128 User Guide
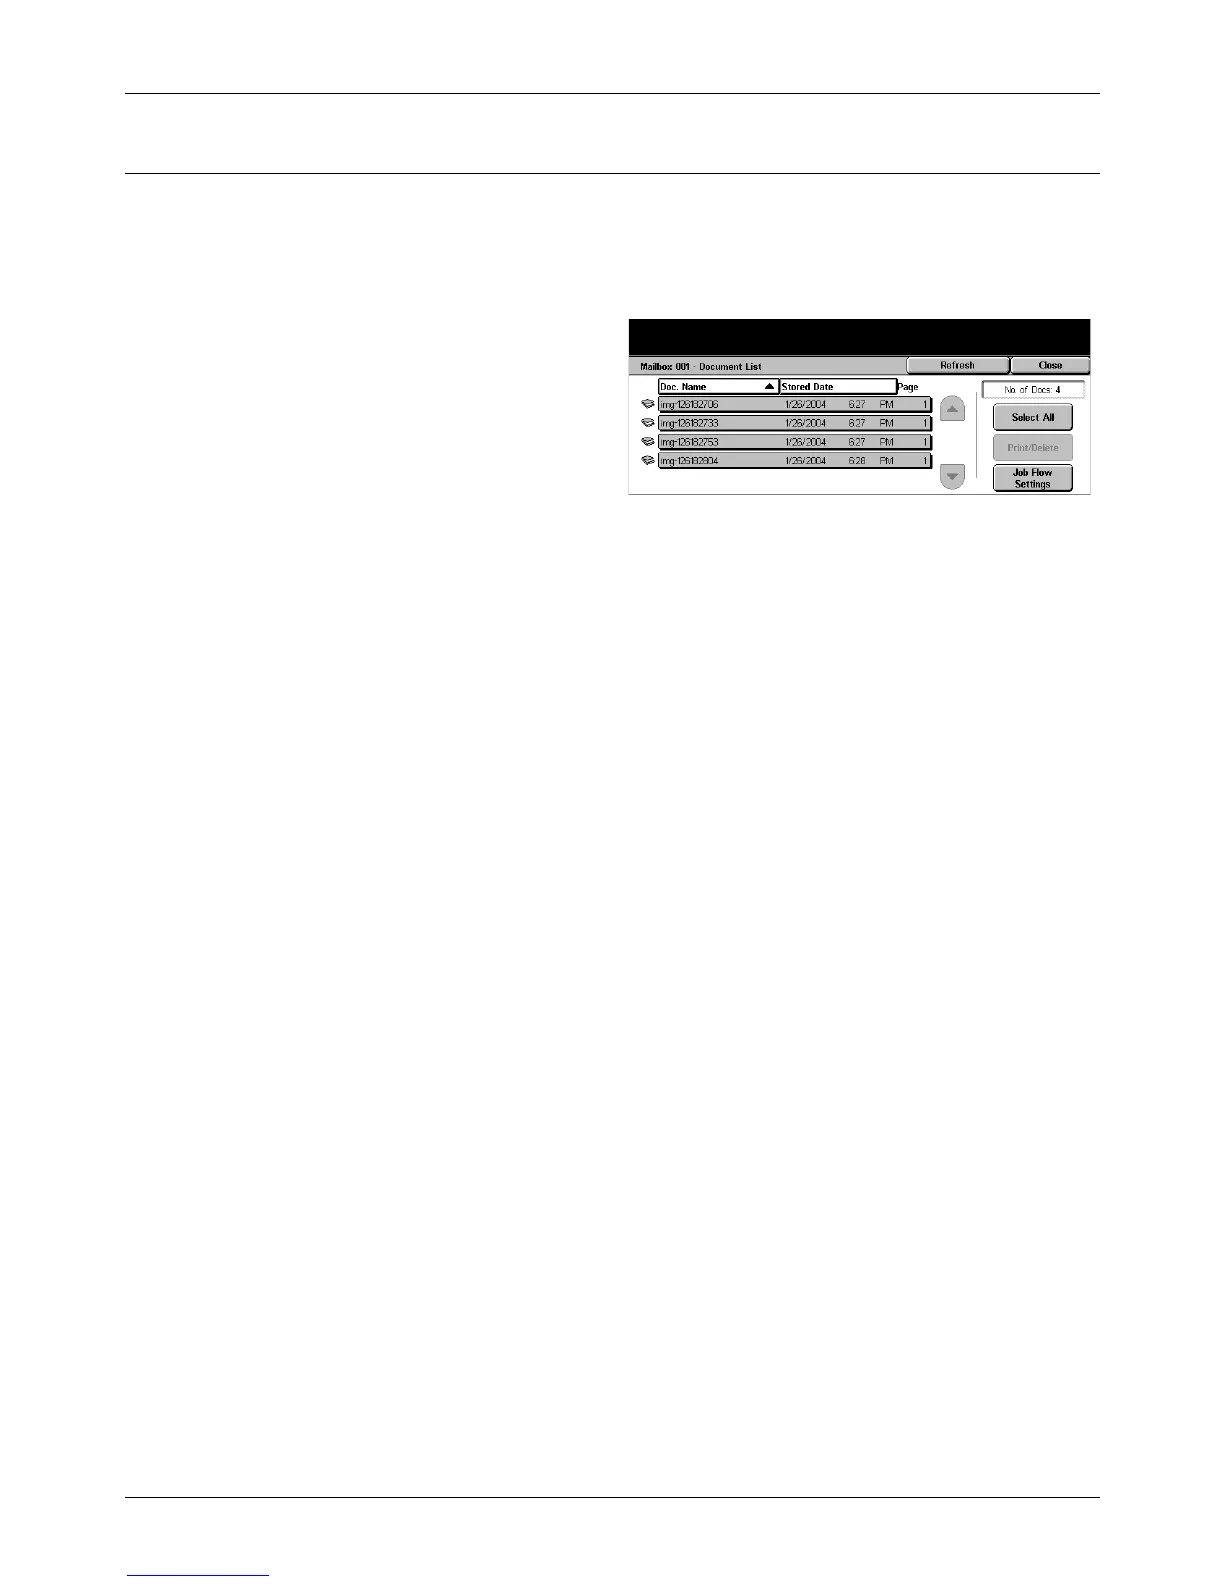
Document List
This screen allows you to print or delete documents in the selected mailbox. You can
also link a mailbox or the documents inside to a job flow sheet to automate document
processing. For more information on job flow sheets, refer to Job Flow Sheets in the
Setups chapter on page 244.
1. Select the required mailbox.
2. Select [Document List] on the
[Check Mailbox] screen.
3. Perform the necessary
operations.
4. Select [Close].
Refresh
Updates the list of documents in the mailbox.
Select All
Selects all the documents in the mailbox, so that you can print or delete them all at
once.
Print/Delete
Displays the [Print/Delete] screen.
• Delete – Deletes the selected document(s).
• Print – Prints out the selected document(s).
NOTE: The documents stored in a private mailbox by scanning cannot be printed.
Job Flow Settings
Displays the [Job Flow Settings] screen.
[Job Flow Settings] Screen
This screen allows you to set, modify, or release linkage with a job flow sheet. You can
also execute the linked job flow sheet from this screen.
A job flow sheet allows you to process the documents stored in private mailboxes. You
can link a mailbox to a job flow sheet in advance to automatically execute the job flow
sheet when a new document is saved in the mailbox, or you can manually start a job
flow sheet as necessary.
NOTE: The job flow sheet you created from this screen can be executed, modified,
duplicated, or deleted only from the private mailbox in which it was created. This job
flow sheet is not displayed on the [Job Flow Sheets] screen in [Setup Menu] on the [All
Services] screen.
 Loading...


