Basic Printing
Phaser® 5500 Laser Printer
2-18
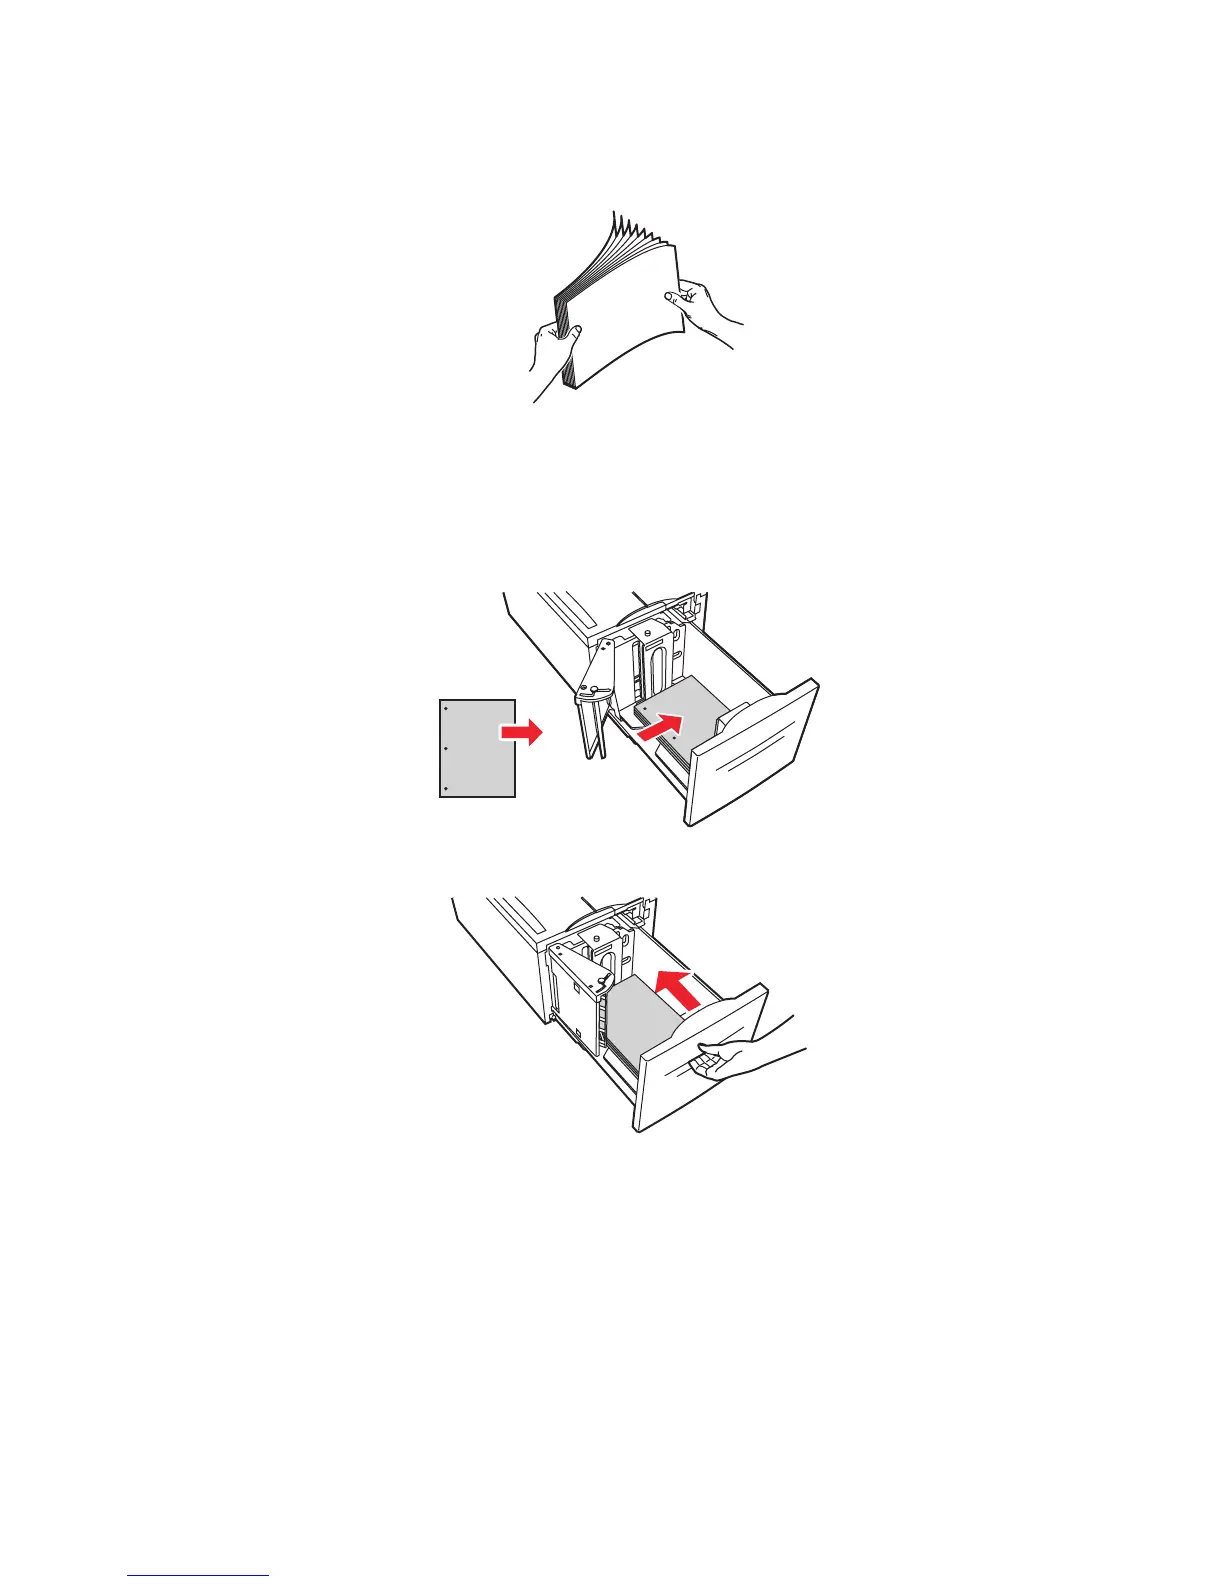
3. Fan the paper to release sheets that may stick together.
■ Place Letter, A4, Executive, and B5 JIS paper long-edge feed into the tray.
■ Place the side to be printed facedown.
■ Place pre-punched paper with the holes toward the left side of the tray.
■ Place letterhead (or the top of the page) toward the front of the tray.
3. Push the tray completely into the printer.
4. If prompted at the printer’s front panel, press the OK button to accept the paper size and
type that are highlighted. If you have changed the paper size or type, do the following:
a. Select Change, then press the OK button.
b. Select the paper size or type, then press the OK button to save your selection.
5. In the printer driver, select either the paper type or Tray 6 as the paper source.
5500-251
5500-255
XEROX
XEROX
5500-115
 Loading...