Panel and Connector Arrangement
12
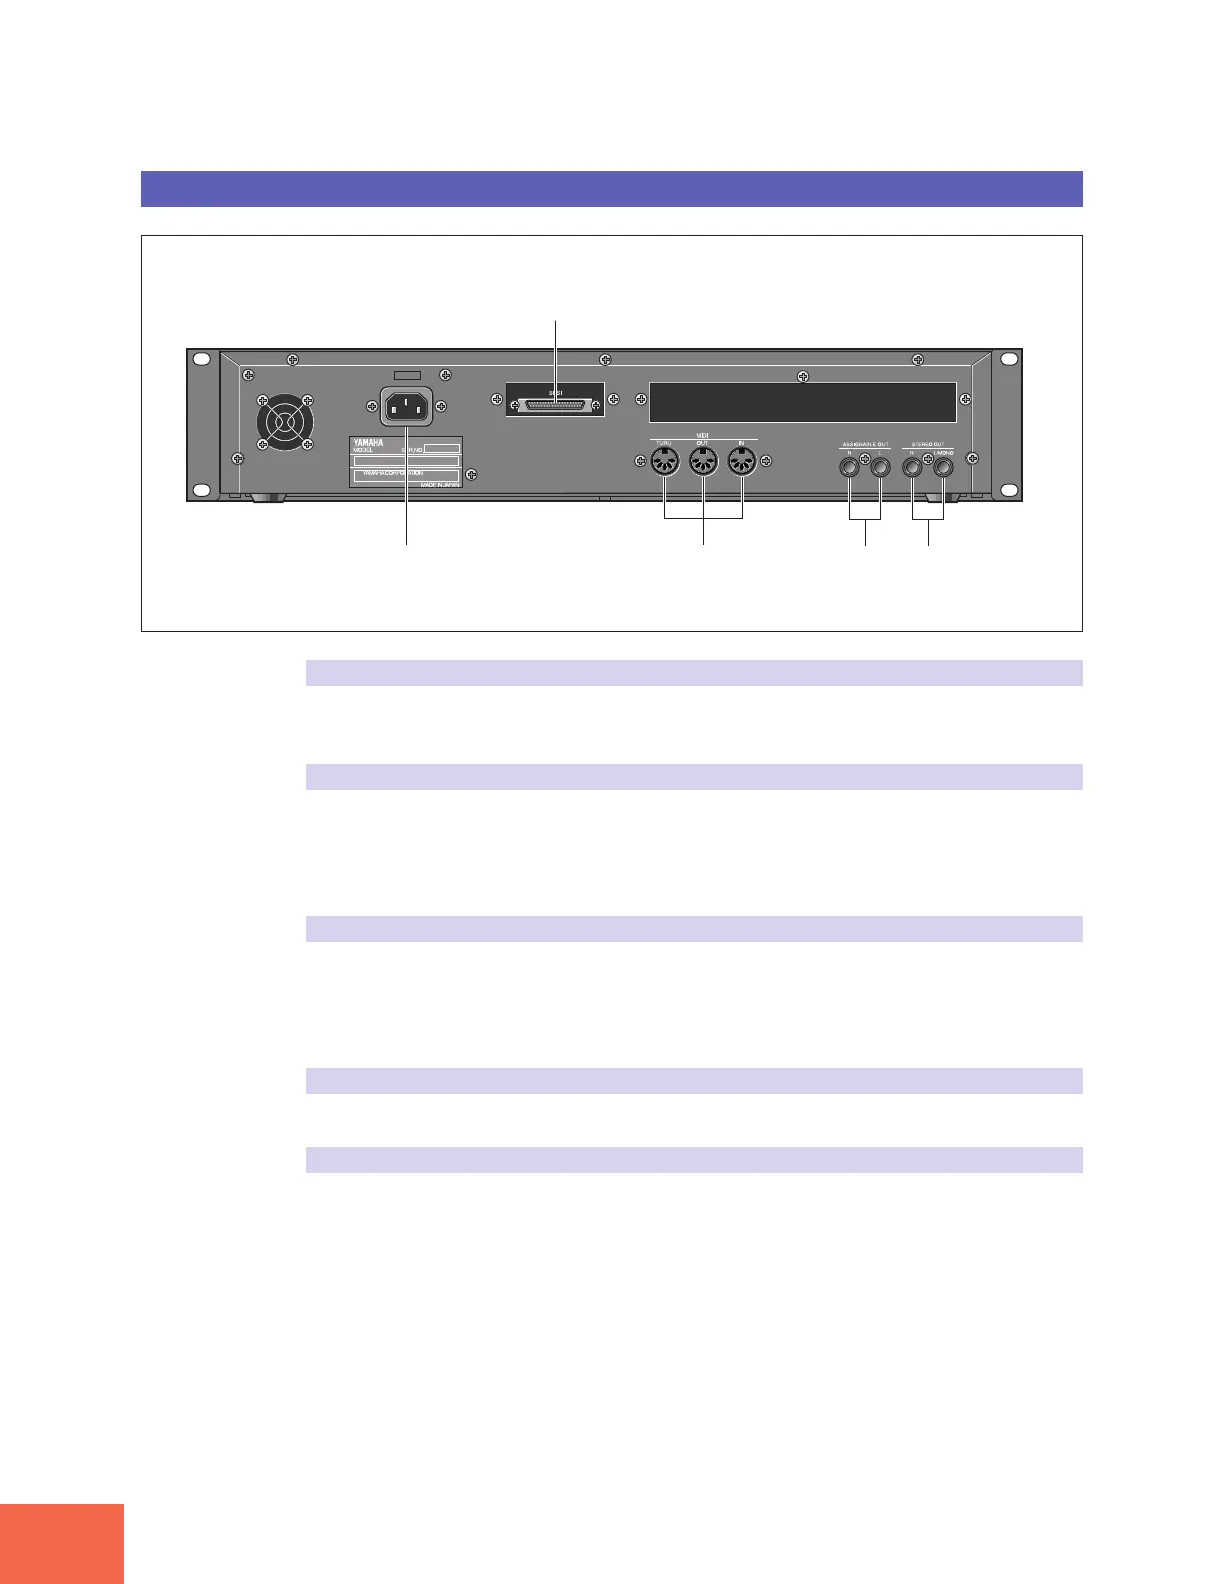
Rear Panel
(1) AC inlet
Connects to the AC power cord supplied with the A3000. (Please do not use any other
power cord with this unit.)
(2) MIDI connectors
These connectors link the A3000 to external MIDI devices. The MIDI IN connector re-
ceives MIDI signals, while the MIDI OUT connector transmits MIDI data generated by
the A3000. The MIDI THRU connector relays the MIDI signals received at the MIDI IN
connector.
(3) ASSIGNABLE OUT jacks
Analog output jacks. These jacks operate independently of the STEREO OUT jacks. You
can use these jacks to output the sound of one or more selected samples, or to output
the signal supplied through the front panel’s analog input connectors (☞134, 176). You
may also set them so that they output the same signal as the STEREO OUT jacks (☞299).
(4) STEREO OUT jacks
These are the main analog output jacks.
(5) SCSI connector
This is a half-pitch 50-pin connector. You use it to connect up a SCSI hard drive, CD-
ROM drive, or other SCSI device.
(1) (2)
(3) (4)
(5)

 Loading...