Getting Started
27
battery at acceptable temperatures. The device or accessory indicates when charging is disabled due to
abnormal temperatures via its LED.
To charge the main battery:
1. Connect the charging accessory to the appropriate power source.
2. Insert the device into a cradle or attach to a cable. The device turns on and begins charging. The
Charging/Notification LED blinks amber while charging, then turns solid green when fully charged.
Charging Indicators
Google Account Setup
NOTE: You must connect the device to the internet in order to set up a Google™ account.
A Google account is only required on devices with GMS software.
The first time the device starts, the Setup Wizard displays. Follow the on-screen instructions to set up a Google
account, configure Google Pay
™ for purchasing items from the Google Play ™ store, to enter your personal
information, and enable backup or restore features.
Zebra Visibility Services
The device captures and provides device analytics to a system administrator. The first time the device boots
(or after a Factory reset), the Zebra Services agreement screen displays.
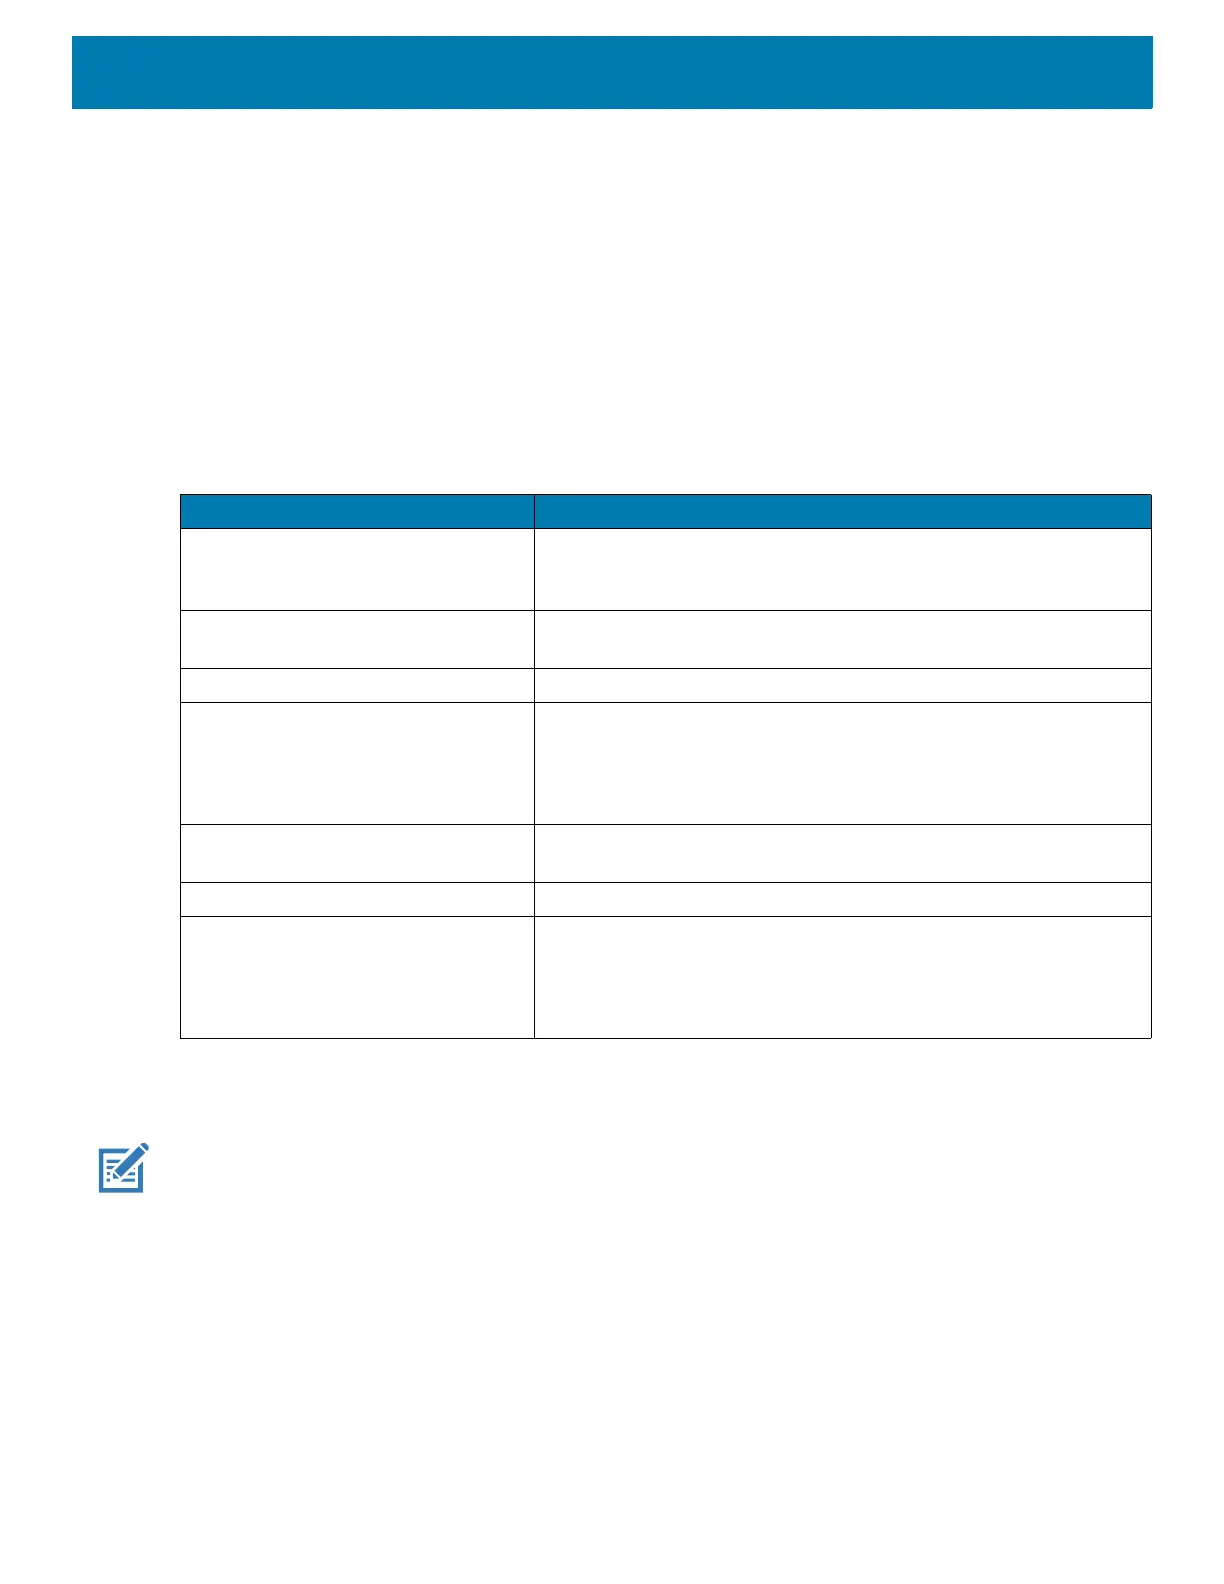
Table 3 Charging/Notification LED Charging Indicators
State Indication
Off The device is not charging. The device is not inserted correctly in
the cradle or connected to a power source. Charger/cradle is not
powered.
Slow Blinking Amber (1 blink every 4
seconds)
The device is charging.
Solid Green Charging complete.
Fast Blinking Amber (2 blinks/second) Charging error:
• Temperature is too low or too high.
• Charging has gone on too long without completion (typically
eight hours).
Slow Blinking Red (1 blink every 4
seconds)
The device is charging but the battery is at end of useful life.
Solid Red Charging complete but the battery is at end of useful life.
Fast Blinking Red (2 blinks/second) Charging error but the battery is at end of useful life.
• Temperature is too low or too high.
• Charging has gone on too long without completion (typically
eight hours).
 Loading...