Enova DGX DXLink™ Fiber Boards
122
Hardware Reference Manual – Enova DGX 100 Series Digital Media Switchers
To configure DXLink Duplex hardware for Unidirectional Mode:
1. For DXLink Fiber Inputs or Outputs – Navigate to the System Configuration interface and toggle the DXLink Mode button:
a. On the Configuration Page (Switcher/Configuration), select an input or output.
b. Select the DXLink Details button on the right pane.
c. Toggle the DXLink Mode button from Bidirectional to Unidirectional.
d. Wait for the board to reboot.
2. For units connected to DXLink board connectors – Place DIP switch #4 (on the bottom of Transmitters/Receivers) in the ON
position to enable Unidirectional Mode and then cycle power to the unit(s) to reboot in Unidirectional Mode.
Configuring DXLink Duplex Hardware for Bidirectional Communication
When starting from Data Link-lost Mode or Unidirectional Mode, the following instructions explain how to restore Duplex hardware
configuration to Bidirectional Mode (default).
For hardware beginning in Data Link-lost Mode, simply restore the fiber optic cables that provide the data return path.
To configure DXLink Duplex hardware for Bidirectional Mode:
1. For DXLink Fiber Inputs or Outputs – Navigate to the System Configuration interface and toggle the DXLink Mode button:
a. On the Configuration Page (Switcher/Configuration), select an input or output.
b. Select the DXLink Details button on the right pane.
c. Toggle the DXLink Mode button from Unidirectional to Bidirectional.
d. Wait for the board to reboot.
2. For units connected to DXLink board connectors – Place DIP switch #4 (on the bottom of Transmitters/Receivers) in the OFF
position to enable Bidirectional Mode and then cycle power to the unit(s) to reboot in Bidirectional Mode.
Checking DXLink Fiber, Duplex Hardware Directional Mode Settings
Directional Mode settings on a DXLink Fiber, Duplex Input or Output Board can be checked by revisiting the DXLink Details.
NOTE: To discover the Directional Mode setting of a DXLink Fiber, Duplex TX or RX unit, check the #4 DIP switch on the bottom of the
unit (ON = unidirectional; OFF = bidirectional).
Configuring DXLink Endpoints for Communication with a Master
DXLink Transmitters and Receivers may be configured for communication in one of two ways: auto-setup or traditional NetLinx
binding. The instructions in this section cover configuration through auto-setup. For instructions that cover configuring TXs and
RXs through traditional NetLinx binding, see the Hardware Reference Manual – DXLink Fiber Transmitters and Receivers.
DXLink endpoints ship from the factory with a default mode which allows auto-setup to work without additional configuration. If the
endpoint has not been altered from its default settings, it should not require any of the following instructions. For information of
control signals passed through an Enova DGX with configured DXLink Transmitter and Receiver, be sure to review “Serial Data
Transfer and IR Flow Control” on page 124.
NOTE: Auto-setup is only available for DXLink endpoints capable of and configured for Bidirectional Mode. Endpoints in Unidirectional
Mode should use traditional NetLinx binding (see the “Hardware Reference Manual – DXLink Fiber Transmitters and Receivers”).
Best Practices for Configuration
Best practices for configuring endpoints includes using auto-setup. Auto-setup was designed to reduce the number of IP
addresses consumed by a complete system. In a system that does not use auto-setup, each endpoint requires its own IP address
whereas a system that uses auto-setup requires only one IP address (for the integrated Master) and each endpoint is configured
for communication via a private LAN (ICS LAN) hosted by the integrated Master.
DIP Switch Toggles
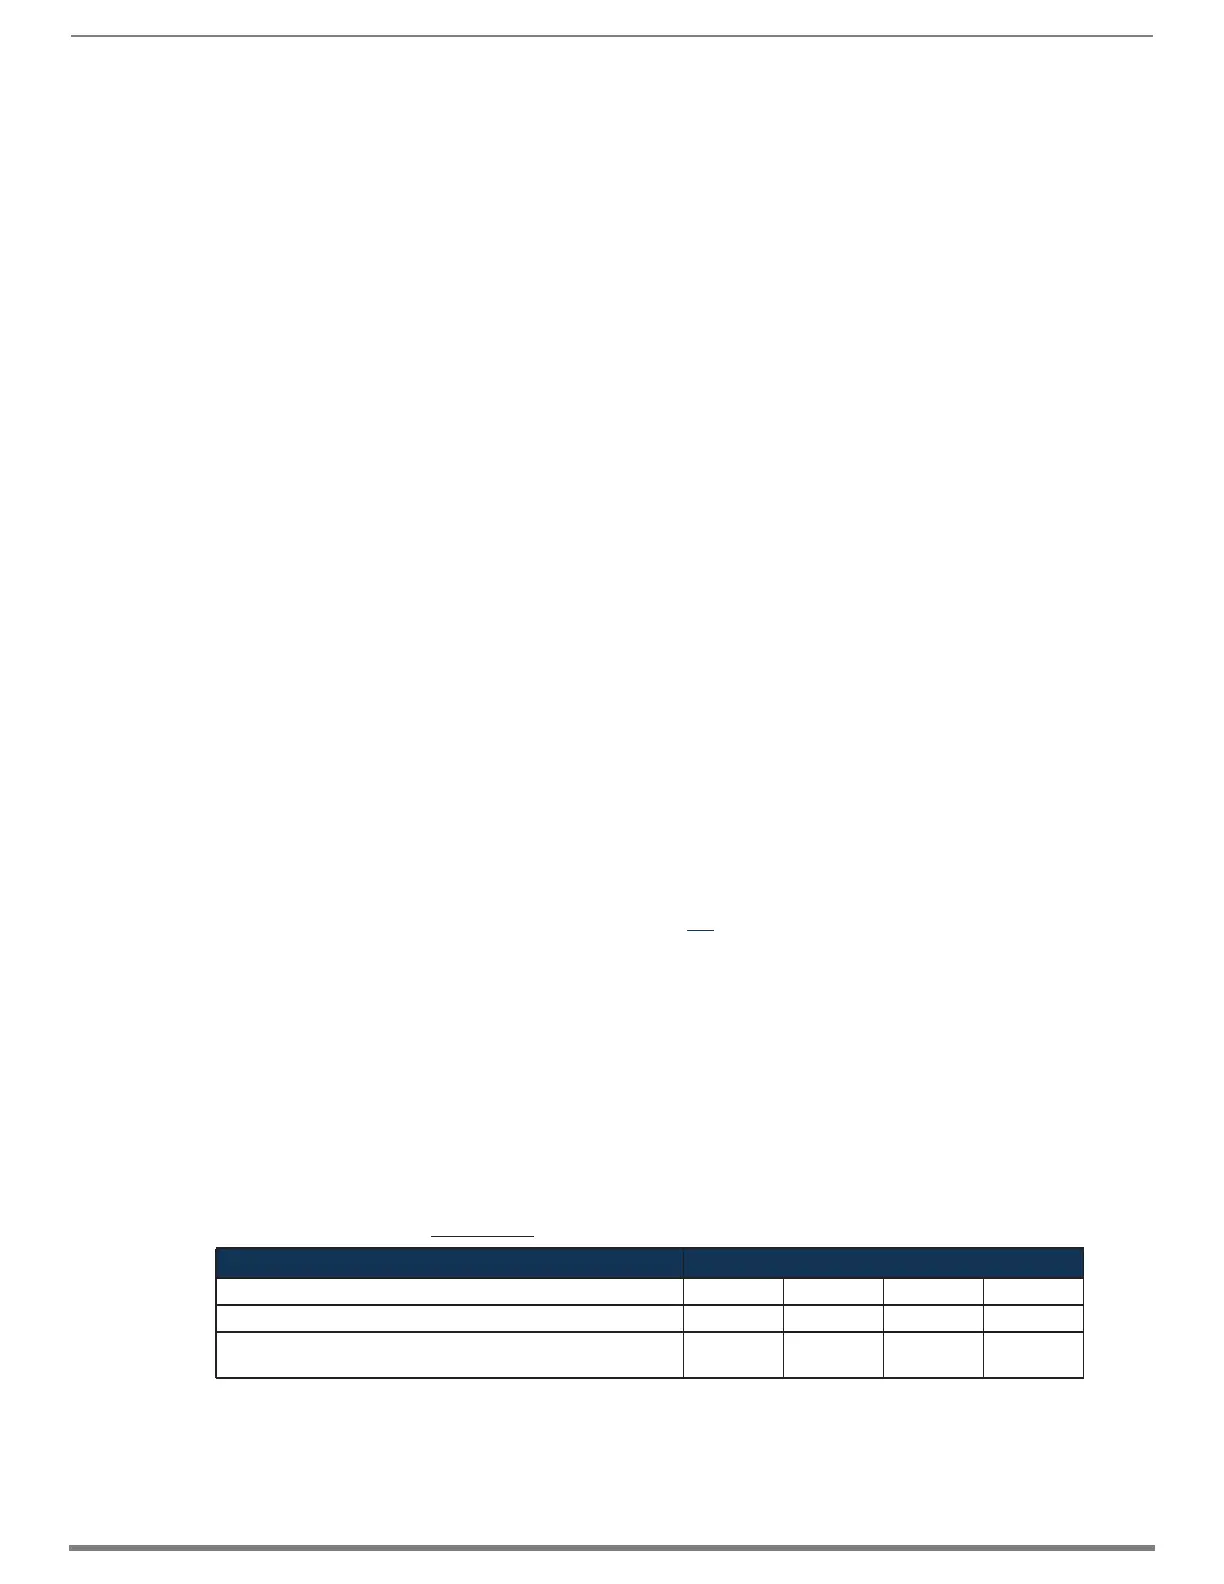
The following table contains some of the most common scenarios for setting up DXLink Fiber Transmitters and Receivers with an
Enova DGX Switcher (the default for all four DIP switch toggles is OFF).
IMPORTANT: Find the scenario in the table below that you want to use and set the DIP switches accordingly.
DIP switch toggles for enabling/disabling special Transmitter/Receiver functionality are located on the bottom of the Transmitters
and Receivers. A detailed description of functions for each toggle is provided in the Hardware Reference Manual – DXLink Fiber
Transmitters and Receivers at www.amx.com.
* With both units connected to boards in an Enova DGX Digital Media Switcher (provides integrated NetLinx control), connect the
ICS LAN 10/100 port on one of the DXLink Fiber units to the network device (e.g., laptop, IP controlled projector, AMX ICSLan EXB
device).
TIP: Each toggle’s ON position is toward the connectors on the rear of the DXLink Fiber Transmitter/Receiver.
Common Scenarios for Auto-setup DXLink Fiber Units DIP Switch Toggle Settings
Switcher Setup – TX/RX with Enova DGX 100 Series 1 2 3 4
AV signals with NetLinx control of TX/RX unit and serial/IR ports OFF OFF OFF OFF
AV signals with NetLinx control of TX/RX unit and serial/IR ports,
plus Ethernet passthrough to networked device*
ON OFF OFF OFF
 Loading...