R5905752 /16 DP2K C50
Image 4–20 Secure UV blocker
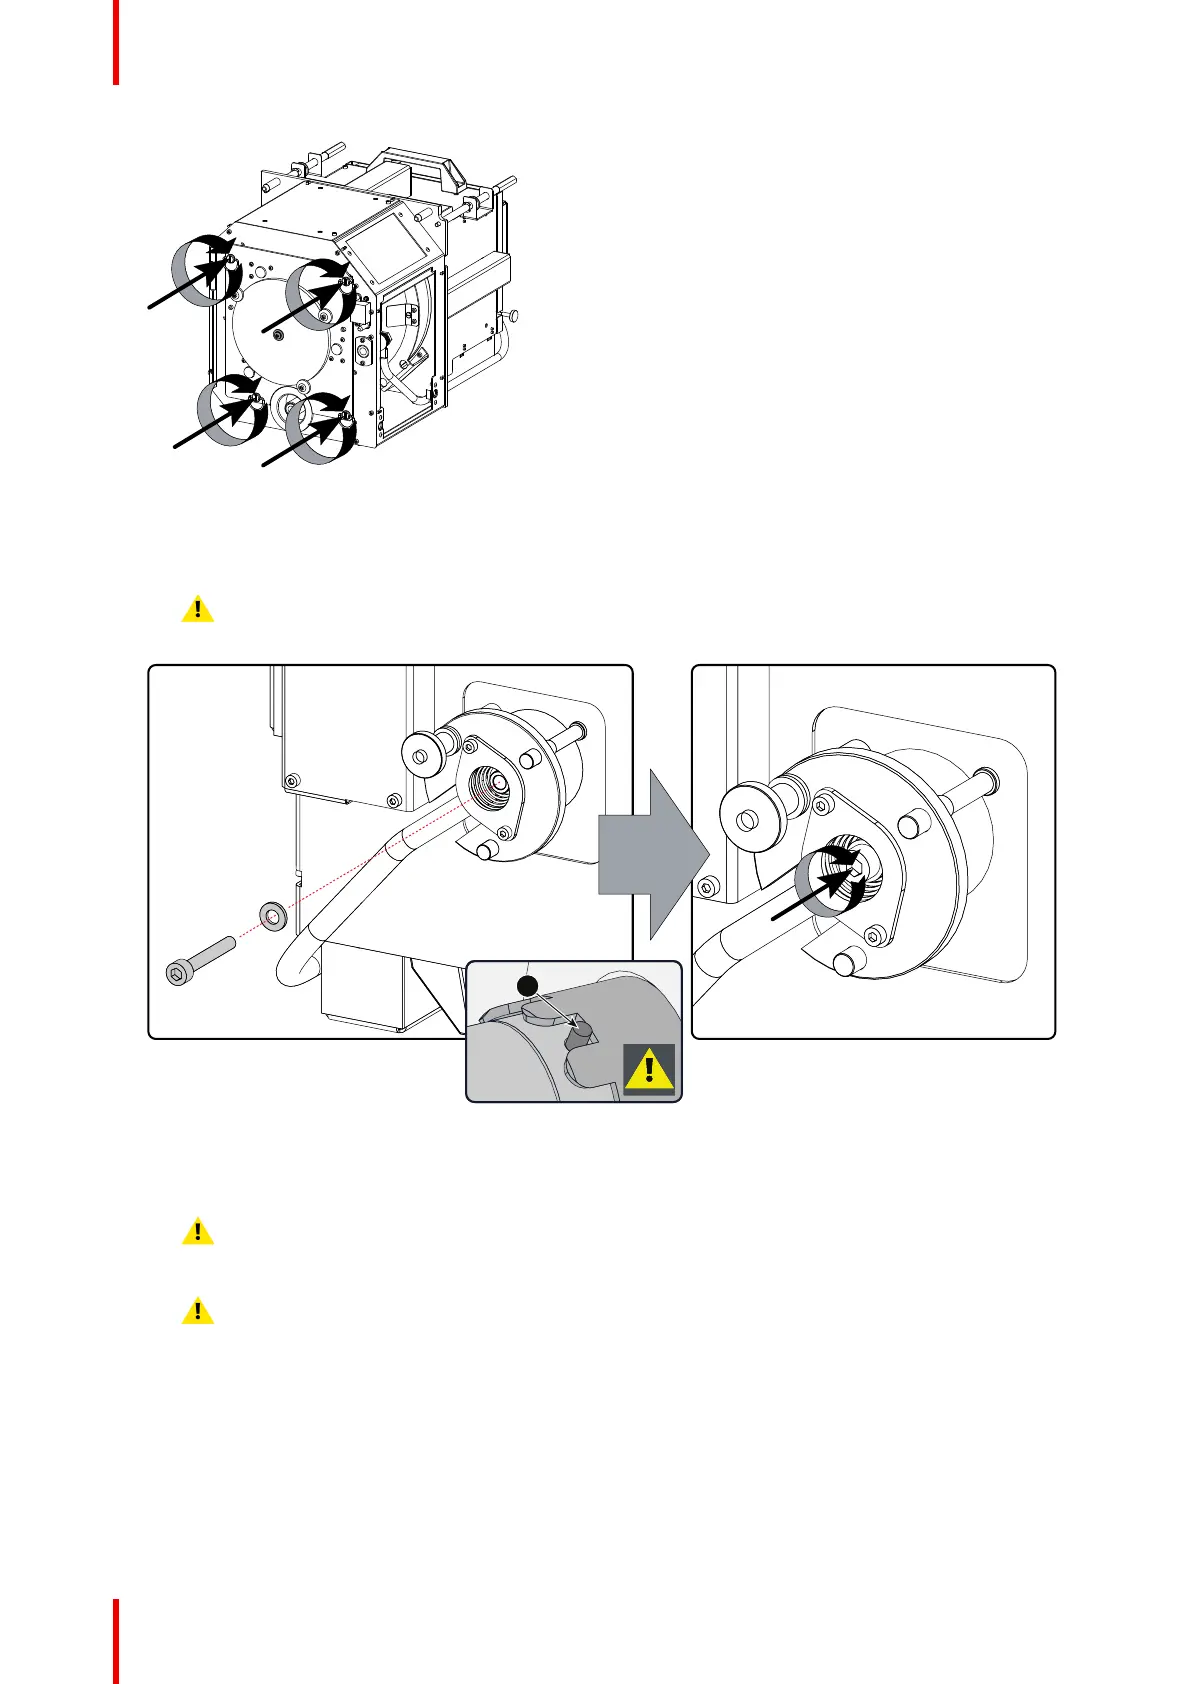
9. Fasten the cathode side of the xenon lamp using a hexagon socket head screw M6 x 40 and a plain
washer as illustrated. Use a torque of 2,5 Nm (1,84 lbf*ft) to fasten the hexagon socket head screw. Use
for that a torque wrench with a 5 mm Allen socket.
Caution: Make sure that the both pins of the cathode adapter remain engaged in the foreseen
slots. Use one hand to keep the xenon lamp into position while inserting the hexagon socket
head screw.
Image 4–21 Fasten cathode side
10. Check the cathode connection inside the Lamp House. Use a 17 mm open-end wrench to hold the first nut
while fastening the second nut on the rod with a torque of 9 Nm (6,64 lbf*ft) using a torque wrench with 17
mm hexagon socket. Ensure that there is a flat washer (reference 3) between the lock nut and the wire lug.
Caution: This cathode connection must be checked with every lamp change!
Caution: Do not tighten the first nut (reference 1) against the connector housing. There must be
some play (1 mm maximum). This is important to insert the Lamp House smoothly into the
projector.
Lamp & Lamp House
 Loading...


