51R5905752 /16 DP2K C
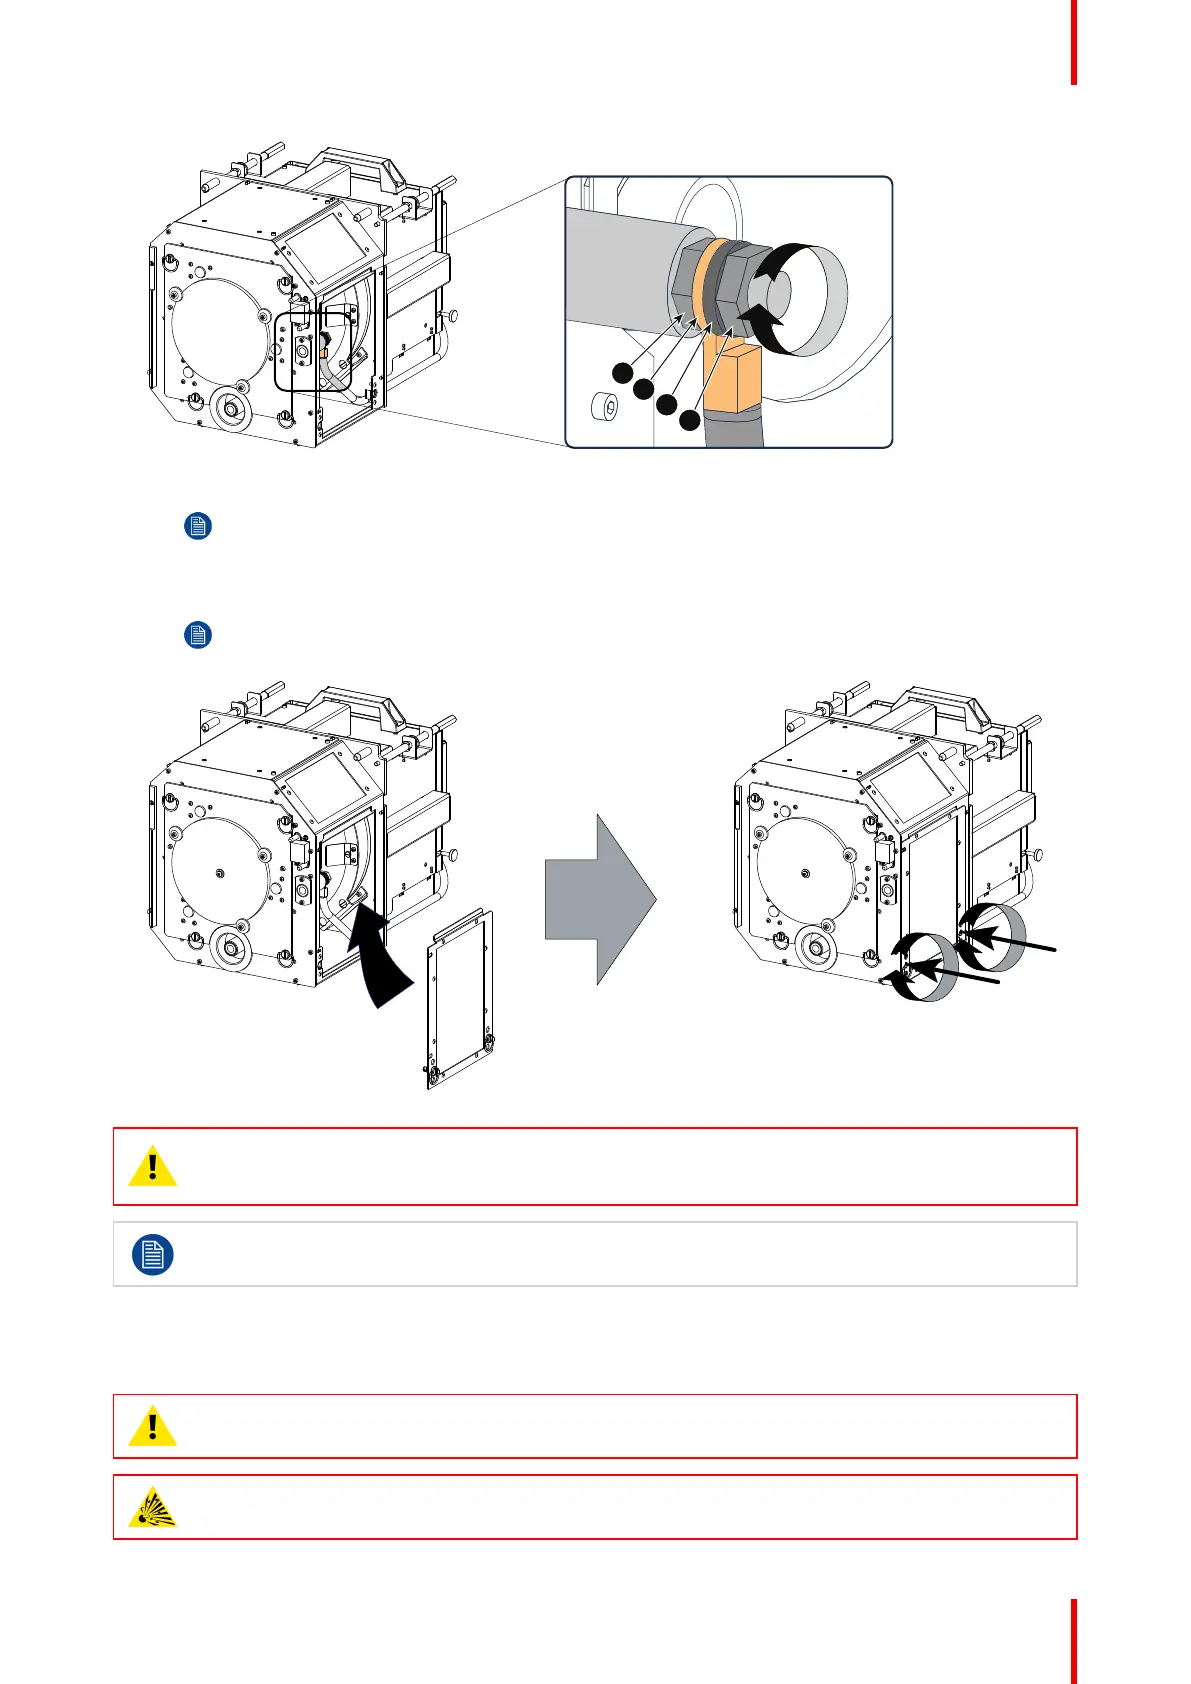
Image 4–22 Check cathode connection
Note: The electrical connection pins of older Lamp Houses may contain two flat washers, one
on each side of the wire lug. New Lamp Houses can contain only one flat washer due to the
shorter thread clearance of the new improved connection pins.
11. Reinstall the side cover of the Lamp House as illustrated.
Note: Please ensure that the thumb screws turning wires are flash with the cover or interference
will occur while inserting the Lamp House into the projector.
Image 4–23 Close side cover
CAUTION: The “LAMP INFO” parameters MUST be updated after each installation of a xenon lamp
inside the lamp house. Neglecting this update will result in poor performance and short life time of
the xenon lamp. See procedure “Resetting the lamp parameters”.
A realignment of the xenon lamp in its reflector is required after the installation of the xenon lamp in
the lamp house. See procedure “Realignment of the lamp in its reflector”, page 54.
4.5 Installation of the lamp house
WARNING: This procedure may only be performed by qualified technical service personnel.
CAUTION: Due to its high internal pressure, the lamp may explode in either hot or cold states if
improperly handled.
Lamp & Lamp House
 Loading...


