Luna
®
G3 APAP / Luna
®
G3 CPAP User Manual
26 / 49
16. Navigating the Patient Menu
16.1 Steps to Navigate the Patient Menu
16.1.1 Accessing the Main Interface
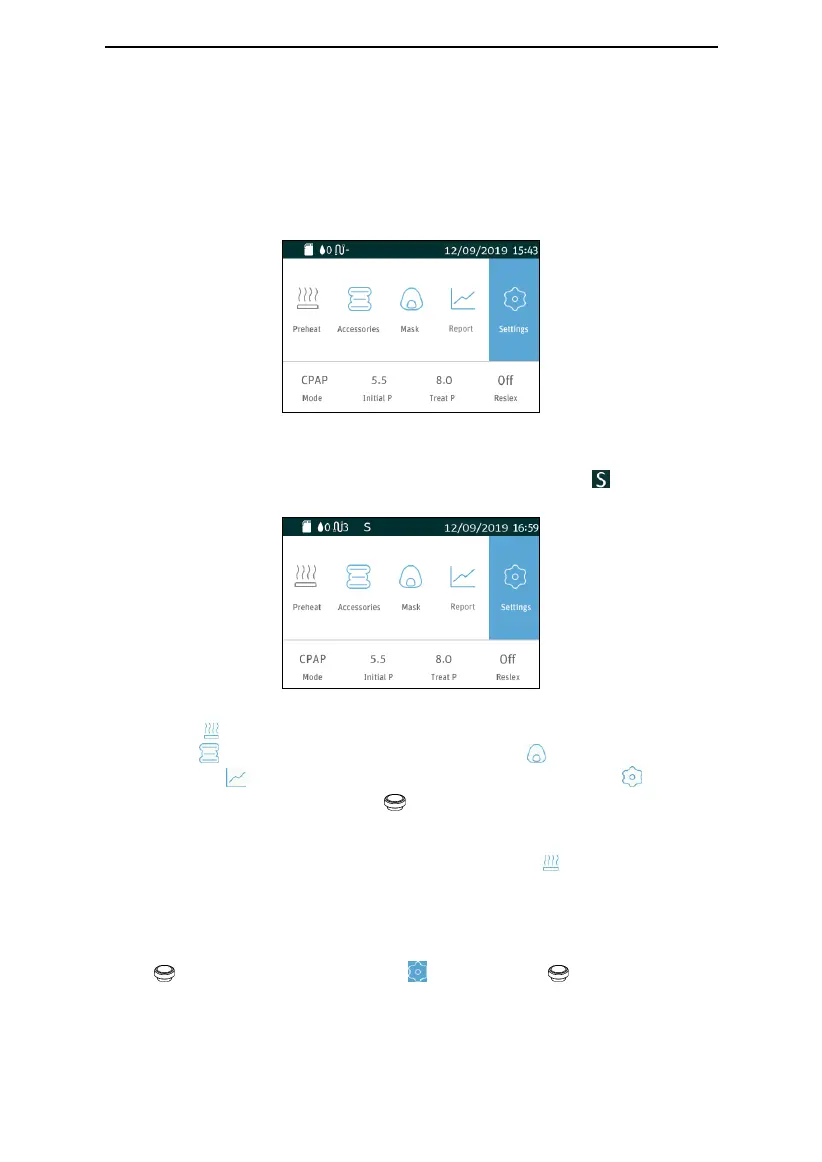
Connect the power cord and power adapter properly. The screen displays the Main
Interface shown in Fig. 16-1.
Fig. 16-1
Note: The above interface only applicable to the device and does not activate the
SmartC or SmartA. If the SmartC or SmartA is enabled, the symbol will appear in
the status bar at the top of the screen, as shown in Fig. 16-2.
Fig. 16-2
The first icon on the upper part of the screen indicates the Preheat Function Icon,
the second indicates the Accessories the third icon indicates Mask Setup,
the fourth icon indicates the Report Interface and the fifth icon indicates
the Initial Setup. As you turn the Knob , the cursor switches among the five icons,
and the interface displayed on the screen changes accordingly.
Note: As the humidity levels is off, the Preheat Function Icon will become gray, as
shown in Fig. 16-2.
16.1.2 Bringing up the Initial Setup Interface
After the display screen displays the Main Interface shown in the Fig. 16-1, turn the
Knob . When the cursor is on the icon , press the Knob , the screen displays
the Initial Setup Interface of the Patient Menu, as shown in Fig. 16-3.
 Loading...