Print Photos Directly
from a USB Flash Drive
Preview and Print Photos
from a USB Flash Drive
Preview your photos on the LCD before you
print them. Print images that are stored on a
USB flash drive.
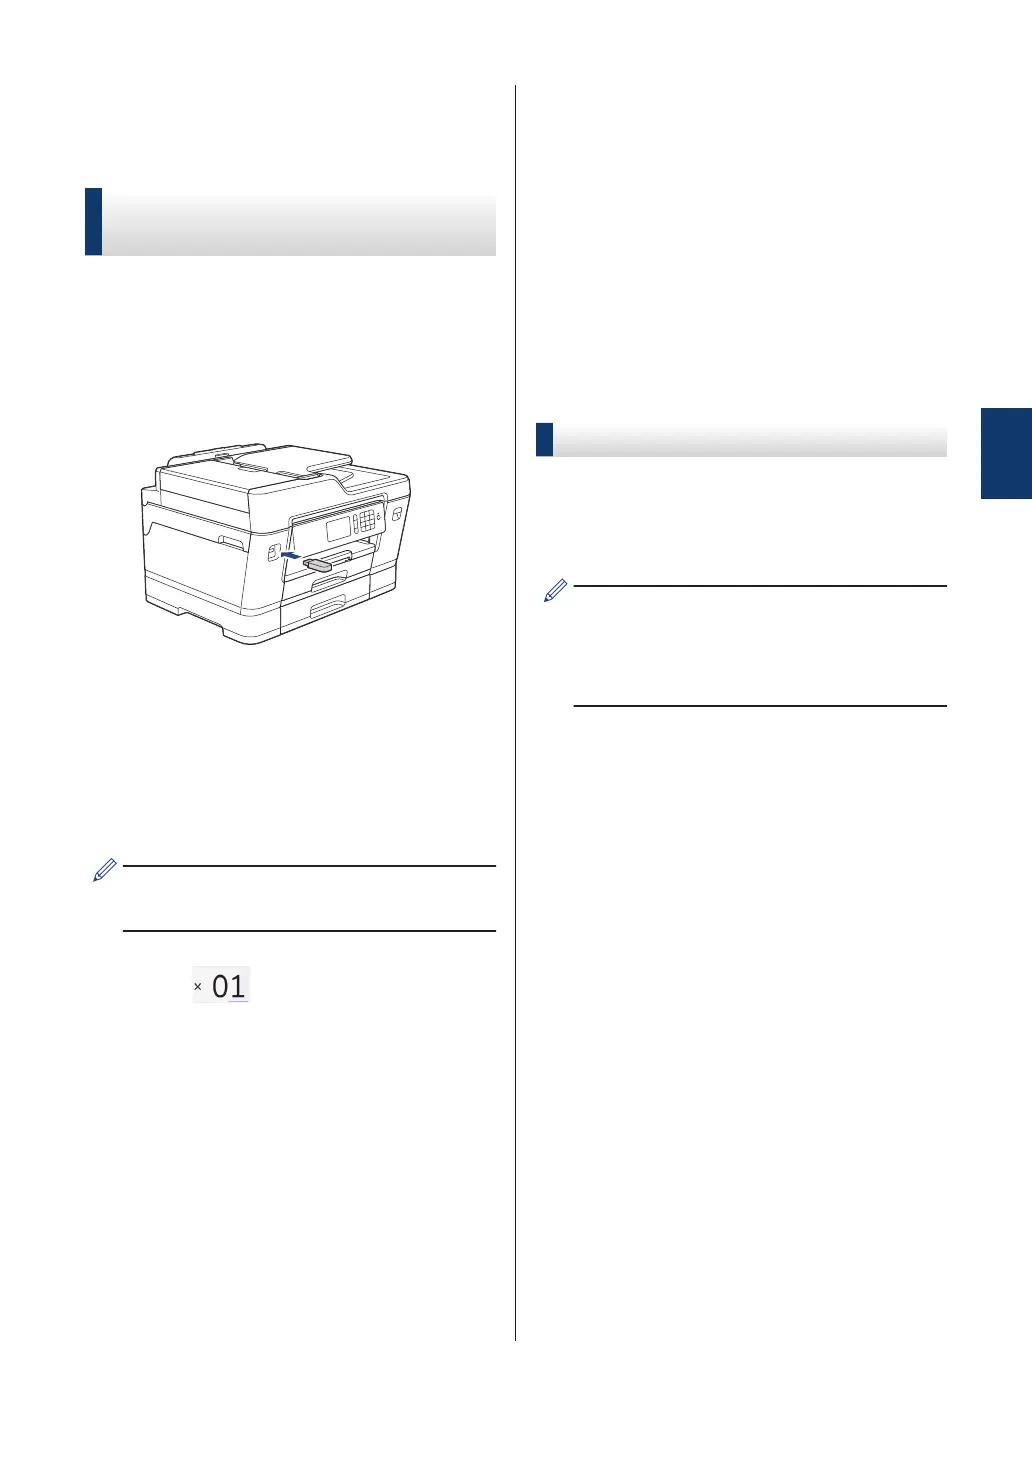
1
Put a USB flash drive in the USB slot.
2
Press [JPEG Print] > [Select
Files].
3
Swipe left or right or press d or c to
display the photo you want to print, and
then press it.
To print all photos, press [Print All],
and then press [Yes] to confirm.
4
Press to display the keyboard on
the Touchscreen, and then enter the
number of copies using the Touchscreen
keyboard. Press [OK].
You can also press [-] or [+] on the
Touchscreen, or use the dial pad
numbers.
5
Press [OK].
6
Repeat the last three steps until you
have selected all the photos you want to
print.
7
Press [OK].
8
Read and confirm the displayed list of
options.
9
To change the print settings, press
[Print Settings].
When finished, press [OK].
10
Press [Start].
Print Settings Overview
The Print Settings you change are temporary
for your current printout. The machine returns
to its default settings after printing is
complete.
You can save the print settings you use
most often by setting them as the default.
For more information, see the Online
User's Guide.
3
Print
23