Check the Print
Alignment from Your
Brother Machine
If your printed text becomes blurred or images
become faded after transporting the machine,
adjust the print alignment.
1
Press [Ink] > [Improve
Print Quality] > [Alignment].
You can also press [Settings] >
[Maintenance] > [Improve Print
Quality] > [Alignment].
2
Press [Next].
3
Swipe up or down or press a or b to
display the paper size that needs a print
alignment adjustment, and then press it.
4
Press [Basic alignment] or
[Advanced alignment].
5
Load the selected paper size in the tray,
and then press [Start].
The machine prints the Alignment
Check Sheet.
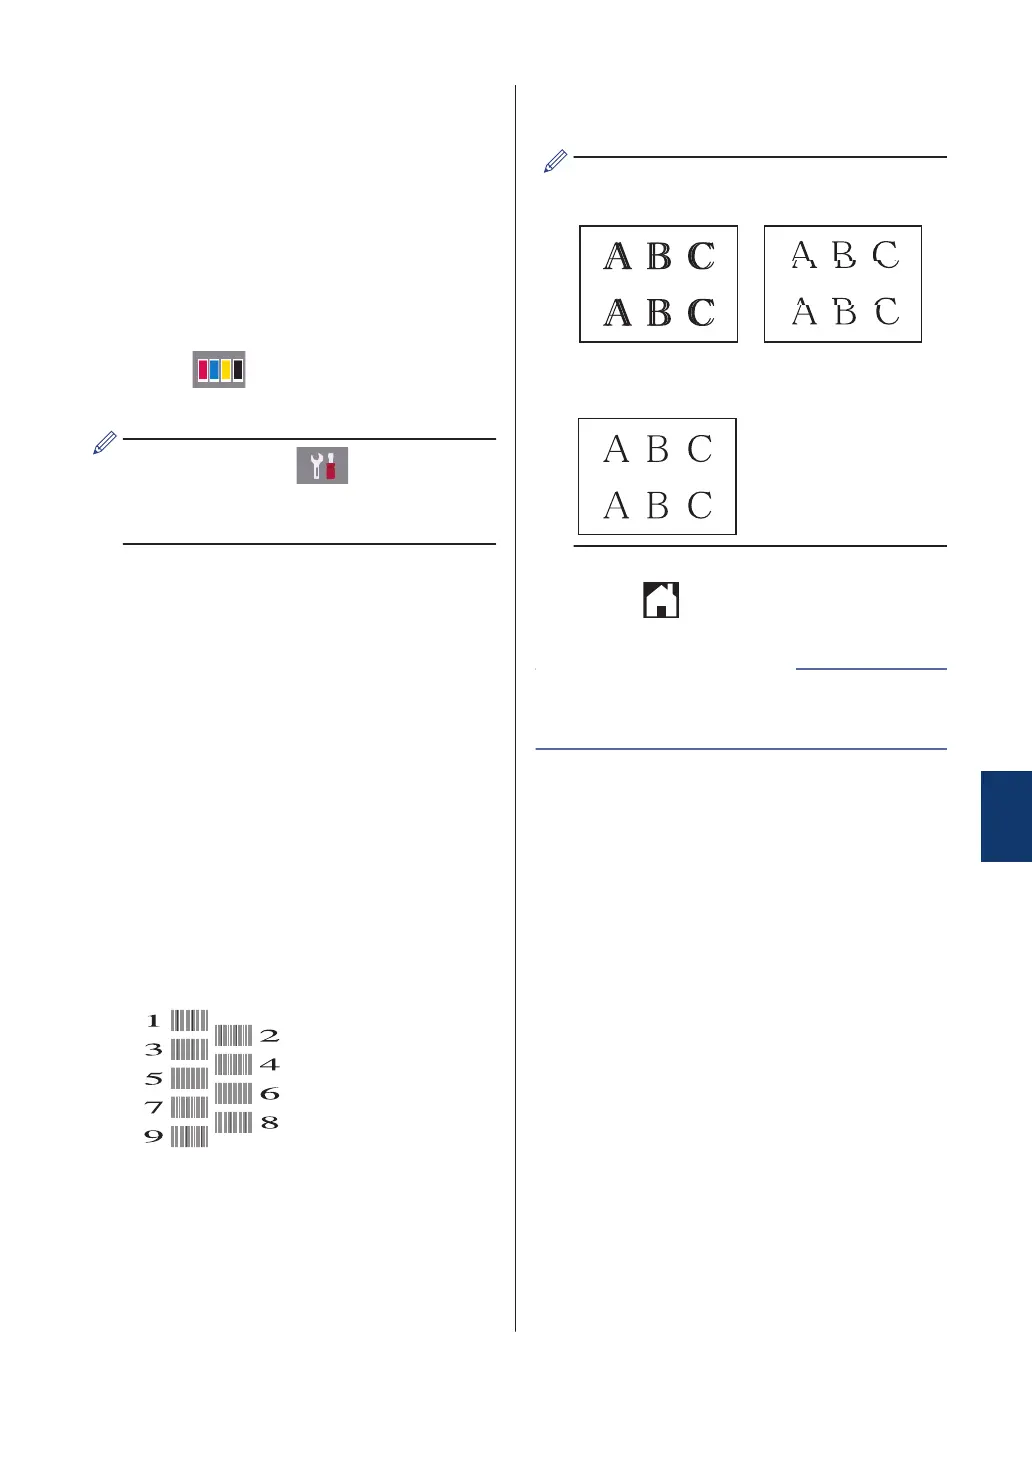
6
For the “A” pattern, swipe up or down or
press a or b to display the number of the
test print with the least visible vertical
stripes (1-9), and then press it (in the
example, number 6 is the best choice).
Press [OK].
Repeat this step for the rest of the
patterns.
When the print alignment is not adjusted
correctly, text looks blurry like this.
After the print alignment is adjusted
correctly, text looks like this.
7
Press .
• Troubleshooting for Other Print Problems
on page 51
Related Information
A
Routine Maintenance
39