155
Operations for Specific Applications
Tutorial 10-1: Creating Split Embroidery Designs
Tutorial 10-1: Creating Split Embroidery
Designs
Layout & Editing has a function for creating split embroidery designs when the embroidery pattern being
created is larger than the embroidery hoop.
The sample file for this tutorial can be found at the following location.
Documents (My Documents)\PE-DESIGN NEXT\Tutorial\Tutorial_10
Step 1 Specifying the Design Page
size in Layout & Editing
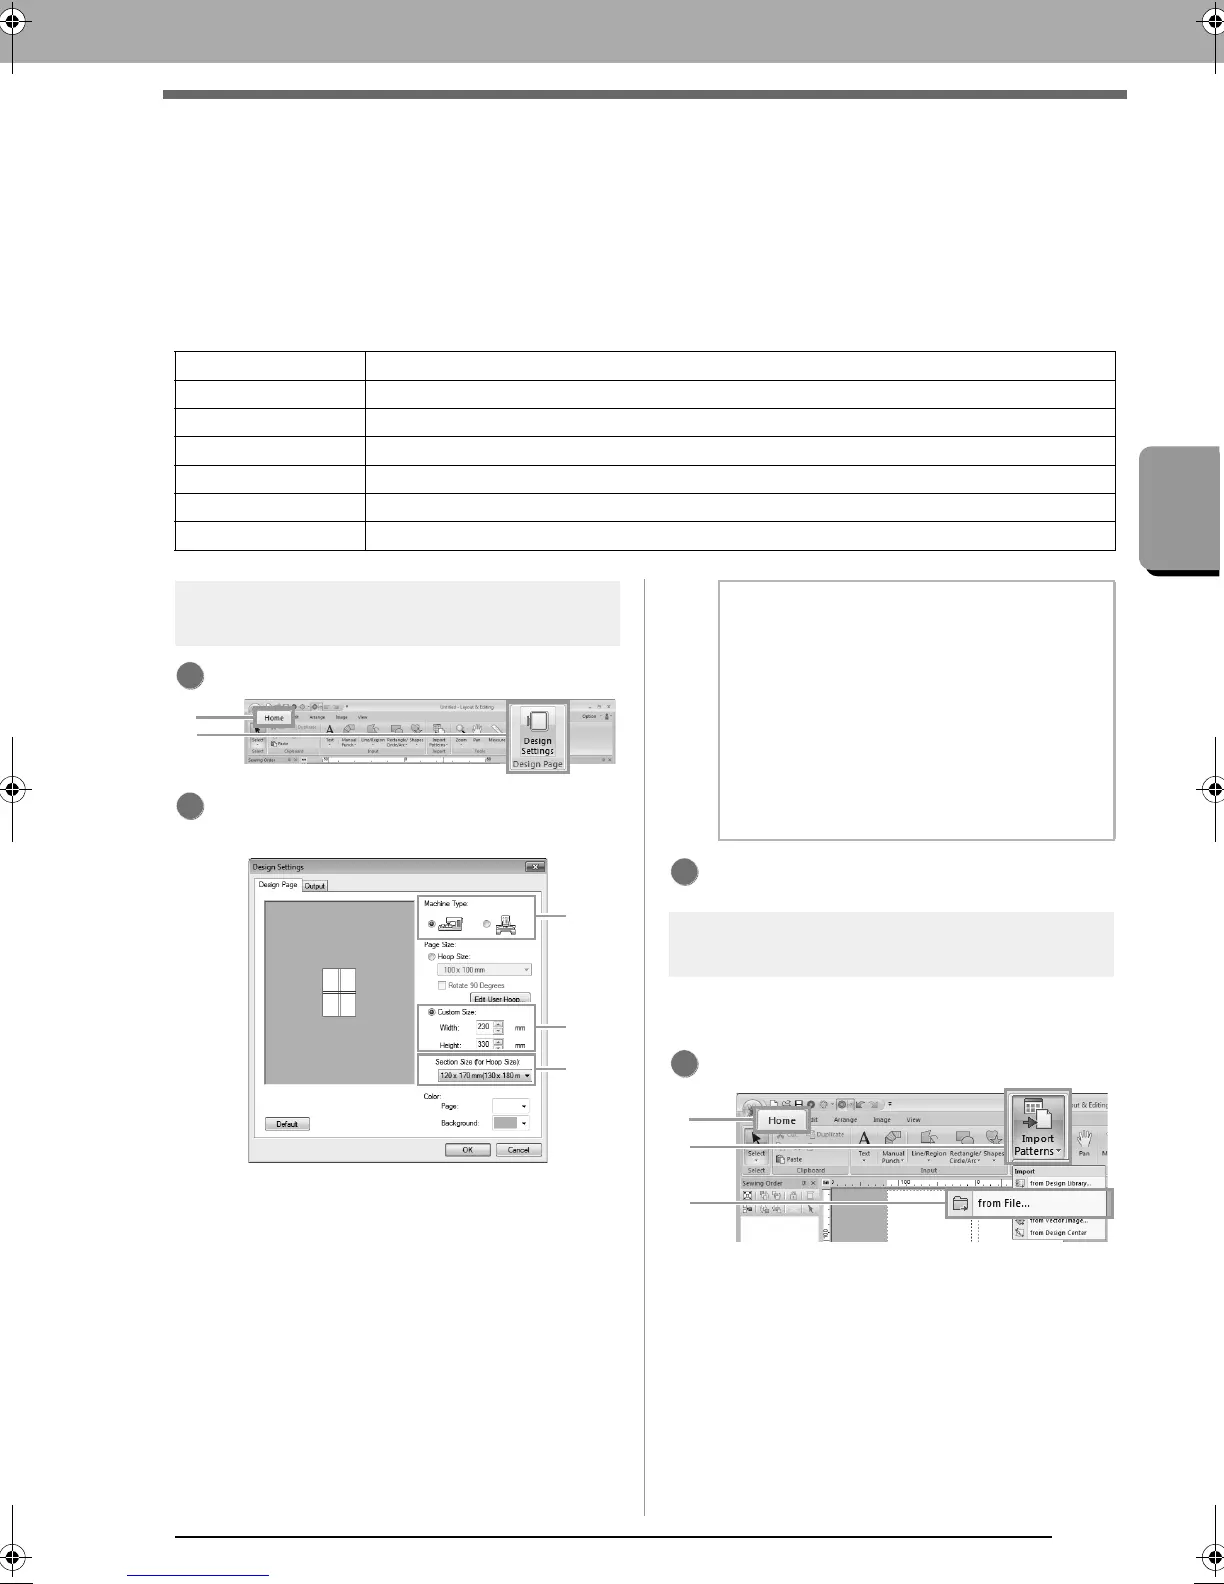
Click 1, then 2.
Specify the Design Page size and the size of
the design sections.
(1) Select the type of embroidery machine to
be used.
(2) Select Custom Size, and then type or
select the desired width and height for the
Design Page. This setting is to specify the
exact width and height of a design. For
this example, set width to 230 mm and
height to 330 mm.
(3) Click in the Section Size (for Hoop Size)
selector, and then select the size of the
sections (your embroidery hoop). For this
example, select 120 × 170 mm
(130 × 180 mm).
Click OK.
Step 2 Creating the embroidery
design
For this example, we will use one of the lace
embroidery patterns provided with the software.
Click 1, then 2, then 3.
Step 1 Specifying the Design Page size in Layout & Editing
Step 2 Creating the embroidery design
Step 3 Checking the embroidering order
Step 4 Attaching stabilizer to the fabric
Step 5 Using the Positioning Sheet, mark the embroidering position on the fabric
Step 6 Hooping the fabric
Step 7 Embroidering
1
2
b Memo:
• With the
Section Size (for Hoop Size)
setting, the width and height of the sections
are 10mm smaller than the actual hoop size
in order to provide space for fine positioning
adjustments with adjustment sections. The
10mm is for overlapping.
• It is not necessary for the
Section Size (for
Hoop Size)
to match the Design Page size.
Select the hoop size to be used for sewing.
3
1
le_specific.fm Page 155 Thursday, May 27, 2010 8:24 PM
 Loading...