5-31
Hardware Installation Guide for Cisco 4000 Series Integrated Services Routers
OL-32185-02
Chapter 5 Install and Upgrade Internal Modules and FRUs
Install and Remove NIMs and SM-Xs on Cisco 4000 Series ISRs
Software Requirement for SM-Xs
Cisco IOS XE software of a specified release or later release is required for using an SM-X.
To determine the version of Cisco IOS software that is running on your router, log in to the router and
enter the show version command:
Router> show version
Cisco Internetwork Operating System Software
4400 Software (C4400-ADVENTERPRISEK9-M), Version 12.3(8.2)T, INTERIM SOFTWARE
Locate SM-X or NIM
See the “Locate Internal and External Slots” section on page 5-6 to locate the SM-X or NIM slot on the
motherboard.
Remove SM-X or NIM
To remove an SM-X:
Step 1 Read the “Safety Warnings” section on page 5-2 and disconnect the power supply before you replace any
module.
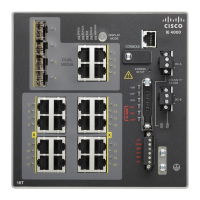
Step 2 Access the SM-X slot. See Figure 5-4 for the various NIM and SM-X slot locations.
Step 3 Loosen the captive screws to open the slot cover. See Figure 5-12 and Figure 5-13.
Step 4 Pull the SM-X out of the connector on the motherboard. Keep the SM-X parallel with the motherboard
to prevent damage to the slot and standoff.
Step 5 Place the SM-X in an antistatic bag to protect it from ESD damage.
Install SM-X
To install an SM-X, use a number 2 Phillips screwdriver or flat-blade screw drive, and a 1/4-inch nut
driver or wrench.
Step 1 Read the “Safety Warnings” section on page 5-2 and disconnect the power supply before you replace any
module.
Step 2 To inset the SM-X, identify the SM-X slot.
Step 3 Loosen the captive screws to open the slot cover. See Figure 5-12 and Figure 5-13.
Step 4 Insert the SM-X to the system board.
Note Press firmly on the SM-X until the board is properly installed on the connector.
Step 5 Insert the screws from the accessory kit through the SM-X into the standoffs. See Figure 5-29. Tighten
the screws with a Phillips screwdriver (torque 6 to 8 in-lb or 0.7 to 1.1 Nm.).
 Loading...