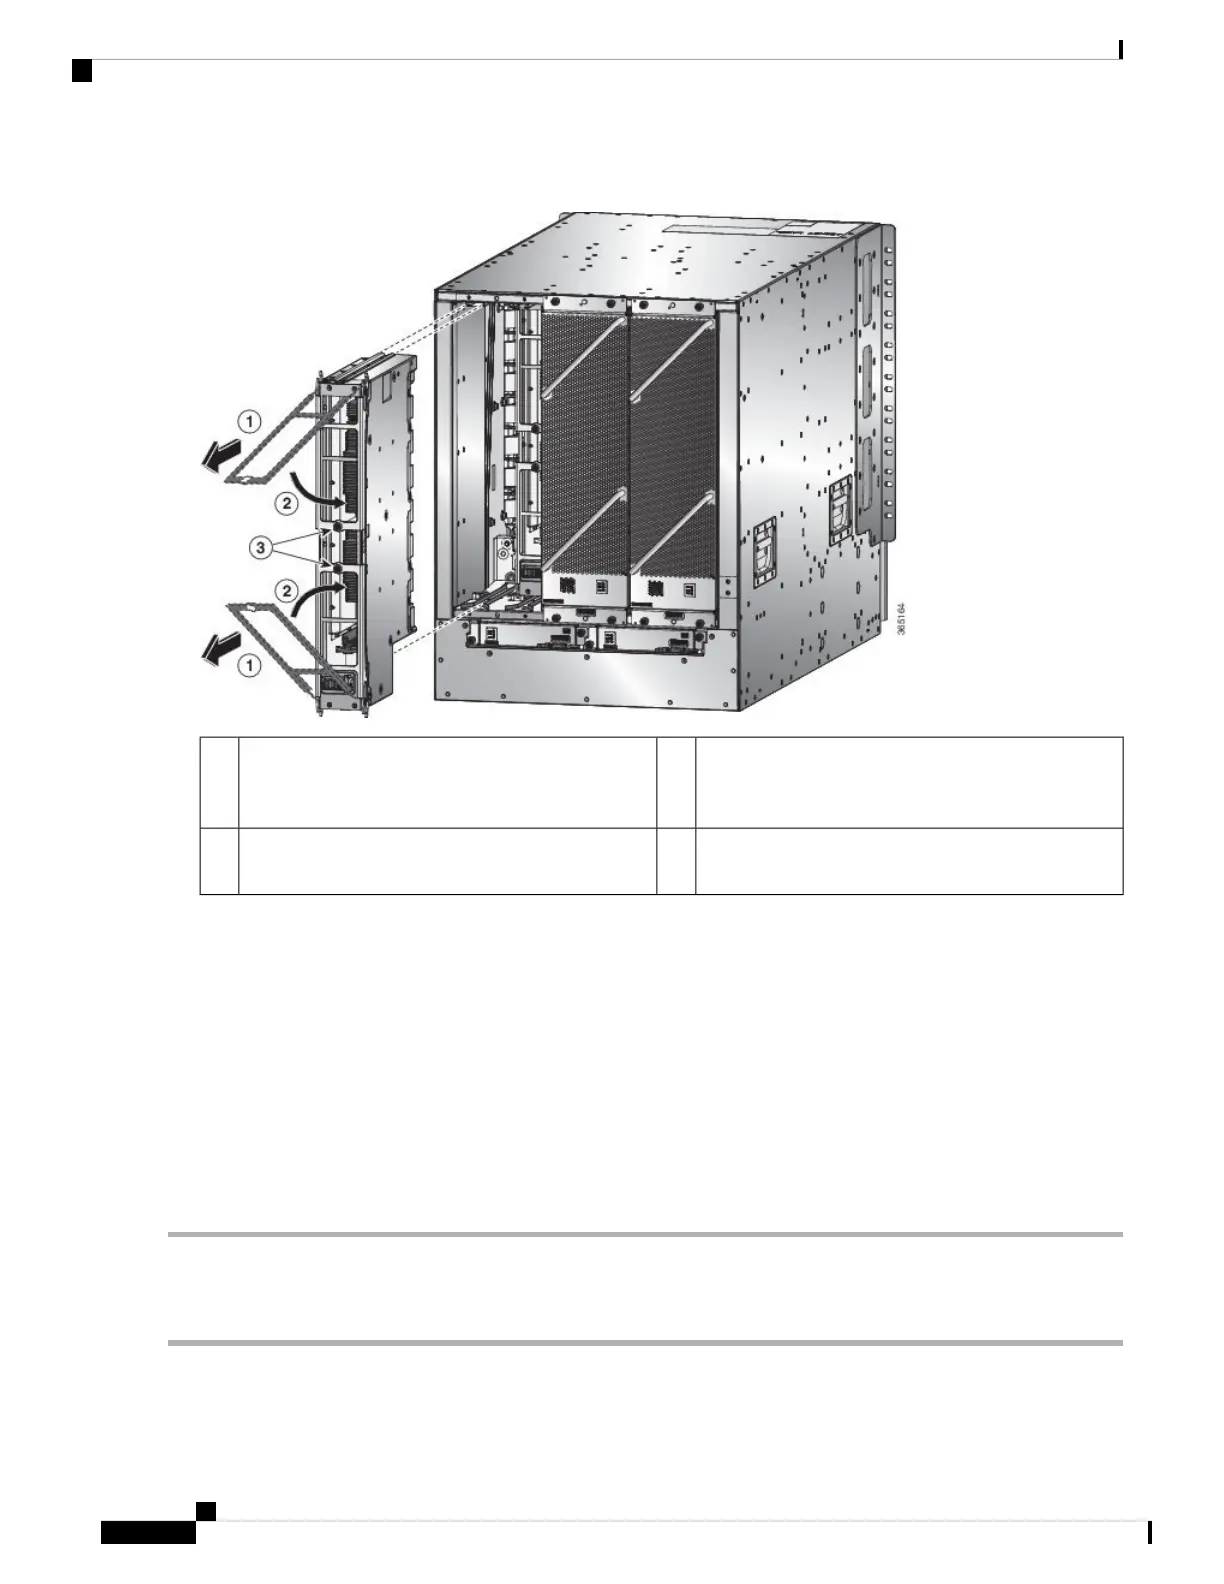
Figure 64: Removing a Fabric Card from the Chassis
Screw in the two captive screws (one on each handle)
to the module. Tighten each of these screws to 8 in-lb
(0.9 N·m) of torque.
3Pull on both handles to partially remove the fabric
card from the chassis
1
Rotate both ejector handles to the front of the
module.
2
d) Rotate both handles back to the front of the module until they click in place. Fasten each handle to the module using
the captive screw on the back of the handle. Tighten the screw to 8 in-lb (0.9 N·m) of torque (see callouts 2 and 3 in
the previous figure).
e) Place one hand under the fabric card to support its weight, place your other hand on the front of the module, and slide
the module out of the slot.
f) Rotate the module 90 degrees and lay it flat on an antistatic surface or in an antistatic bag.
Step 5 Replace the card, and login to the System admin mode. Power on the card gracefully using the no hw-module location
<loc> shutdown command.
Step 6 Verify that the card shows as operational in XR VM and System Admin VM using the show platform command. From
the System admin mode, enable the plane using the no controller fabric plane <plane-id> shutdown command.
Step 7 Verify if the plane displays “UP UP” using the show controllers fabric plane all command.
Install a Fabric Card
Step 1 Place one hand on the front of the module and turn the module 90 degrees so that the electrical connectors are on the
bottom.
Hardware Installation Guide for Cisco NCS 5500 Series Modular Routers
114
Replace Chassis Components
Install a Fabric Card
 Loading...