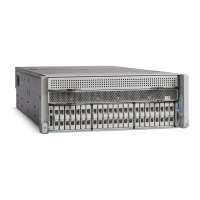
a) Shut down and remove power from the server as described in Shutting Down and Removing Power From the Server,
on page 7.
b) Slide the server out the front of the rack far enough so that you can remove the top cover. You might have to detach
cables from the rear panel to provide clearance.
If you cannot safely view and access the component, remove the server from the rack.
Caution
c) Remove the top cover from the server as described in Removing the Server Top Cover, on page 9.
Step 2 Remove the mRAID riser (riser 3) from the server:
a) Using both hands, grasp the external blue handle on the rear of the riser and the blue finger-grip on the front end of
the riser.
b) Lift the riser straight up to disengage it from the motherboard socket.
c) Set the riser upside down on an antistatic surface.
Step 3 Remove any existing card from the riser:
a) Disconnect cables from the existing card.
b) Open the blue card-ejector lever on the back side of the card to eject it from the socket on the riser.
c) Pull the card from the riser and set it aside.
Step 4 Install a new card to the riser:
a) With the riser upside down, set the card on the riser.
b) Push on both corners of the card to seat its connector in the riser socket.
c) Close the card-ejector lever on the card to lock it into the riser.
Step 5 Return the riser to the server:
a) Align the connector on the riser with the socket on the motherboard. At the same time, align the two slots on the back
side of the bracket with the two pegs on the inner chassis wall.
b) Push down gently to engage the riser connector with the motherboard socket. The metal riser bracket must also engage
the two pegs that secure it to the chassis wall.
Step 6 Reconnect the cables to their connectors on the new card.
Step 7 Replace the top cover to the server.
Step 8 Replace the server in the rack, replace cables, and then fully power on the server by pressing the Power button.
Maintaining the Server
71
Maintaining the Server
Replacing a SATA Interposer Card
 Loading...