How to replace the Compressor Si30-408
228 Appendix
6. How to replace the Compressor
For RSXYP to M:
(1) Collect the refrigerant by using refrigerant
recovery unit.
(Since the setting on outdoor unit PCB is required
for refrigerant recovery, refer to the warning plate
"Precautions in service work" attached on the
switch box cover.)
(2) Remove the sound insulator mat covering the
faulty compressor, and disconnect the power
cable from terminal board of the compressor.
(3) Disconnect the brazing sections of suction pipe
and discharge pipe by using brazing torch after
the refrigerant has been collected completely.
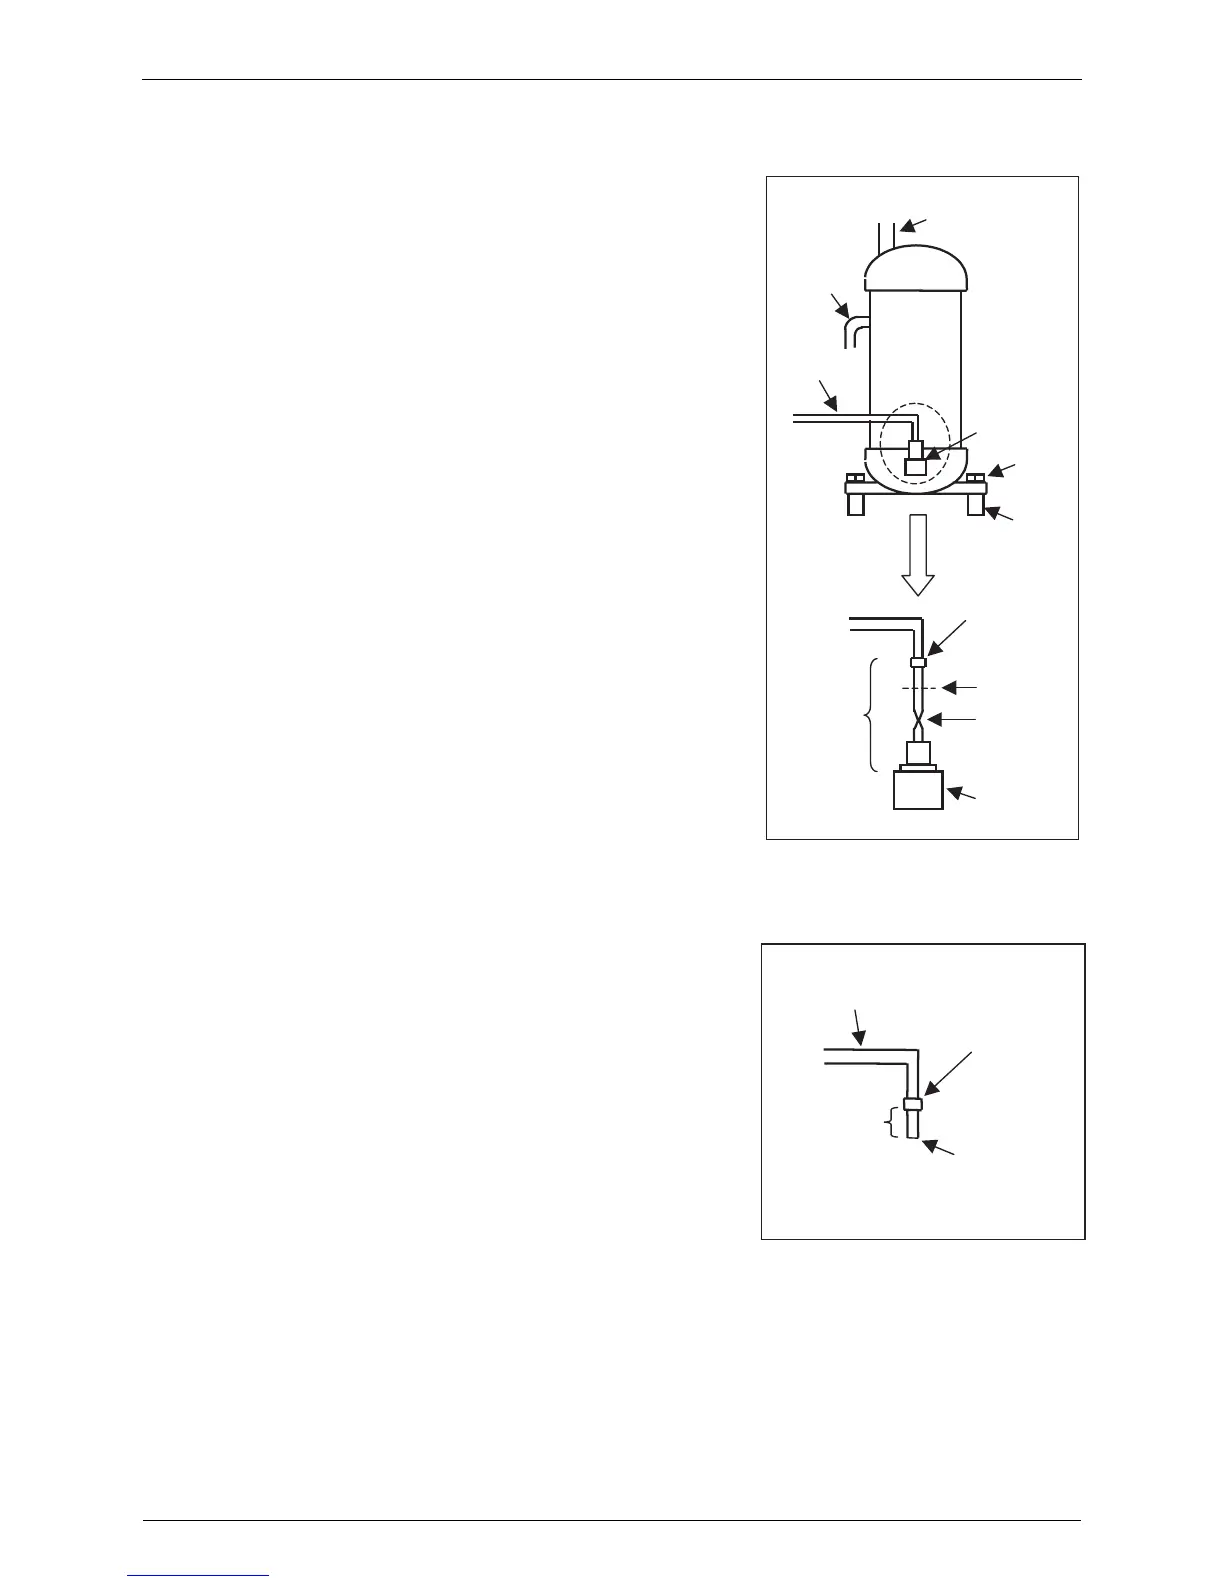
(4) Pinch the oil pressure equalizing pipe of the faulty
compressor at the lower part of the brazed joint as
shown in figure 1, and cut it between the pinched
section and brazed joint in order to prevent
residual oil from discharging.
(5) Remove three bolts at cushion rubber section to
take out the faulty compressor outside the unit.
(6) Check that no oil remains in the oil pressure
equalizing pipe as shown in figure 2, then remove
the cut pipe from the brazed joint with brazing
torch.
(7) Install the new compressor in the unit.
(Be sure to insert the cushion rubbers before
tightening the fixing bolts of compressor.)
(8) Remove the rubber caps put on the suction and
discharge pipe of the new compressor to release
the sealing nitrogen gas.
(Take note that oil may spout due to the pipe
inside pressure if the plug put on the equalizing
seat is removed before removing of rubber cap.)
(9) Remove the plug put on the equalizing seat of the
new compressor.
(10) Install the outlet pipe on the equalizing seat of the
new compressor.
(11) Braze the equalizing seat outlet pipe to the oil
pressure equalizing pipe with brazing torch.
* Since an O-ring is put in the equalizing seat, be
sure to maintain the parts around O-ring in cool.
(12) Braze the suction and discharge pipe with brazing
torch to the compressor.
(13) Conduct air tight test to check the piping system is
free from leakage.
(14) Connect power cable to the terminal board of
compressor and cover the compressor with sound
insulator mat.
(15) Conduct vacuum drying.
(Since the setting on outdoor unit PCB is required for vacuum drying, refer to the warning
plate “Precautions in service work” attached on the switch box cover.)
(16) Charge refrigerant after the completion of vacuum drying, and check the function of
compressor with cooling or heating operation.
Suction pipe
Discharge pipe
INV
compressor
Oil equalizing
pipe
Equalizing seat
Bolts
Cushion
rubber
Brazed section
2. Cut
1. Pinch
Equalizing seat outlet pipe
Equalizing seat
Fig. 1
Oil pressure equalizing pipe
Brazed section
Cut section
Remove
* Check that no oil remains in the oil pressure
equalizing pipe before removing of the cut
pipe.
Fig. 2
 Loading...
