NOTE: If the memory module is difficult to remove, gently ease the memory module back and forth to remove it from
the slot.
NOTE: Note the slot and the orientation of the memory module in order to replace it in the correct slot.
3. Repeat step 1 and 2 to remove any other memory modules installed in your computer.
Installing the memory module
Prerequisites
If you are replacing a component, remove the existing component before performing the installation procedure.
About this task
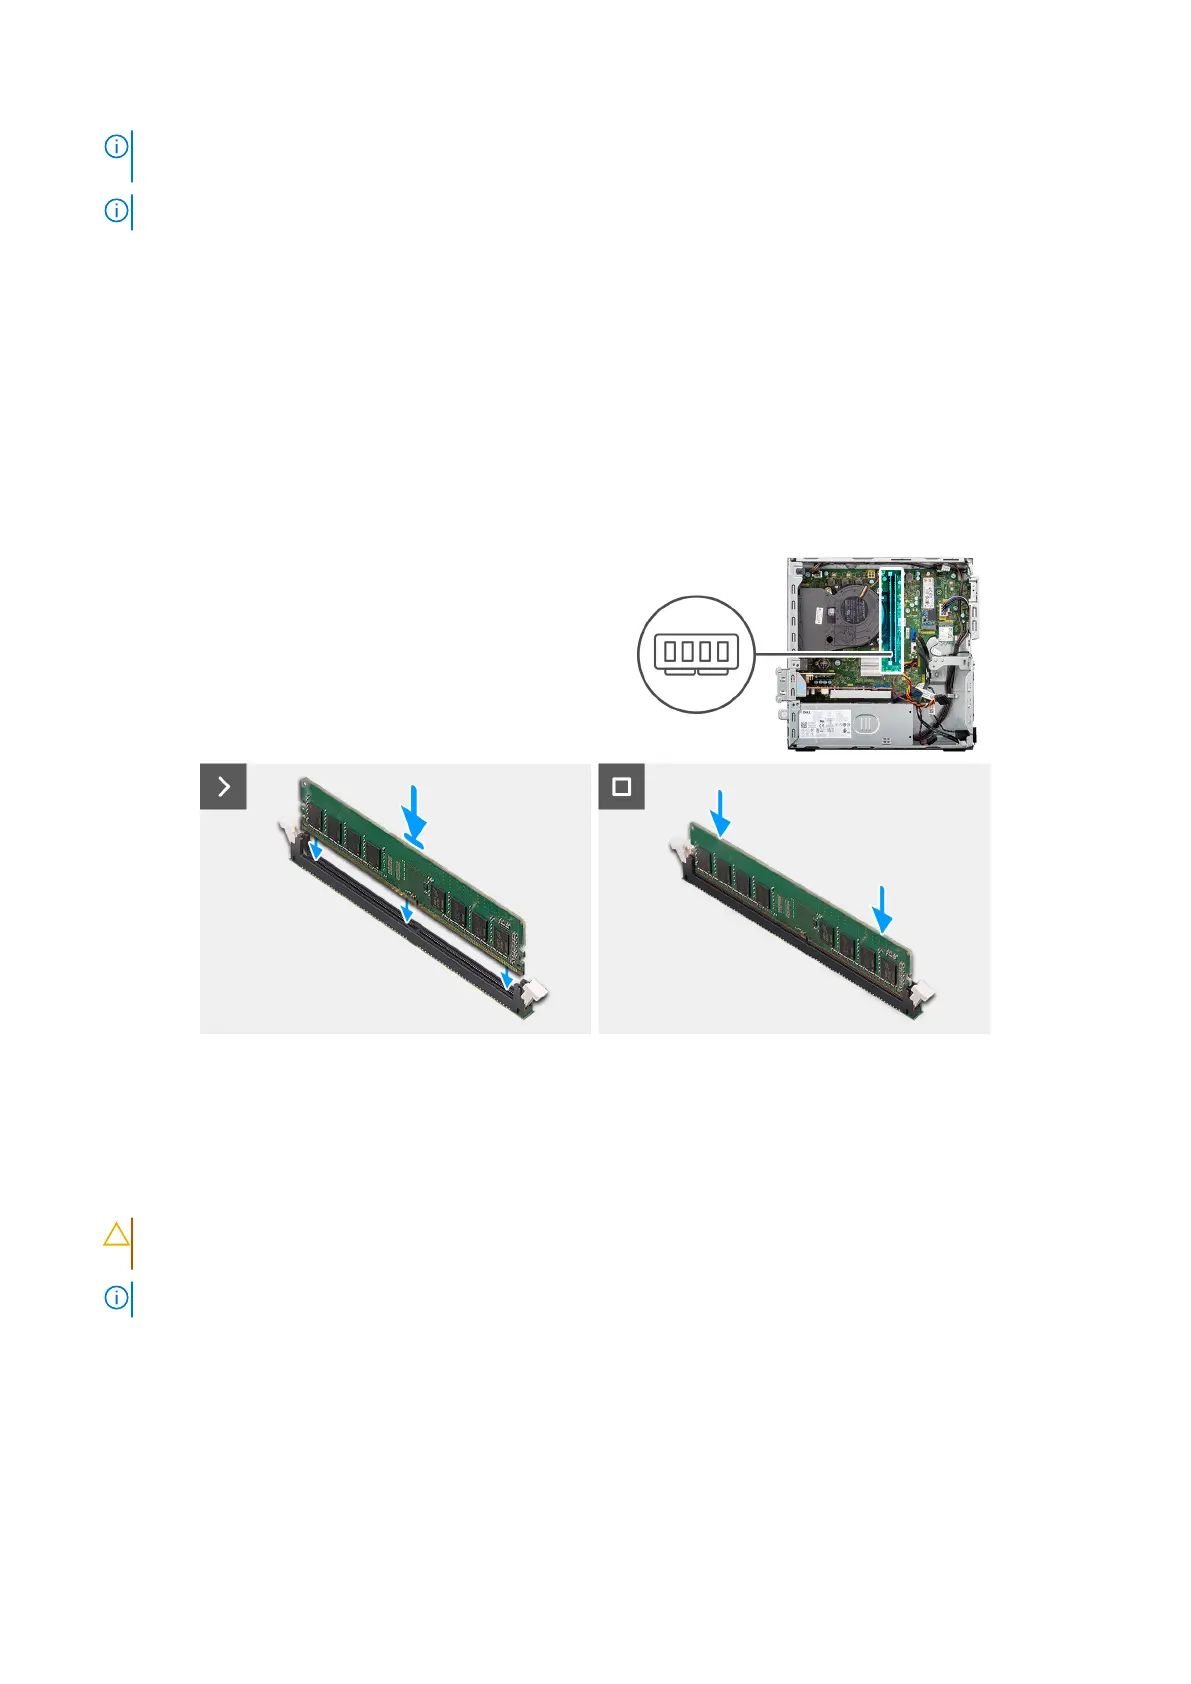
The following images indicate the location of the memory modules and provide a visual representation of the installation
procedure.
Figure 16. Installing the memory
Steps
1. Ensure that the memory-module securing clips are in an open position.
2. Align the notch on the memory module with the tab on the memory-module slot (DIMM1 or DIMM2, whichever is applicable).
3. Press down on the memory module until the memory module snaps into position and the securing clips lock in place.
CAUTION:
To prevent damage to the memory module, hold the memory module by the edges. Do not touch
the components on the memory module.
NOTE: If you do not hear the click, remove the memory module and reinstall it.
4. Repeat steps 1 to 3 to install the other memory modules in your computer, if applicable.
Next steps
1. Install the disk-drive cage.
2. Install the 3.5-inch hard drive, if applicable.
3. Install the front bezel.
4. Install the side cover.
Removing and installing Customer Replaceable Units (CRUs)
55
Restricted - Confidential
 Loading...