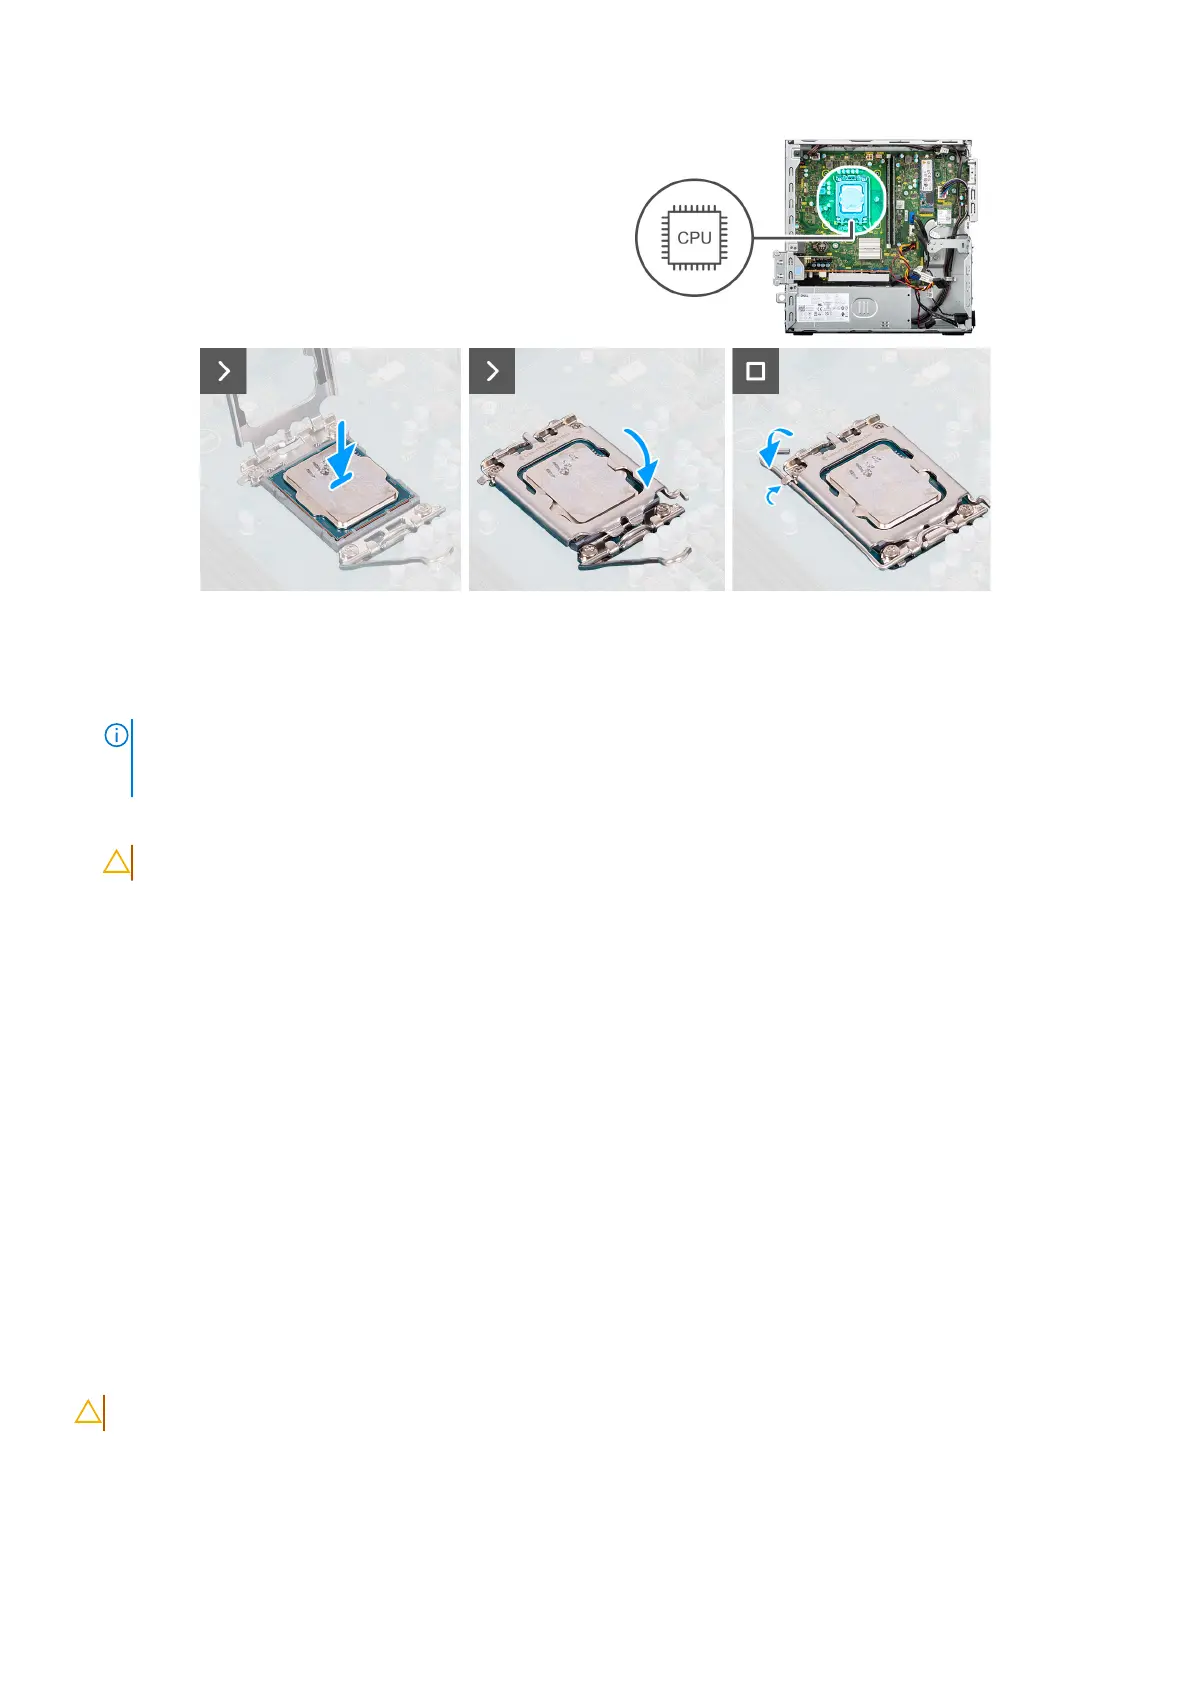
Figure 47. Installing the processor
Steps
1. Ensure that the release lever on the processor socket is fully extended in the open position.
NOTE:
The pin-1 corner of the processor has a triangle that aligns with the triangle on the pin-1 corner on the processor
socket. When the processor is properly seated, all four corners are aligned at the same height. If one or more corners of
the processor are higher than the others, the processor is not seated properly.
2. Align the notches on the processor with the tabs on the processor socket and place the processor in the processor socket.
CAUTION: Ensure that the processor-cover notch is positioned underneath the alignment post.
3. When the processor is fully seated in the socket, pivot the release-lever down and place it under the tab on the processor
cover.
Next steps
1. Install the processor fan and heat-sink assembly.
2. Install the disk-drive cage.
3. Install the 3.5-inch hard drive, if applicable.
4. Install the front bezel.
5. Install the side cover.
6. Follow the procedure in After working inside your computer.
Optional Input/Output modules
Serial module
Removing the serial module
CAUTION: The information in this removal section is intended for authorized service technicians only.
Prerequisites
1. Follow the procedure in Before working inside your computer.
94
Removing and installing Field Replaceable Units (FRUs)
Restricted - Confidential
 Loading...