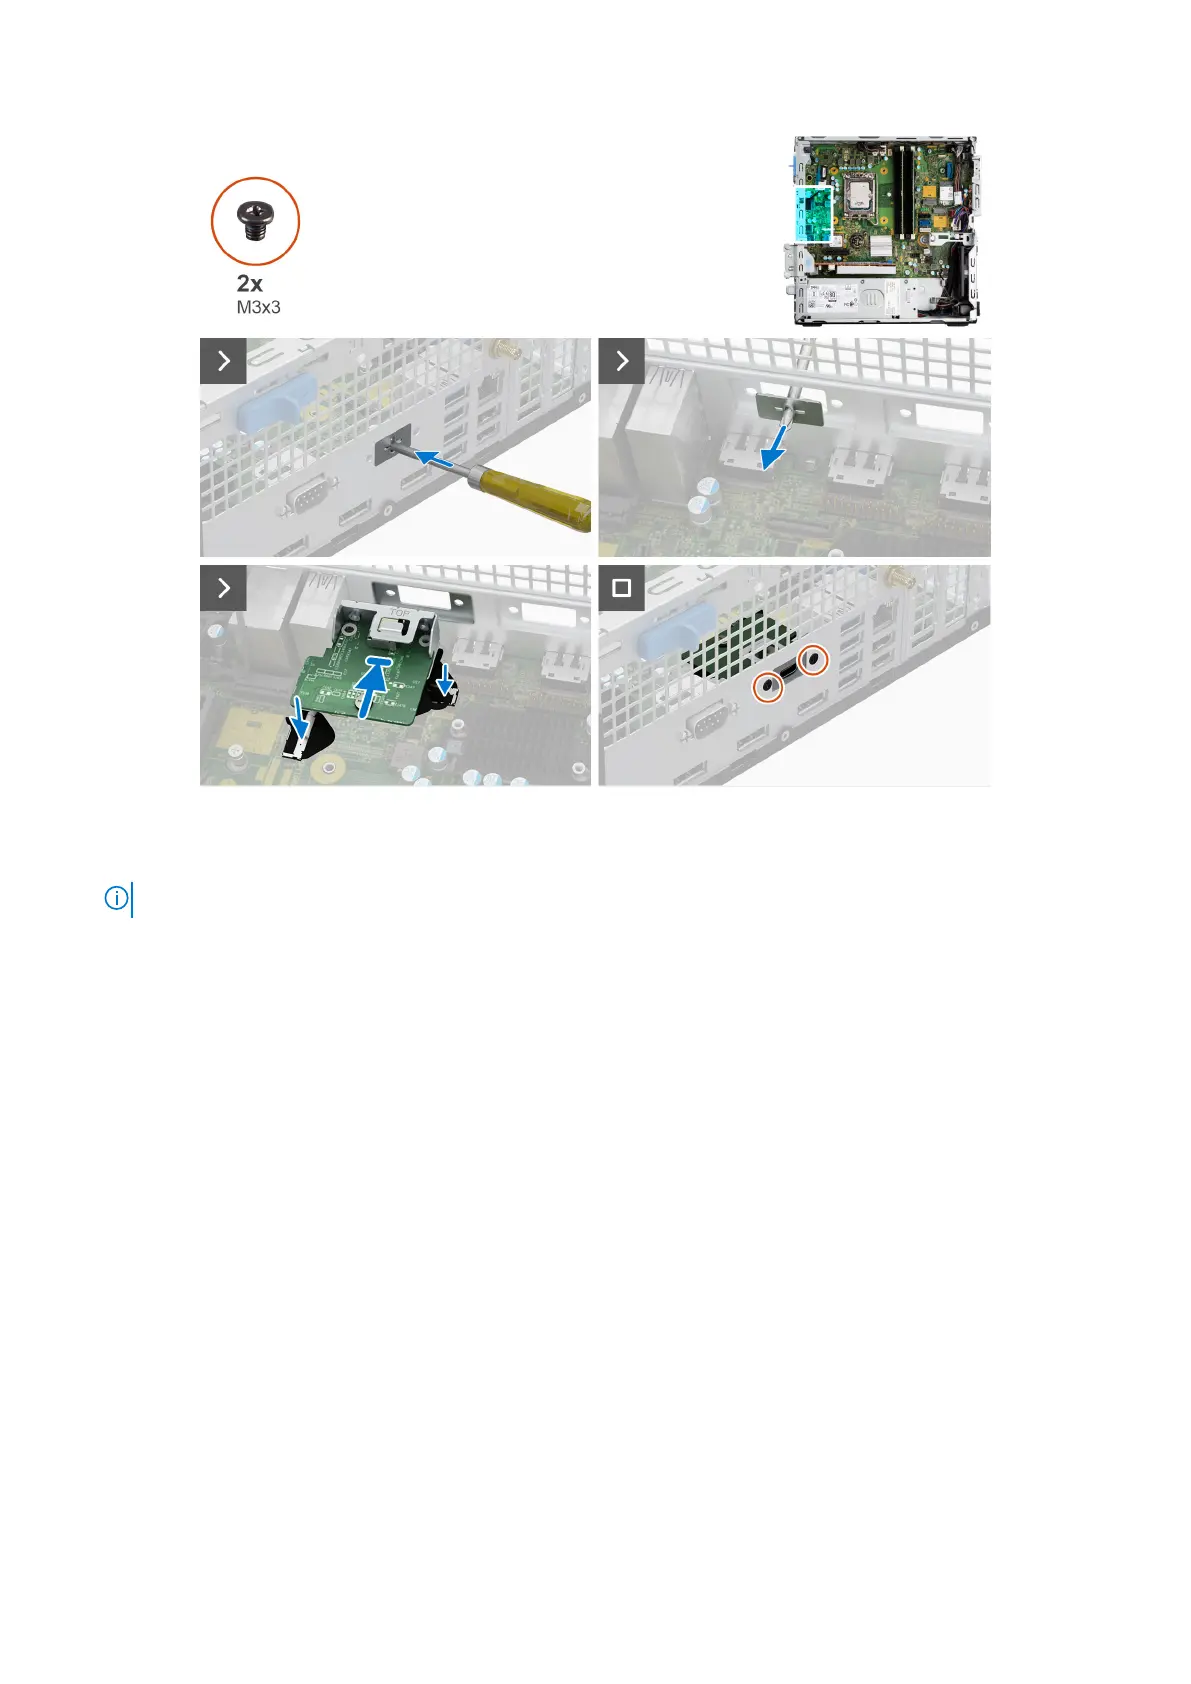
Schritte
1. Entfernen Sie die Typ-C-Modulabdeckung mit einem Schraubendreher vom Gehäuse.
ANMERKUNG: Dieser Schritt gilt nur, wenn das Typ-C-Modul zum ersten Mal installiert wird.
2. Verbinden Sie die Typ-C-Modulkabel mit ihren Anschlüssen (VIDEO und TYPE-C) auf der Systemplatine.
3. Setzen Sie das Typ-C-Modul in den Steckplatz am Gehäuse ein.
4. Bringen Sie die beiden Schrauben (M3x3) zur Befestigung des Typ-C-Moduls am Gehäuse wieder an.
Nächste Schritte
1. Bringen Sie die Seitenabdeckung an.
2. Befolgen Sie die Anweisungen unter Nach der Arbeit an Komponenten im Inneren des Computers.
Systemplatine
Removing the system board
Prerequisites
1. Follow the procedure in Before working inside your computer.
2. Remove the side cover.
3. Remove the front bezel.
4. Remove the 2.5-inch hard drive if applicable.
5. Remove the 3.5-inch hard drive if applicable.
6. Remove the disk-drive cage.
7. Remove the Optional I/O modules.
8. Remove the expansion card.
Entfernen und Installieren von vor Ort austauschbaren Einheiten (FRUs)
101
 Loading...