Steps
1. Lay the computer on the right side.
2. Press the releasing clip on the power-cable connectors and disconnect the power cables from the graphics card.
3. Slide the power-supply unit cage release latches to the unlock position.
4. Lift the power-supply unit cage.
5. Rotate the power-supply unit cage away from the chassis.
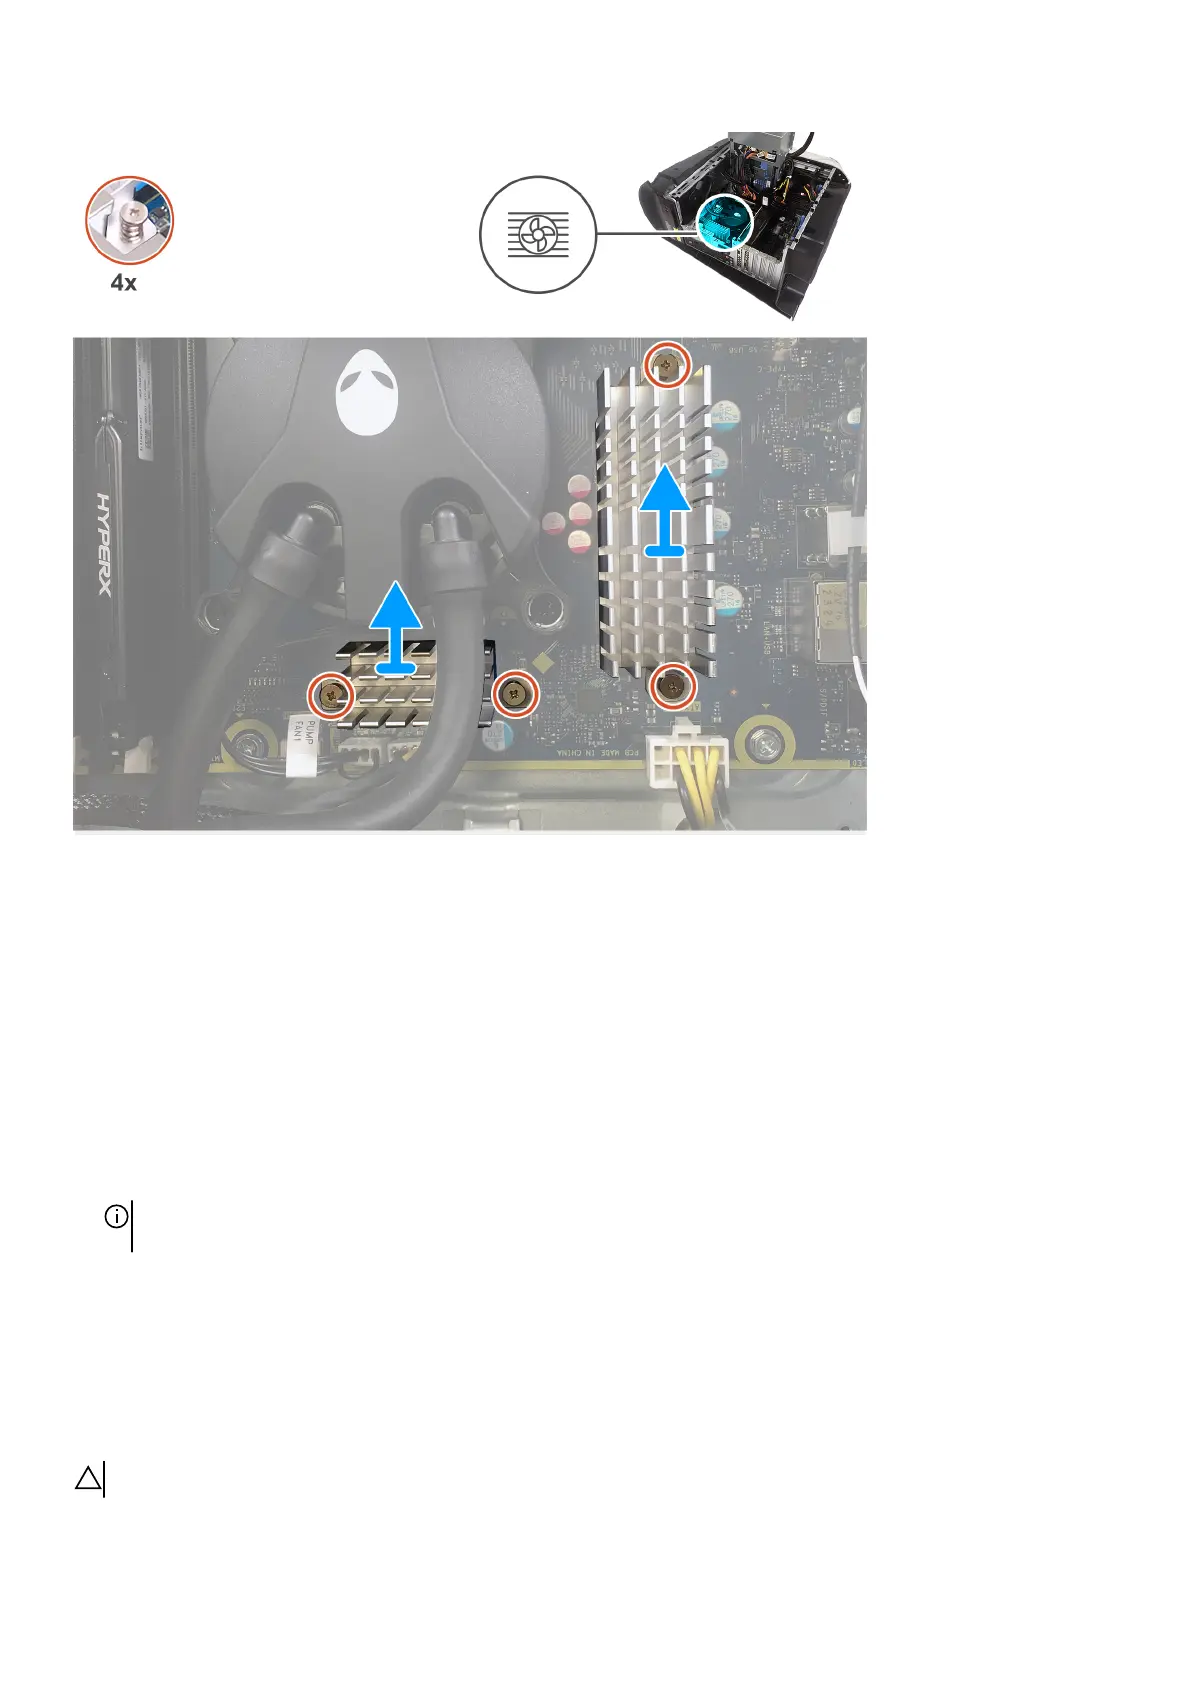
6. Loosen the four captive screws that secure the VR heat sink to the system board.
7. Remove the four screws (#6-32) that secure the radiator and fan assembly to the radiator and fan cage.
8. Lift the two VR heat sink off the computer.
9. Disconnect the processor-cooling assembly cables from the system board.
10.In the reverse sequential order (as indicated on the processor cooler), loosen the four captive screws that secure the processor
cooler to the system board.
NOTE: If your are using an electric screwdriver, torque the screws at 6.9 +/-1.15 kilogram-force centimeter (6 +/-1 pound
force inch).
11. Lift the processor-cooling assembly along with the cables off the computer.
Installing the processor liquid-cooling assembly
Prerequisites
If you are replacing a component, remove the existing component before performing the installation procedure.
CAUTION: Incorrect alignment of the processor liquid-cooling assembly can damage the system board and processor.
40
 Loading...