2. Align the notch on the memory module with the tab on the memory-module slot.
3. Insert the memory module into the memory-module slot and press the memory module down until it snaps into position and the
securing clips lock in place.
CAUTION: To prevent damage to the memory module, hold the memory module by the edges. Do not touch the
components on the memory module.
NOTE: Repeat step 1 to step 3 to replace any other memory modules installed in your computer.
4. Rotate the power-supply unit cage towards the chassis.
5. Connect the power cables to the graphics card.
6. Slide the power-supply unit cage release latches towards the locked position.
NOTE: Use slots XMM1 and XMM2 if you need to use two memory modules. For more information, see system-board
components.
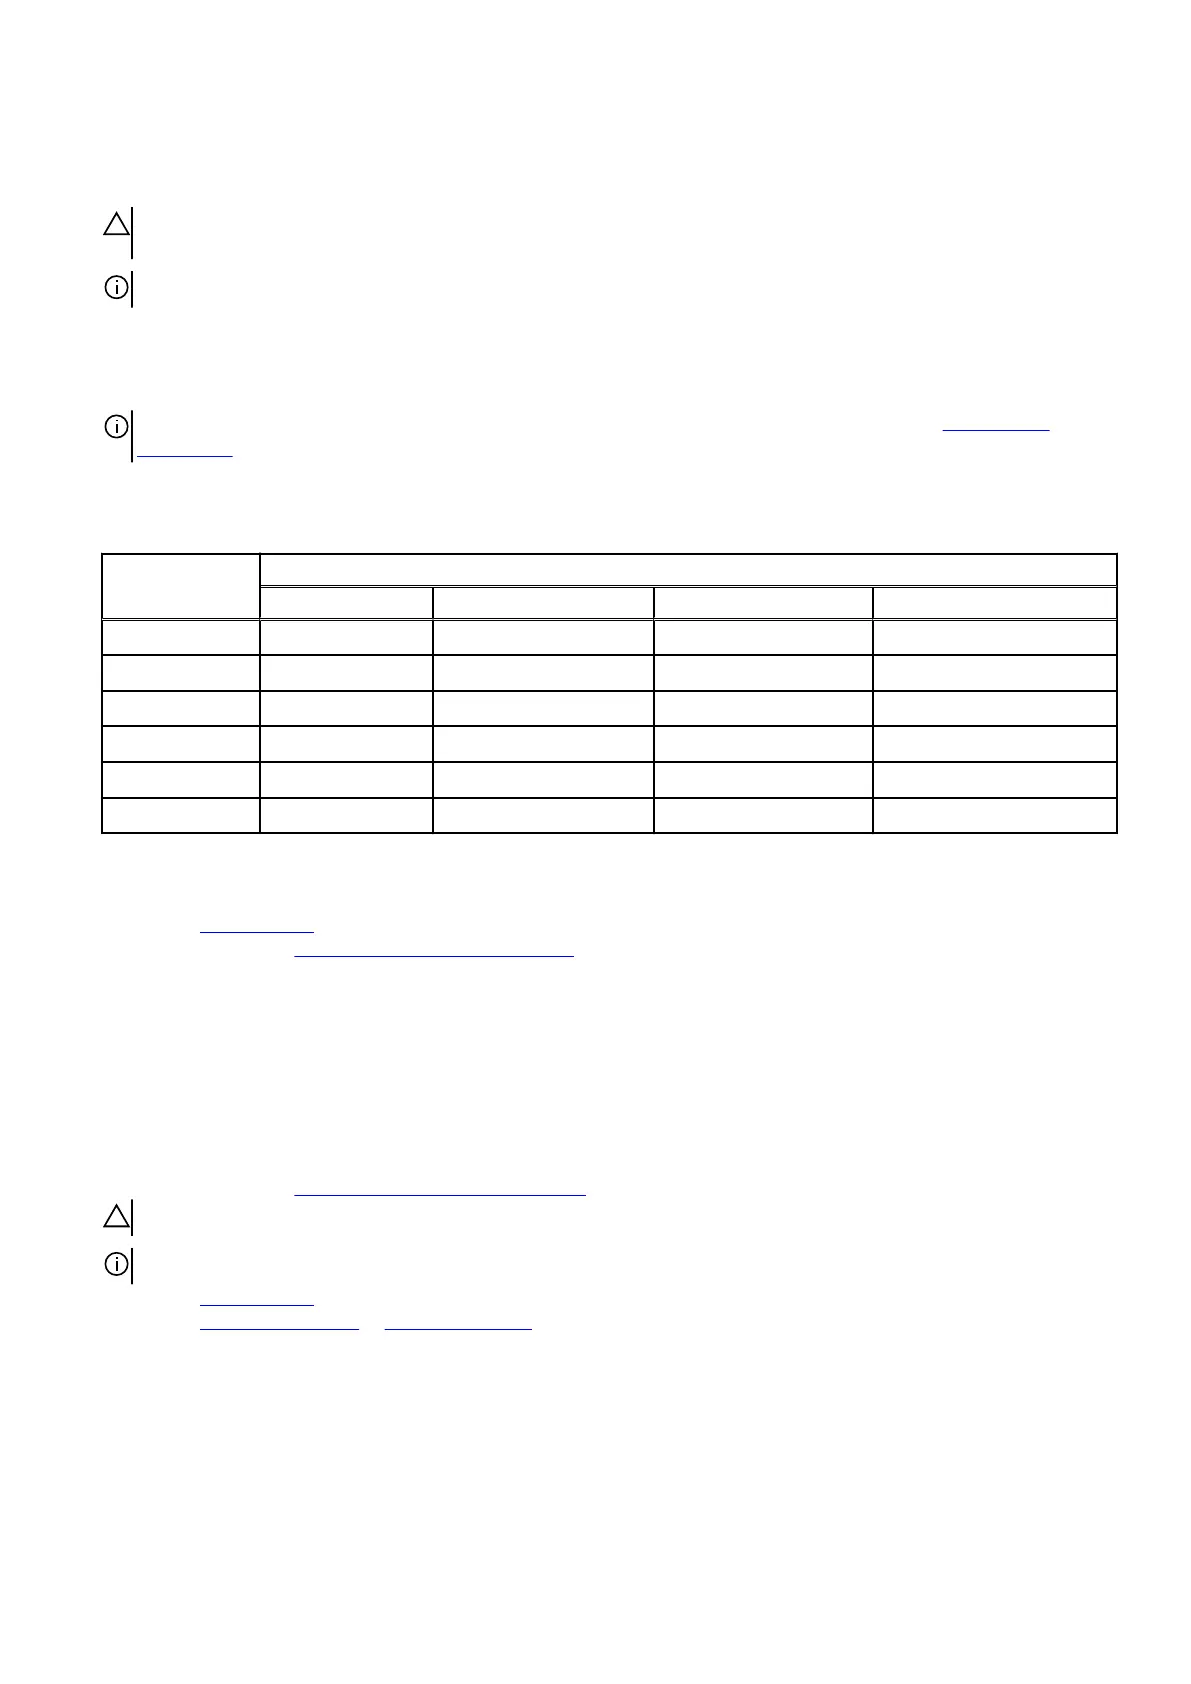
The following table lists the available memory configuration matrix:
Table 2. Memory configuration matrix
Configuration
Slot
XMM1 XMM2 XMM3 XMM4
8 GB XMP 8 GB
16 GB XMP 16 GB
64 GB XMP 32 GB 32 GB
16 GB XMP 8 GB 8 GB
32 GB XMP 16 GB 16 GB
64 GB XMP 16 GB 16 GB 16 GB 16 GB
Next steps
1. Remove the left-side cover.
2. Follow the procedure in
After working inside your computer.
Solid-state drive
Removing the solid-state drive
Prerequisites
1. Follow the procedure in Before working inside your computer.
CAUTION: Solid-state drives are fragile. Exercise care when handling the solid-state drive.
NOTE: To avoid data loss, do not remove the drive while the computer is in sleep or on state.
2. Remove the left-side cover.
3. Remove the single-graphics card or dual-graphics card, as applicable.
About this task
The following images indicate the location of the solid-state drive and provides a visual representation of the removal procedure.
50
 Loading...